

Introduction
In this article, I will create a read-only Web API. In this tutorial we will only implement the ReadOnly Method, that is a GET method.
Now let's see how to create the Web API application/
Step 1
Create an application using the following:
- Start Visual Studio 2013.
- From Start Window Select "New Project".
- Select "Installed" -> "Template" -> "Visual C#" -> "Web" -> "Visual Studio 2012" and then select "ASP.NET MVC4 Web Application".
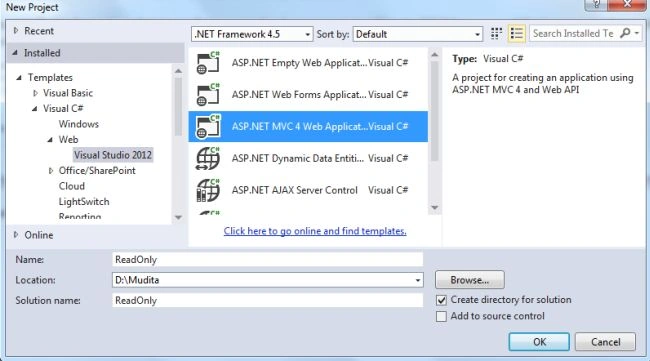
- Click on the "OK" button.
- From the MVC4 project window select "Web API".
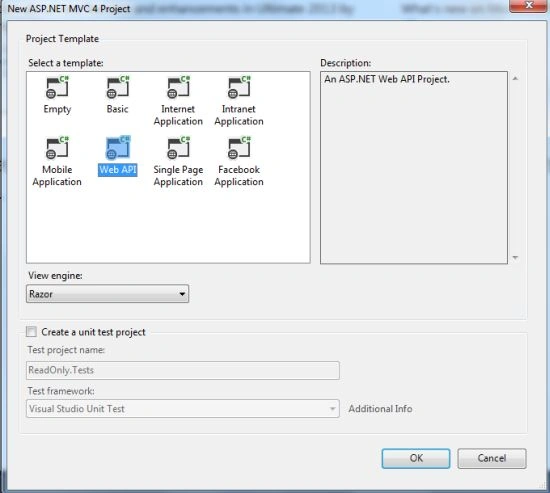
- Click on the "OK" button.
Step 2
Now add an API Controller to the project using the following:
- In the "Solution Explorer".
- Right-click on the "Controller folder".
- Select "Add" -> "Controller".
- Select "API Controller" from the template.
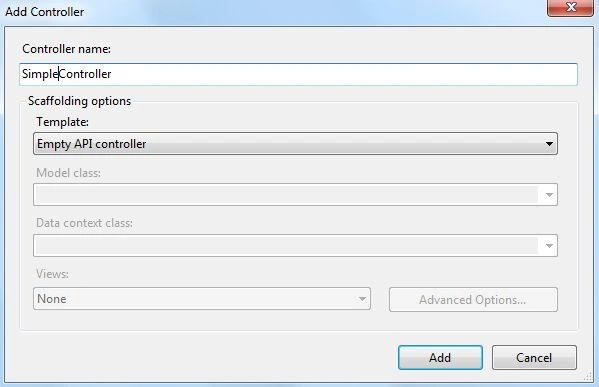
- Click on the "Add" button.
Add the following code:
- using System;
- using System.Collections.Generic;
- using System.Linq;
- using System.Net;
- using System.Net.Http;
- using System.Web.Http;
- using ReadOnly.Models;
- namespace ReadOnly.Controllers
- {
- public class SimpleController : ApiController
- {
- public string[] Get()
- {
- return new string[]
- {
- "Hello",
- "India"
- };
- }
- }
- }
Step 3
Now execute the application in Internet Explorer.
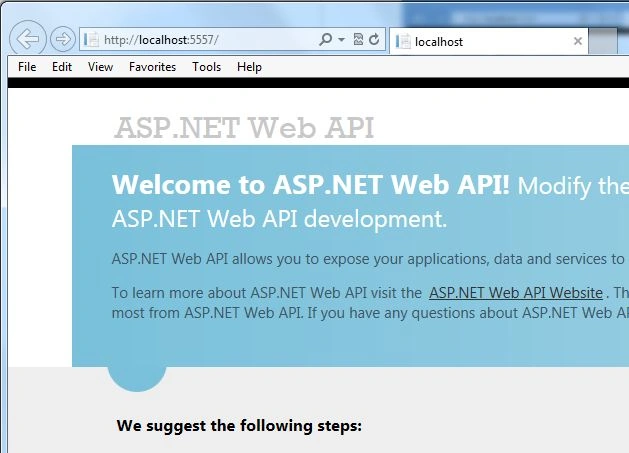
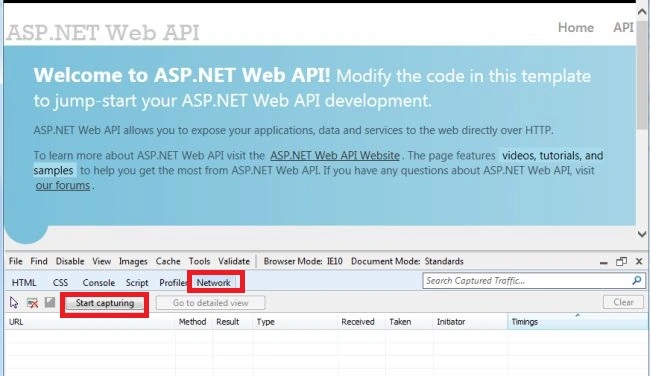
Now we append the URL "http://localhost:5557/" with "http://localhost:5557/api/simple" and press Enter. The details of capturing is displayed in the network capture window. The MIME type is "application/JSON".
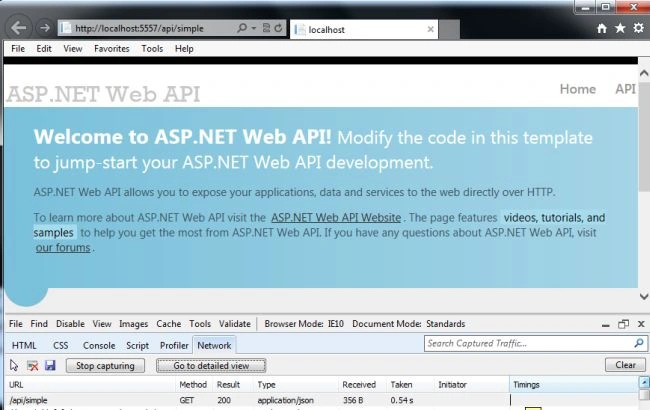
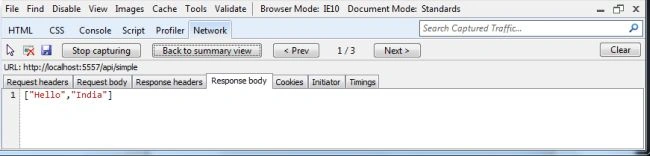
Now when we click on the "Go to detailed view" tab it displays all the details of the API. To see the JSON results click on the "Response Body" tab.
Step 4
Now we add a Model class to the Model folder.
- In the Solution Explorer.
- Right-click on the Model Folder.
- Select "Add" -> "Class".
- Select "Installed" -> "Visual C#"-> and select class.
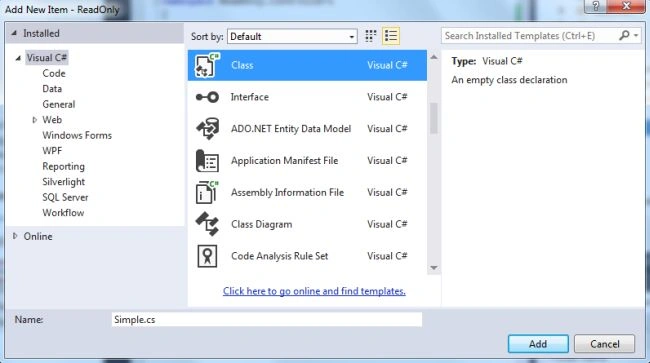
- Click on the "OK" button.
Add the following code:
- using System;
- using System.Collections.Generic;
- using System.Linq;
- using System.Web;
- namespace ReadOnly.Models
- {
- public class Simple
- {
- public int ID { get; set; }
- public string Name { get; set; }
- }
- }
Step 5
Now modify the GET method in the SimpleController class.
- public Simple[] Get()
- {
- return new Simple[]
- {
- new Simple
- {
- ID=1,
- Name="Smith Patel"
- },
- new Simple
- {
- ID=2,
- Name="Virat Kohli"
- },
- new Simple
- {
- ID=3,
- Name="Rohit Shrma"
- }
- };
- }
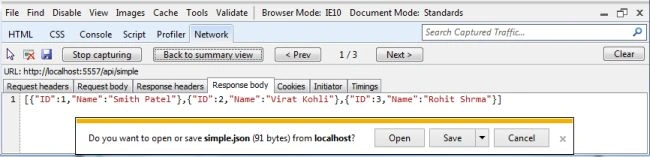
Now again execute the application to see the changes in the GET method of the Controller.
-
Press F12 to open the developer Tools.
-
Click on the "Network" tab then "Start Capturing".
-
Append the URL as "http://localhost:5557/api/simple".
-
Go to the Detailed View.
-
Select the "Response Body' for seeing the JSON result.
Step 6
We need to add a service folder to the project. Right-click on the project, select "Add New Folder" then change the name to "Services".

Step 7
Now add the Repository class to the service folder:
- In the Solution Explorer.
- Right-click on the Services Folder.
- Select "Add" -> "Class".
- Select "Installed" -> "Visual C#"-> and select class.

- Click on the "Add" button.
Add the following code in this repository class:
- using System;
- using System.Collections.Generic;
- using System.Linq;
- using System.Web;
- using ReadOnly.Models;
- namespace ReadOnly.Services
- {
- public class SimpleRepository
- {
- public Simple[] GetAllSimples()
- {
- return new Simple[]
- {
- new Simple
- {
- ID=1,
- Name="Smith Patel"
- },
- new Simple
- {
- ID=2,
- Name="Virat Kohli"
- },
- new Simple
- {
- ID=3,
- Name="Rohit Shrma"
- }
- };
- }
- }
- }
Step 8
In the SimpleController class add the private field for representing the instance of the repository class and change the code of the SimpleController class as in the following:
Add the following namespace in the controller:
- using ReadOnly.Services;
Now change the following code:
- private SimpleRepository simplerepository;
- public SimpleController()
- {
- this.simplerepository = new SimpleRepository();
- }
- public Simple[] Get()
- {
- return simplerepository.GetAllSimples();
- }
Step 9
Enter the breakpoint in the SimpleController class.

Again execute the application:
-
Press F12 to open the Developer Tools.
-
Click on the "Network" tab then "Start Capturing".
-
Append the URL as "http://localhost:5557/api/simple".
-
Go to the Detailed View.
-
Select the "Response Body' for seeing the JSON results.
Join the conversation! Your thoughts help the community grow.