

Introduction
This article describes how to move a Tooltip by moving the cursor using jQuery. When you move the mouse or curser, the tooltip also moves depending on the cursor or mouse.
The following describes the procedure to do that.
Step 1
First create an application:
- Start Visual Studio 2012.
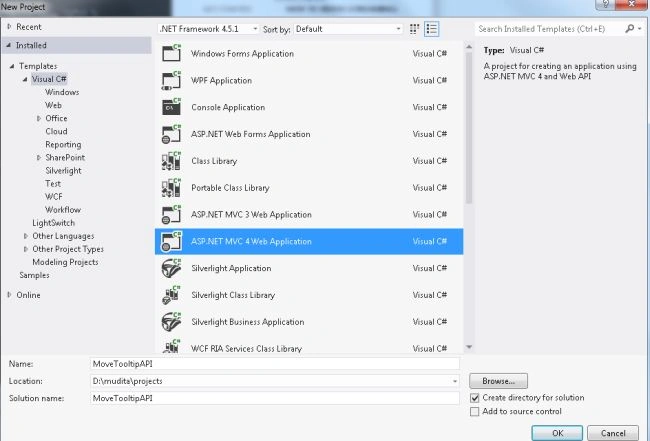
- From the start window select "New Project".
- From the new project window select "Installed" -> "Visual C#" -> "Web".
- Select "ASP.NET MVC4 Web Application" and click on the "OK" button.
- From the "MVC4 Project" window select "Web API".
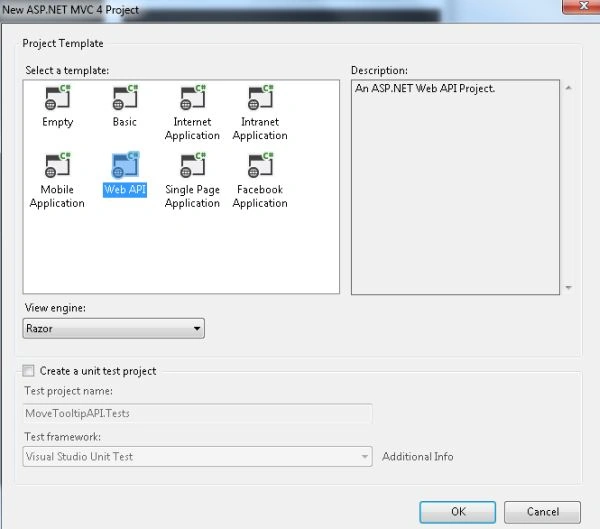
- Click on the "OK" button.
Step 2
Add a model class in the model folder.
- In the "Solution Explorer".
- Right-click on the Model Folder and select "Add" -> "Class".
- Select "Installed" -> "Visual C# " and select "Class".
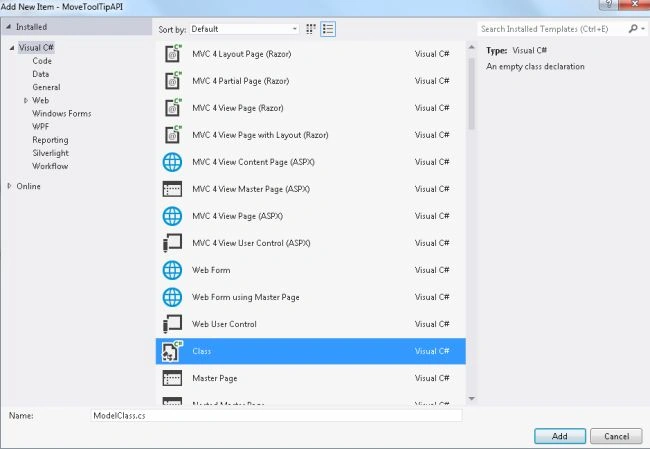
- Click the "Add" button.
Add the following code:
- using System;
- using System.Collections.Generic;
- using System.Linq;
- using System.Web;
- namespace MoveToolTipAPI.Models
- {
- public class ModelClass
- {
- public List<Employee> EmployeeList { get; set; }
- }
- public class Employee
- {
- public int ID { get; set; }
- public string Name { get; set; }
- public int EmpChart { get; set; }
- }
- }
Step 3
In the "HomeController" add some code. This file exists:
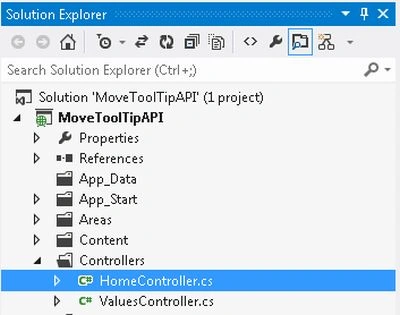
- In the "Solution Explorer".
- Expand the "Controller" folder.
- Select the "HomeController".
Add the following code.
- using System;
- using System.Collections.Generic;
- using System.Linq;
- using System.Web;
- using System.Web.Mvc;
- using MoveToolTipAPI.Models;
- namespace MoveToolTipAPI.Controllers
- {
- public class HomeController : Controller
- {
- public ActionResult Index()
- {
- ModelClass mdlc = new ModelClass();
- List<Employee> objemp = new List<Employee>();
- objemp = GetEmployeeList();
- mdlc.EmployeeList = objemp;
- return View(mdlc);
- }
- public List<Employee> GetEmployeeList()
- {
- List<Employee> mdlc = new List<Employee>();
- mdlc.Add(new Employee { ID = 1, Name = "Employee1",EmpChart=19 });
- mdlc.Add(new Employee { ID = 2, Name = "Employee2" ,EmpChart=34});
- mdlc.Add(new Employee { ID = 3, Name = "Employee3" ,EmpChart=12});
- mdlc.Add(new Employee { ID = 4, Name = "Employee4" ,EmpChart=67});
- mdlc.Add(new Employee { ID = 5, Name = "Employee5" ,EmpChart=45});
- mdlc.Add(new Employee { ID = 6, Name = "Employee6",EmpChart=10 });
- mdlc.Add(new Employee { ID = 7, Name = "Employee7" ,EmpChart=20});
- return mdlc;
- }
- }
- }
Step 4
In the "View" use the following procedure:
- In the "Solution Explorer".
- Expand the "Views" folder.
- Select "Home" -> "Index.cshtml".
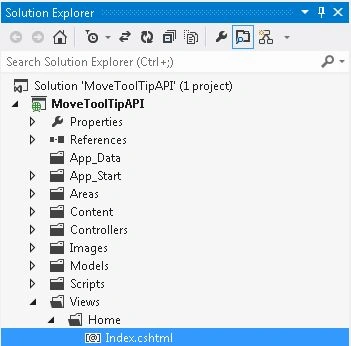
Add the following code:
- @model MoveToolTipAPI.Models.ModelClass
- @{
- ViewBag.Title = "Grid";
- }
- <link rel="stylesheet" href="http://code.jquery.com/ui/1.9.2/thems/base/jquery-ui.css" />
- <script src="http://code.jquery.com/jquery-1.8.2.js"></script>
- <script src="http://code.jquery.com/ui/1.9.2/jquery-ui.js"></script>
- <style type="text/css">
- .ui-tooltip { font-size:12pt;
- font-family:Arial;
- } body { font-size:12pt;
- padding:10px;
- font-family:Arial;
- } </style>
- <script type="text/javascript">
- $(function () {
- $('.demotooltip').tooltip({
- track: true
- });
- }); </script>
- <h2>@ViewBag.Message</h2>
- @{
- var grid = new WebGrid(source: Model.EmployeeList,rowsPerPage: 10);
- }
- @grid.GetHtml(alternatingRowStyle:"even",
- columns:grid.Columns(
- grid.Column("ID","ID"),
- grid.Column("Name",header:"Name"),
- grid.Column("EmpChart",header: "WorkingAverage" ,format:@<text><img src="https://chart.googleapis.com/chart?cht=bhs&chd=t:@item.EmpChart&chs=200x30" alt="@item.EmpChart" title="WorkingAverage of @item.Name is @item.EmpChart"
- class="demotooltip" /></text>)
- )
- )
Step 5
Execute the application. The output will be as:
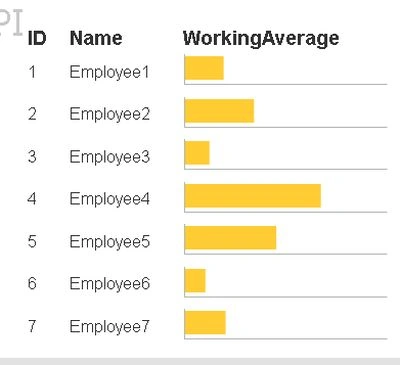
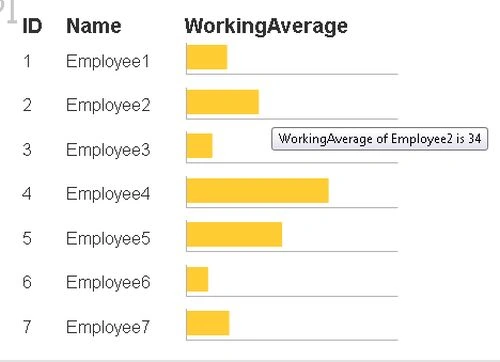
Move the cursor to any graph. It then displays a tooltip with a message.
Yusuf KaratoprakPosted Oct 1, 2013, 8:30 AM
Hi; you are using WebApi but implementation is " public class HomeController : Controller" i think is it wrong? you should write " public class HomeController : ApiController"