
Introduction : The Rating control provides an intuitive rating experience that allows users to select the number of stars that represents their rating. The page designer can specify the initial rating, the maximum rating to allow, the alignment and direction of the stars, and custom styles for the different states a star can have. Rating also supports a ClientCallBack event that allows custom code.
Rating Control Properties :
- Behaviour ID.
- MaxRating.
- StarCssClass.
- WaitingStarCssClass.
- FilledStarCssClass.
- OnChanged.
- ToolTip.
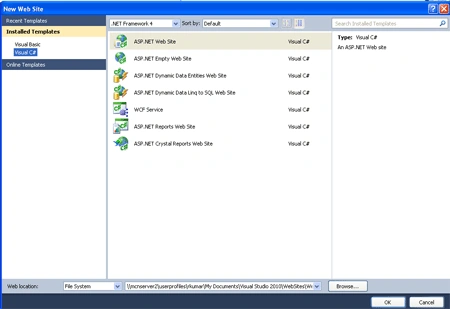
Step 1 : Open Visual Studio 2010.
- Go to File->New->WebSite.
- Select ASP.NET WebSite.
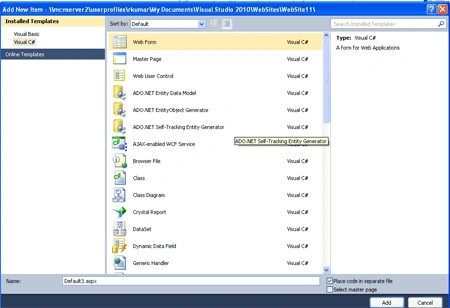
Step 2 : Go to Solution Explorer and right-click.
- Select Add-> New Item.
- Select WebForm.
- Default.aspx page open.
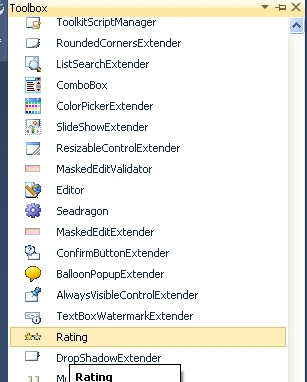
Step 3 : Drag controls from Toolbox.
- Drag ScriptManager, UpdatePanel, Rating Control in Default.aspx page.
- Drag Rating control from Ajax Control Toolkit.
- Go to Design option and see the page.
- Write the below simple code in the Default.aspx page.
Code :
<title>My
rating application</title>
</head>
<body>
<form
id="form1"
runat="server">
<asp:ScriptManager
ID="ScriptManager1"
runat="server">
</asp:ScriptManager>
<div>
<asp:UpdatePanel
ID="UpdatePanel1"
runat="server">
<ContentTemplate>
<!-- Declare Rating Control Here
-->
<asp:Rating
ID="Rating1"
runat="server"
BehaviorID="RatingBhvrId1"
CurrentRating="4"MaxRating="6"
StarCssClass="ratingStar"
WaitingStarCssClass="savedRatingStar"
FilledStarCssClass="filledRatingStar"
EmptyStarCssClass="emptyRatingStar"
OnChanged="Rating1_Changed"
ToolTip="Please Rate!"
style="float:left;"
BackImageUrl="~/image/images.jpeg"
Height="211px"
Width="200px"
BackColor =
"Aqua" BorderColor
=
"red">
</asp:Rating>
<!-- Label to Display Message -->
<span
id="lblResponse" class="heading"></span>
</ContentTemplate>
</asp:UpdatePanel
</div>
</form>
</body>
</html>
Step 4 : Declare Javascript
for rating with the help of CallbackResult.
Script code :
<script
language="javascript"
type="text/javascript">
Sys.Application.add_load(function ()
{
$find("RatingBhvrId1").add_EndClientCallback(function
(sender, e) {
var lblCtrl =
document.getElementById('lblResponse');
lblCtrl.innerHTML = e.get_CallbackResult();
});
});
</script>
Step 5 : Go to Solution
Explorer and right-click.
- Select Add-> New Item.
- Select Style Sheet file.
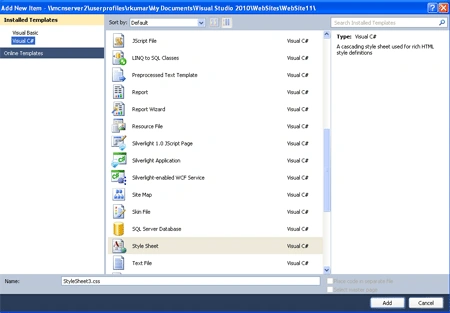
Step 6 : In Style Sheet file we can add image to image folder and design the CSS.
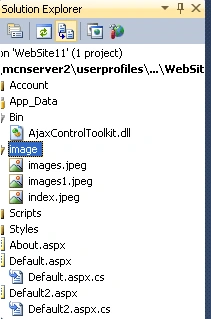
Step 7 : Now write the below code and define the image url from Solution Explorer.
Code :
.ratingStar {
font-size:
0pt;
width:
31px;
height:
30px;
margin:
0px;
padding:
0px;
cursor:
pointer;
display:
block;
background-repeat:
no-repeat;
}
.filledRatingStar
{
background-image:url(image/images.jpeg);
}
.filledRatingStar
{
background-image:
url(image/image1.jpeg);
}
.savedRatingStar
{
background-image:
url(Images/index.jpeg);
}
Declaring Rating1_Changed Event :
Step 8 : Go to the Solution Explorer and click in Default.aspx.cs and define the event and write the code for the rating control.
Code :
using System;
using
System.Collections.Generic;
using
System.Linq;
using System.Web;
using
System.Web.UI;
using
System.Web.UI.WebControls;
public
partial class
Default2 : System.Web.UI.Page
{
protected void
Page_Load(object sender,
EventArgs e)
{
}
protected void
Rating1_Changed(object sender,
AjaxControlToolkit.RatingEventArgs e)
{
System.Threading.Thread.Sleep(500);
int iRate =
Convert.ToInt16(e.Value);
string strMessage =
string.Empty;
switch (iRate)
{
case 1:
strMessage = "Not Useful";
break;
case 2:
strMessage = "Average";
break;
case 3:
strMessage = "Useful";
break;
case 4:
strMessage = "Informative";
break;
case 5:
strMessage = "Excellent";
break;
}
strMessage = "Thanks for Rating, You found
this Question " + strMessage;
e.CallbackResult = strMessage;
}
}
Step 9 : Now press F5 and run
the application.
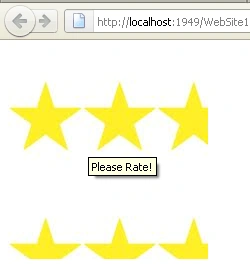
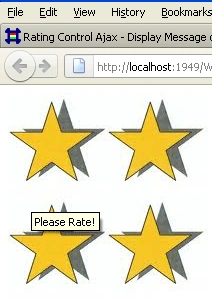
Step 10 : During rating control following output show.
Join the conversation! Your thoughts help the community grow.