

Introduction
In this article I will show you how to place a grid control in a message box. To create this you have two choices, one is to create the grid using C# and the other one is to create it using XAML. The latter one looks more promising and user-friendly. I'll also use the Custom Message Box control of the Windows Phone toolkit. In our app we can use the default message box to show alerts or messages to the user but it is very limited. Like we won't be able to show a scrollable message or hyperlinks and so on. The Windows Phone 8 toolkit removes the limitations of the default message box by providing a Custom Message Box control. So let's get started.
Custom Message Box
Custom Message Box is a control provided in the Windows Phone 8 toolkit for customizing the interface and content of the message box. It enables you to add various UI elements in the message box that is not possible in the default message box. In this demo , we will create our UI from XAML and use the C# to position it in a message box.
In the following demo I have used the following properties of the Custom Message Box:
-
Content
It takes an object as a value. It is displayed in the message box as we see a text in our default message box. String is also an object and can be used for adding text to a message box. -
Height
To set the height of the message box. It can be set or left to auto fit as per content size. -
Opacity
To set the opacity of the message box. Value ranging from 0 to 1. -
Left Button Content
It also takes object as value. It is the left message button of the message box. -
Right Button Content
It also takes an object as a value. It is the right message button of the message box.
Apart from the properties, the following method is also used:
-
Show
This method is used to show the message box. -
SetIsTiltEnabled
To enable a tilt effect on the control.
To handle the user response to the dialog we are handling the click event of dialog buttons. For this I'm handling a dialog dismissing event. In the handler I'm comparing the dialog result to perform the various actions on user response.
Before you can run the following demo you need to install a Windows Phone 8 toolkit in your project. It's very easy to do this.
Installing Windows Phone 8 Toolkit
Use the following procedure to install the Windows Phone 8 toolkit using Nugget:
-
Open your app project (either an existing one or a new one).
-
From the toolbar select "Tools" -> "NuGet Package Manager" -> "Package Manager Console".
-
Now in the Package Manager Console type the following:
Install-Package WPtoolkit
After typing this you will probably see the log similar to this:
install-package wptoolkit
'WPtoolkit 4.2013.08.16' already installed.
Adding 'WPtoolkit 4.2013.08.16' to Demo.
Successfully added 'WPtoolkit 4.2013.08.16' to Demo. - The next step is to add its reference to the XAML page. To do this just add this line:
xmlns:toolkit="clr-namespace:Microsoft.Phone.Controls;assembly=Microsoft.Phone.Controls.Toolkit"
Demo
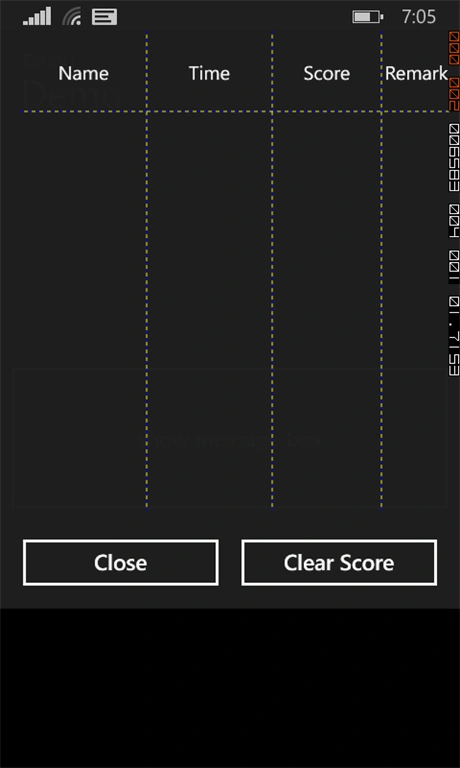
The following code places a grid control inside the message box control. To go step-by-step, first create a grid using XAML code. Name that grid as msggrid. Once you complete the design of the grid, set its visibility to collapsed. In the code behind, we are doing the following:
-
Capture the instance of msggrid in page constructor.
-
Remove the msggrid from page.
-
Add the grid in message box and set its visibility to visible.
Let's see how to code it.
XAML
<phone:PhoneApplicationPage
x:Class="Demo.MainPage"
xmlns="http://schemas.microsoft.com/winfx/2006/xaml/presentation"
xmlns:x="http://schemas.microsoft.com/winfx/2006/xaml"
xmlns:phone="clr-namespace:Microsoft.Phone.Controls;assembly=Microsoft.Phone"
xmlns:shell="clr-namespace:Microsoft.Phone.Shell;assembly=Microsoft.Phone"
xmlns:d="http://schemas.microsoft.com/expression/blend/2008"
xmlns:mc="http://schemas.openxmlformats.org/markup-compatibility/2006"
xmlns:toolkit="clr-namespace:Microsoft.Phone.Controls;assembly=Microsoft.Phone.Controls.Toolkit"
mc:Ignorable="d"
FontFamily="{StaticResource PhoneFontFamilyNormal}"
FontSize="{StaticResource PhoneFontSizeNormal}"
Foreground="{StaticResource PhoneForegroundBrush}"
SupportedOrientations="Portrait" Orientation="Portrait"
shell:SystemTray.IsVisible="True">
<!--LayoutRoot is the root grid where all page content is placed-->
<Grid x:Name="LayoutRoot" Background="Transparent">
<Grid.RowDefinitions>
<RowDefinition Height="Auto"/>
<RowDefinition Height="*"/>
</Grid.RowDefinitions>
<!--TitlePanel contains the name of the application and page title-->
<StackPanel x:Name="TitlePanel" Grid.Row="0" Margin="12,17,0,28">
<TextBlock Text="Demo" Style="{StaticResource PhoneTextNormalStyle}" Margin="12,0"/>
<TextBlock Text="Demo" Margin="9,-7,0,0" FontSize="40" />
</StackPanel>
<!--ContentPanel - place additional content here-->
<Grid Name="msgGrid" Height="500" Width="450" ShowGridLines="True" Visibility="Collapsed">
<Grid.RowDefinitions>
<RowDefinition Height="21*"/>
<RowDefinition Height="104*"/>
</Grid.RowDefinitions>
<Grid.ColumnDefinitions>
<ColumnDefinition Width="132*"/>
<ColumnDefinition Width="131*"/>
<ColumnDefinition Width="114*"/>
<ColumnDefinition Width="73*"/>
</Grid.ColumnDefinitions>
<TextBlock Text="Name" TextAlignment="Center" VerticalAlignment="Center" Grid.Column="0"></TextBlock>
<TextBlock Text="Time" TextAlignment="Center" VerticalAlignment="Center" Grid.Column="1"></TextBlock>
<TextBlock Text="Score" TextAlignment="Center" VerticalAlignment="Center" Grid.Column="2"></TextBlock>
<TextBlock Text="Remark" TextAlignment="Center" VerticalAlignment="Center" Grid.Column="3"></TextBlock>
</Grid>
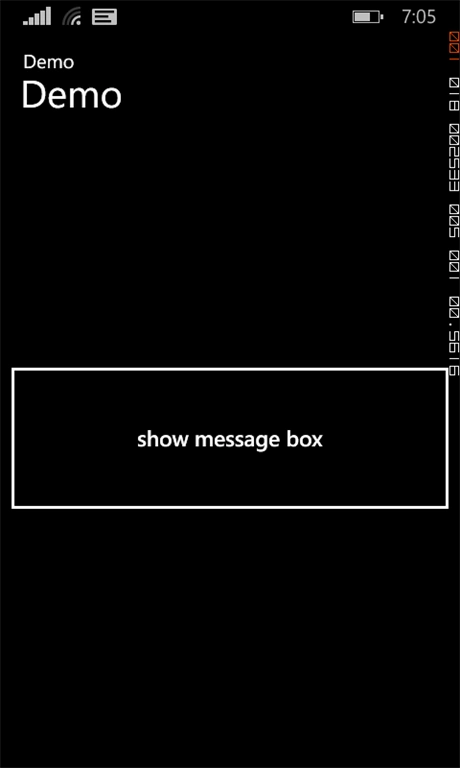
<Button Content="show message box" Click="openMsgBox" Height="171" VerticalAlignment="Bottom" Margin="0,0,0,258" Grid.Row="1"></Button>
</Grid>
</phone:PhoneApplicationPage>
C# Code Behind
using Microsoft.Phone.Controls;
using System;
using System.Collections.Generic;
using System.Linq;
using System.Net;
using System.Windows;
using System.Windows.Controls;
using System.Diagnostics;
using Microsoft.Phone.Tasks;
using System.Windows.Media;
using System.Windows.Media.Animation;
using System.IO;
namespace Demo
{
public partial class MainPage : PhoneApplicationPage
{
// Constructor
public MainPage()
{
InitializeComponent();
grid = msgGrid;
//remove from main page
LayoutRoot.Children.Remove(msgGrid);
}
UIElement grid;
StackPanel sp;
CustomMessageBox cmb;
private void openMsgBox(object sender, RoutedEventArgs e)
{
// create new Stack panel
sp = new StackPanel() { Orientation = System.Windows.Controls.Orientation.Vertical };
//Add grid in Stack panel
grid = msgGrid;
sp.Children.Add(grid);
//enable tilt effect
TiltEffect.SetIsTiltEnabled(sp, true);
// Create new Custom Message Box instance
cmb = new CustomMessageBox()
{
// Set its content to our Stack Panel
Content = sp,
Opacity = 0.98,
// Left button of message box Button
LeftButtonContent = "Close",
//Right button of message Box
RightButtonContent = "Clear Score",
};
//Handle msg box closing
cmb.Dismissing += cmb_Dismissing;
//Show the message box...
cmb.Show();
grid.Visibility = System.Windows.Visibility.Visible;
}
void cmb_Dismissing(object sender, DismissingEventArgs e)
{
if (e.Result == CustomMessageBoxResult.LeftButton)
{
sp.Children.Remove(grid);
//action on close btn click
}
if (e.Result == CustomMessageBoxResult.RightButton)
{
sp.Children.Remove(grid);
// Clear the grid
}
}
}
}
The Show method is used to launch the task.
Output
Join the conversation! Your thoughts help the community grow.