

Introduction
Today, I am creating an article series based on the ASP.NET Web API 2. Well, if we are talking about the Web API then HTTP is the most powerful platform for creating a Web API.
We can broadcast the service and data using the Web API. The use of HTTP is very easy and formative. As we know that every platform can understand the HTTP so that it can be accessible from everywhere like applications created on desktops, mobiles and as well as browsers.
Therefore, we can say that the ASP.NET Web API is a framework for building Web APIs on top of the .NET Framework. In this article, I'll describe the simple and easy use of the Web API with which we can fetch the data and show the data in the browser.
Features
The ASP.NET Web API has very good features that are defined below:
- Attribute Routing
- CORS
- OWIN
Attribute Routing
Now the Web API 2 supports a new type of routing that is called the attribute routing. Now we can define the routes with the use of attributes. It provides more control over the URIs of the Web API.
CORS
Generally, browsers do not allow cross-domain capabiluty. CORS stands for Cross Origin Resource Sharing. Now ASP.NET Web API 2 supports the CORS with which we can make the AJAX call to two different domains.
OWIN
The acronym of the Open Web Interface is OWIN. The ASP.NET Web API 2 has the new functionality to self-host the application with the use of OWIN self host. The OWIN self host process is the better way for hosting the application rather then the IIS hosting.
Getting Started
So, let's proceed and create the application using Web API 2 with the following sections:
- Creating Empty Project using Web API
- Adding Model
Creating Empty Project using Web API
In this section we'll create the ASP.NET empty web application with the use of the Web API Project Template. So, use the following procedure:
Step 1: Open Visual Studio 2013 and click on New Project.
Step 2: Select the ASP.NET Web Application and enter the name as in the following:
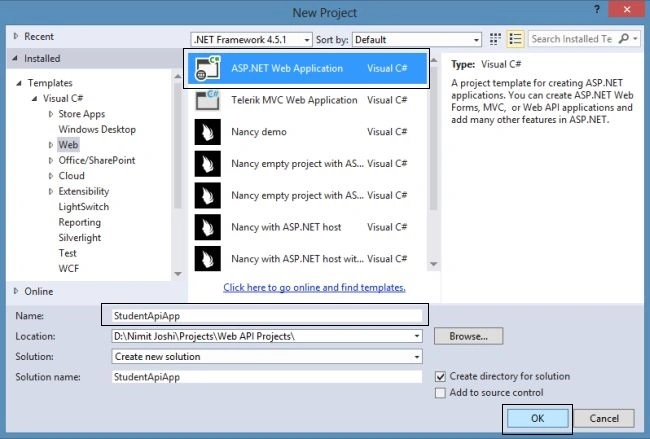
Step 3: Select the Empty Project Template and select the Web API option.
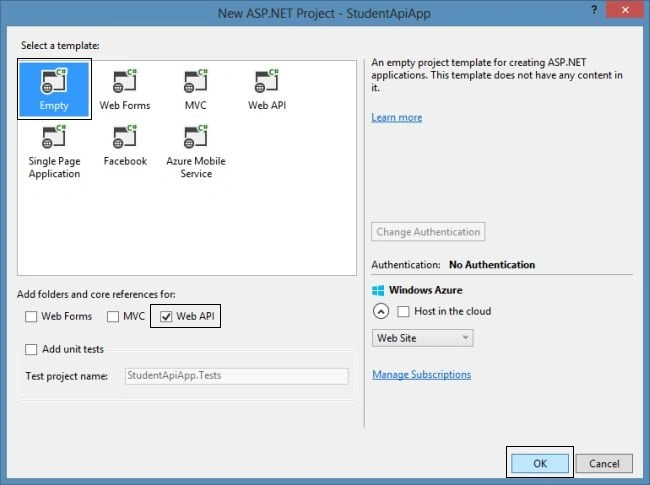
Note: You can select the Web API project template to create the application that gives you the MVC environment to work on it. I am selecting the Empty project here.
Step 4: The empty project solution now has the Models and Controllers folder and you can see it in the Solution Explorer.
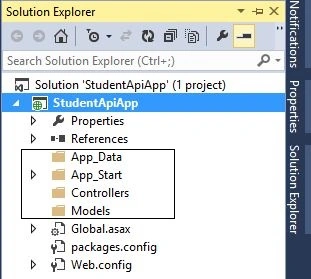
Now we're done with the first section. Let's move to the next section to add a model.
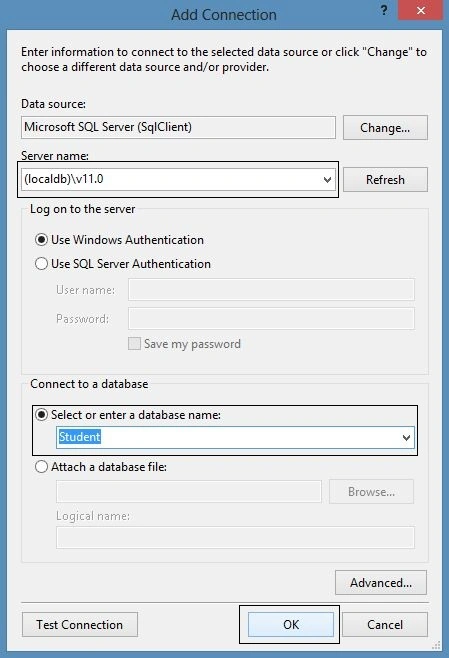
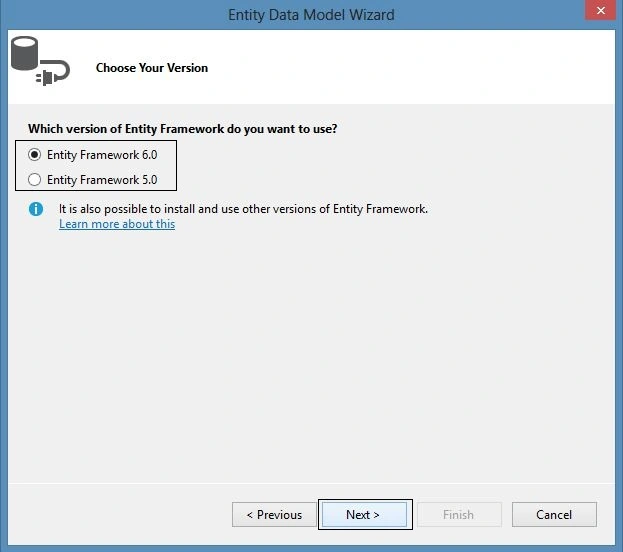
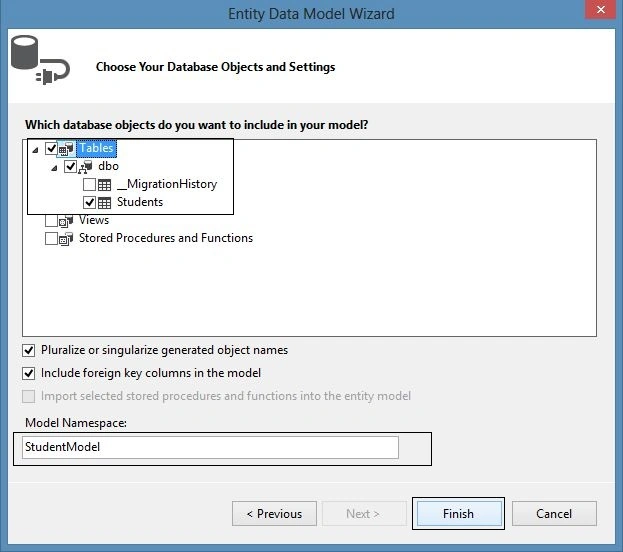
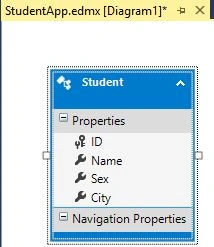
Adding Model


Prerana TiwariPosted Jul 21, 2014, 10:57 PM
Nice article sir....