

Introduction
In this article, we are explaining how to remove the Recycle Bin icon from your Desktop. Windows 8 provides the ability to remove the Recycle Bin from the Desktop. We remove the Recycle Bin using "gpedit.msc" and the "regedit" command. Type "regedit" in the search box and click on the "Application" tab in the result window. The Recycle Bin is removed using the "Local Group Policy Editor".
In Windows 8 the Recycle Bin is removed using two methods; first using "gpedit.msc" and the second is "regedit". You move the cursor to the bottom-right and click on the search box and enter "gpedit.msc" and click on the result window. After opening the result window, the Local Group Policy Editor shows. In the Local Group Policy Editor that shows, you click on the User Configuration, sub-category Administrative Templates and you click on Desktop and then follow the steps.
If you want to remove the Recycle Bin, use the following steps. These are given below.
How to Remove the Recycle Bin From your Desktop in Windows 8
Step 1
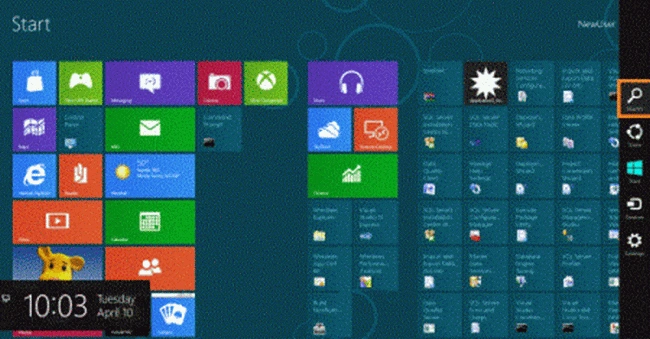
You can move the cursor to the bottom-right and select the search box and enter the name of which you want in the search box.
Step 2
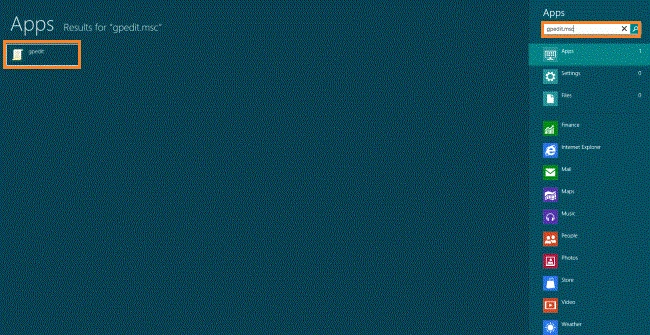
After opening the search box, you can type the "gpedit.msc" in the search box under the application tab and click on it.
Step 3
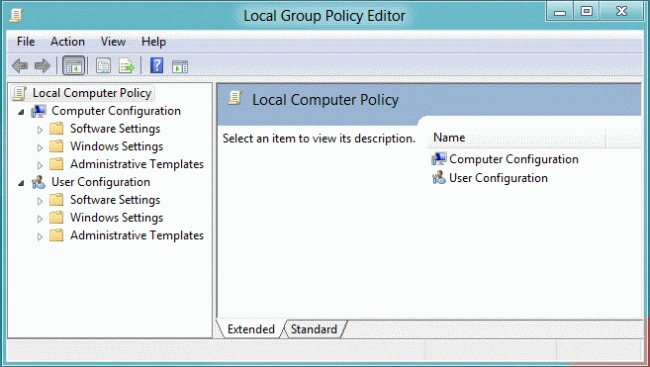
After clicking on "gpedit.msc", a new window will be opened; the name is "Local Group Policy Editor".
Step 4
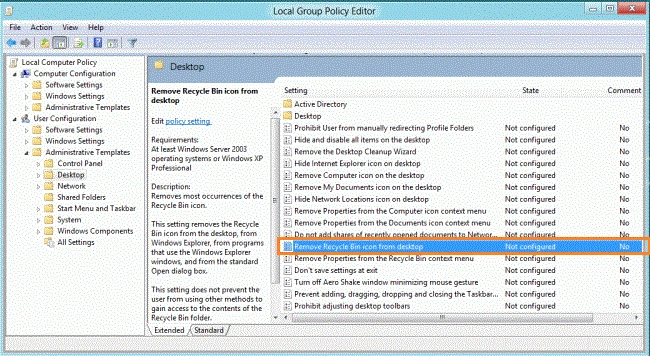
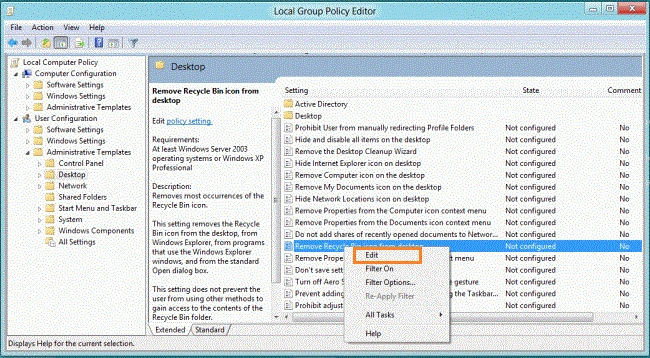
In User Configuration choose subcategory Administrative Template and click on the Desktop and click on the "Remove Recycle Bin Icon From Desktop".
"User Configuration" << "Administrative Templates" << "Desktop".
Step 5
In this step right-click on the "Remove Recycle Bin Icon From Desktop" and select the "Edit" tab and click on it.
Step 6
In this step, you click on the "Enable" button to remove the Recycle Bin Icon from the Desktop and click on the "Apply" or "Ok" button.
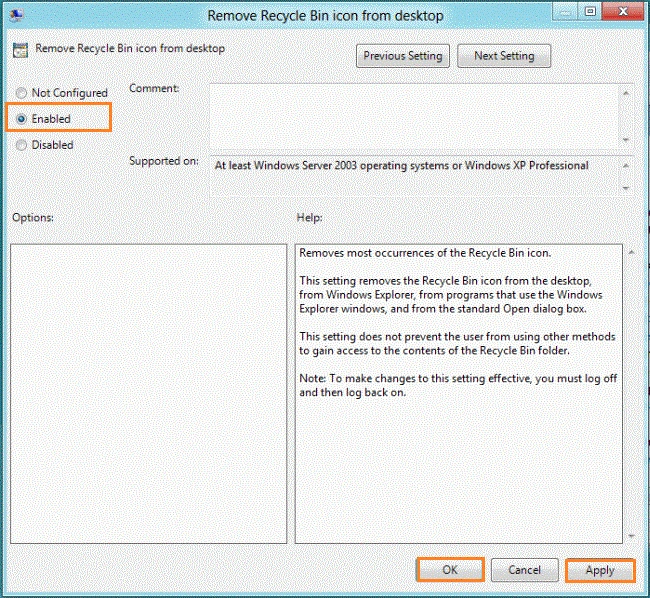
After completing that process Restart your system.
Step 7
After removing the Recycle Bin, the Desktop is as shown below.

Another way Remove Recycle Bin Icon from the Desktop using the Registry Editor
Step 1
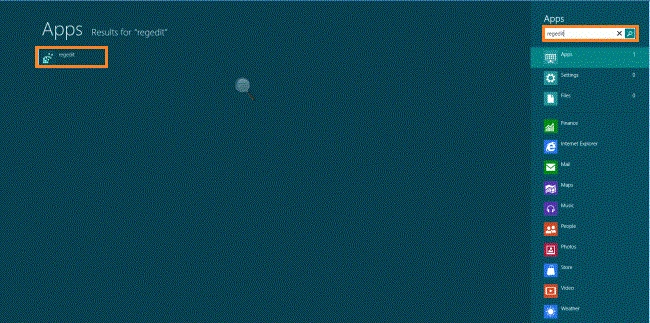
In the Metro UI search box type "regedit" under the Application tab and click on it.
Step 2
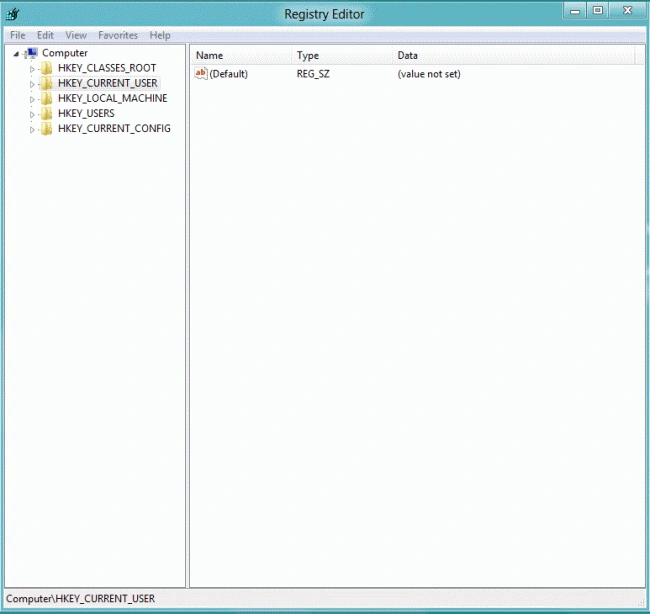
After clicking on the regedit a new window will be opened.
Step 3
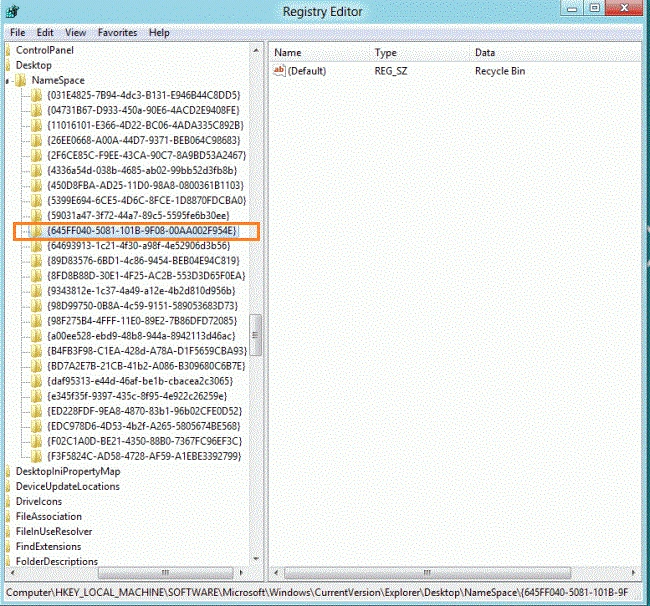
In this step you click on the HKEY_LOCAL_MACHINE; choose the sub-category "Software"; then choose sub-category "Microsoft"; choose the sub-category "Windows"; choose the sub-category "Current Version"; choose the sub-category "Explorer"; choose the sub-category "Desktop"; choose the sub-category "NameSpace" and choose "645FF040-5081-101B-9F08-00AA002F954E".
"HKEY_LOCAL_MACHINE" << "Software" << "Microsoft" << "Windows" << "Current Version" << "Explorer" << "Desktop" << "NameSpace" << "645FF040-5081-101B-9F08-00AA002F954E".
Step 4
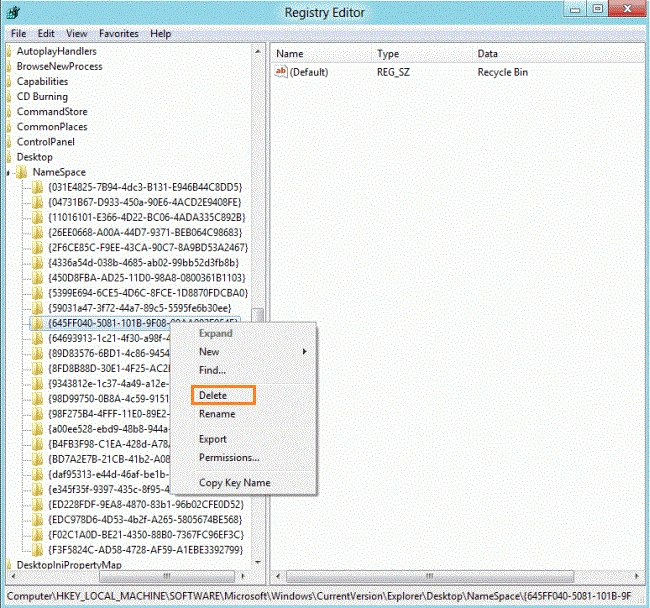
Right-click on the 645FF040-5081-101B-9F08-00AA002F954E and select Delete and then restart your system.
Summary
In this article, we learned about Remove Recycle Bin Icon From Desktop in Windows 8.
NandorPosted Jan 7, 2013, 2:21 PM
There is much easier way to do this: type "desktop icons" in the search box. Click on "show or hide common icons on the desktop", un-tick "recycle bin". Done.
Sam HobbsPosted May 3, 2012, 12:47 PM
If I understand what it is that you are doing here, then it is easier to do in Windows 7 than in Windows 8. In Windows 7, I right-click on the desktop and select "Personalize". Then in the left side I choose "Change desktop icons". Then all I need to do is to uncheck the relevant checkbox.