

Introduction
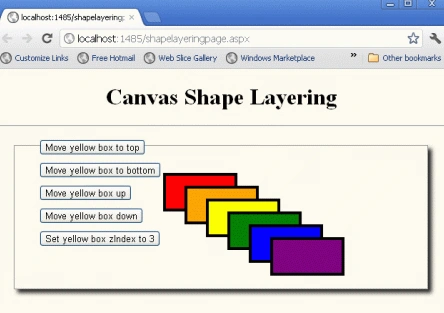
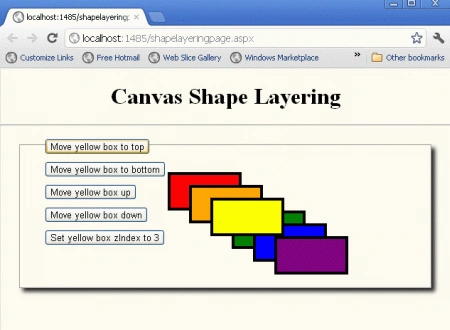
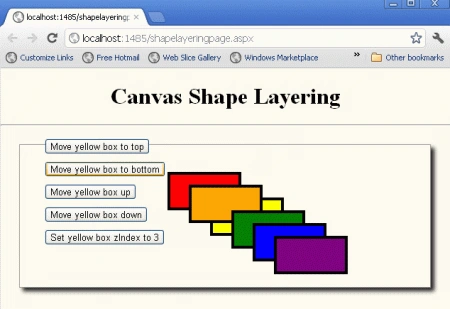
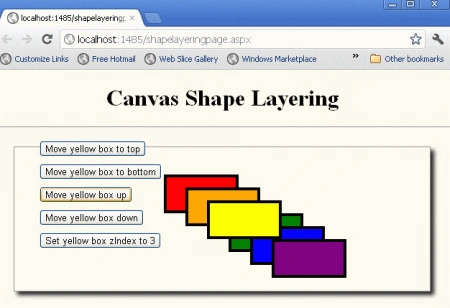
In this article, we are going to have a very interesting section about canvas shape layering using HTML 5. To layer shapes we can use one of the following layering methods like moveToTop(), moveToBottom(), moveUp() and moveDown(). Drag and drop the boxes to move them around, and then use the buttons on the left to reorder the yellow box. We will see the layering with various colors change in accordance with a button click while displaying the application in the browser.
Here we will use some JavaScript and some styles along with HTML code. Just go through the steps to see how to create this application.
Let's see how the ShapeLayering application can be created. To do so use the following steps.
Step 1 : Open a HTML editor or Visual Studio.
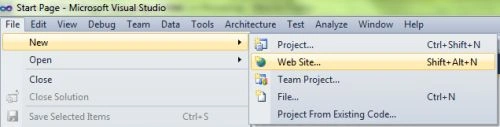
Open File menu ->select new ->Choose Website then.
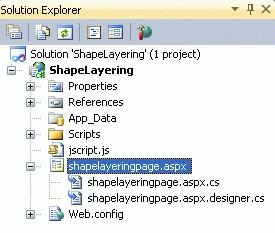
- Go to Solution Explorer
- Right-click on the Application name
- Select Add-->add new item
- Now in the window that opens, select an HTML page or new Webform
- Rename it to shapelayeringpage.aspx
- <style>
- body
- {
- margin: 0px;
- padding: 0px;
- }
- Canvas
- {
- border: 2px solid #9C9898;
- margin-top: 50px;
- box-shadow: 5px 5px 8px #222;
- }
- #buttons
- {
- position: absolute;
- left: 60px;
- }
- button
- {
- margin-top: 10px;
- display: block;
- }
- </style>
Step 3: In this part, we need to work on some JavaScript. To fully understanding how the JavaScript works, download the attached .rar file and run the ShapeLayering application.
The whole JavaScript looks as in the following.
- <script>
- window.onload = function ()
- {
- var stage = new Kinetic.Stage("container", 578, 200);
- var layer = new Kinetic.Layer();
- var offsetX = 0;
- var offsetY = 0;
- var colors = ["red", "orange", "yellow", "green", "blue", "purple"];
- for (var n = 0; n < 6; n++)
- {
- (function ()
- {
- var i = n;
- var box = new Kinetic.Rect({
- x: i * 30 + 210,
- y: i * 18 + 40,
- width: 100,
- height: 50,
- fill: colors[i],
- stroke: "black",
- strokeWidth: 4,
- draggable: true,
- name: colors[i]
- });
- box.on("mouseover", function () {
- document.body.style.cursor = "pointer";
- });
- box.on("mouseout", function () {
- document.body.style.cursor = "default";
- });
- layer.add(box);
- })();
- }
- stage.add(layer);
- // add button event bindings
- document.getElementById("toTop").addEventListener("click", function ()
- {
- layer.getChild("yellow").moveToTop();
- layer.draw();
- }, false);
- document.getElementById("toBottom").addEventListener("click", function ()
- {
- layer.getChild("yellow").moveToBottom();
- layer.draw();
- }, false);
- document.getElementById("up").addEventListener("click", function ()
- {
- layer.getChild("yellow").moveUp();
- layer.draw();
- }, false);
- document.getElementById("down").addEventListener("click", function ()
- {
- layer.getChild("yellow").moveDown();
- layer.draw();
- }, false);
- document.getElementById("zIndex").addEventListener("click", function ()
- {
- layer.getChild("yellow").setZIndex(3);
- layer.draw();
- }, false);
- };
- </script>
Step 4: In this section, we are going to become familiar with the body part of HTML scripting. Replace this script from the body section of the shapelayeringpage.aspx page. Here we pass a Canvas in the canvas tag.
- <body style="background-color: #FFFAF0">
- <center>
- <h1>
- Canvas Shape Layering
- </h1>
- <hr />
- <div id="container">
- </div>
- <div id="buttons">
- <button id="toTop">
- Move yellow box to top
- </button>
- <button id="toBottom">
- Move yellow box to bottom
- </button>
- <button id="up">
- Move yellow box up
- </button>
- <button id="down">
- Move yellow box down
- </button>
- <button id="zIndex">
- Set yellow box zIndex to 3
- </button>
- </div>
- </center>
- </body>
Step 5 : The complete code for the ShapeLayering application is:
- <%@ Page Language="C#" AutoEventWireup="true" CodeBehind="shapelayeringpage.aspx.cs" Inherits="ShapeLayering._Default" %>
- <!DOCTYPE html PUBLIC "-//W3C//DTD XHTML 1.0 Transitional//EN" "http://www.w3.org/TR/xhtml1/DTD/xhtml1-transitional.dtd">
- <html xmlns="http://www.w3.org/1999/xhtml">
- <head runat="server">
- <style>
- </style>
- <script src="jscript.js">
- </script>
- <script>
- </script>
- </head>
- <body style="background-color: #FFFAF0">
- <center>
- <h1>
- Canvas Shape Layering
- </h1>
- <hr />
- <div id="container">
- </div>
- <div id="buttons">
- <button id="toTop">
- Move yellow box to top
- </button>
- <button id="toBottom">
- Move yellow box to bottom
- </button>
- <button id="up">
- Move yellow box up
- </button>
- <button id="down">
- Move yellow box down
- </button>
- <button id="zIndex">
- Set yellow box zIndex to 3
- </button>
- </div>
- </center>
- </body>
- </html>
Step 6: Output Press F5
Note: For the accurate output of HTML5 applications, you must have the Google Chrome browser on your PC. You will see the layering with different colors changes in accordance with button click while displaying the application in the browser.
Gowtham RajamanickamPosted Apr 11, 2015, 1:32 PM
easy artcle
Gowtham RajamanickamPosted Apr 11, 2015, 1:32 PM
great one