

Introduction : I developed a simple application to display person records in ASP.NET using MVC tools. This application for beginners to help them understand what MVC tools is and the benefits of ASP.NET MVC.
ASP.NET MVC gives you a powerful, patterns-based way to build dynamic websites that enables a clean separation of concerns and that gives you full control over markup for enjoyable, agile development. ASP.NET MVC includes many features that enable fast, Test-driven development-friendly development for creating sophisticated applications that use the latest web standards. ASP.NET MVC is a part of the ASP.NET Web application framework. It is one of the two different programming models you can use to create ASP.NET Web applications, the other being ASP.NET Web Forms.
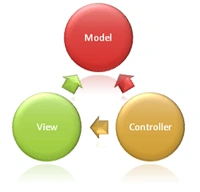
- Model: The model contains the core information for an application. This includes the data and validation rules as well as data access and aggregation logic.
- View: The view encapsulates the presentation of the application, and in ASP.NET this is typically the HTML markup.
- Controller: The controller contains the control-flow logic. It interacts with the Model and Views to control the flow of information and execution of the application.
Step 1 : Open Visual Studio 2010.
- Go to file -> New->Projects.
- Open ASP.NET MVC 2 Empty Web Application.
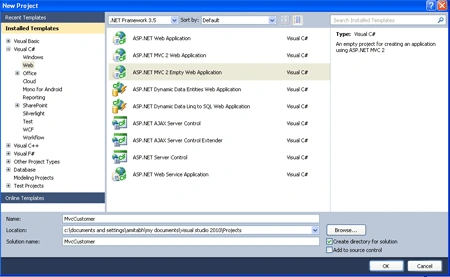
Step 2 :
- Right click of Model folder ->add new items->add class.
- Name of Class is "Persons".
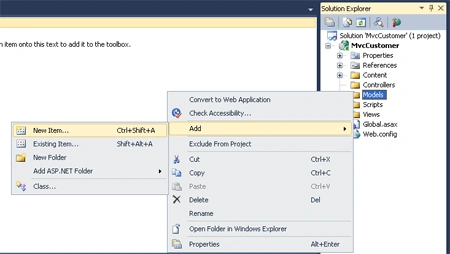
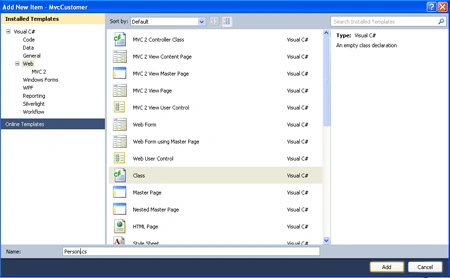
Code :
using
System;
using
System.Collections.Generic;
using
System.Linq;
using
System.Web;
namespace
MvcCustomer.Models
{
public class
Person
{
public int
id { get; set; }
public string
name { get; set;
}
public int
salary { get; set;
}
}
}
Step 3 :
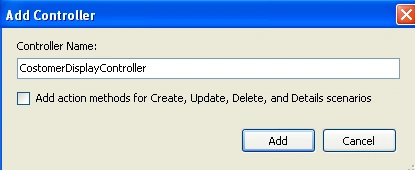
- Right click of Controllers folder ->add->Controllers.
- Name of Controllers is "CustomerDiaplayController".
Code :
using
System;
using
System.Collections.Generic;
using
System.Linq;
using
System.Web;
using
System.Web.Mvc;
using
MvcCustomer.Models;
namespace
MvcCustomer.Controllers
{
public class
CustomerDiaplayController :
Controller
{
//
// GET: /CustomerDiaplay/
public
ActionResult Index()
{
Person pr =
new Person();
pr.id = 1000;
pr.name = "manish singh";
pr.salary = 20000;
return View(pr);
}
}
}
Step 4 :
-
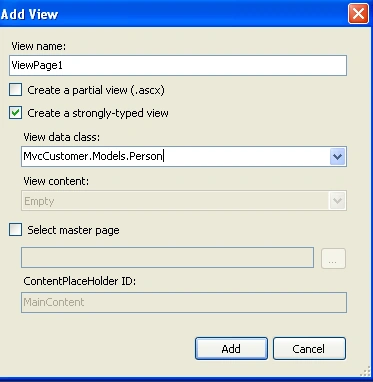
Right click of Index Method -> Add View.
-
View name same as "Index".
-
Create a Strong type View.
Code :
<%@
Page Language="C#"
Inherits="System.Web.Mvc.ViewPage<MvcCustomer.Models.Person>"
%>
<!DOCTYPE
html PUBLIC
"-//W3C//DTD XHTML 1.0 Transitional//EN"
"http://www.w3.org/TR/xhtml1/DTD/xhtml1-transitional.dtd">
<html
xmlns="http://www.w3.org/1999/xhtml"
>
<head
runat="server">
<title>Index</title>
</head>
<body>
<div>
Persion id is <%
= Model.id %><br
/>
person name is <%
= Model.name %><br
/>
persone salary is <%
= Model.salary %>
</div>
</body>
</html>
Step 5 :
-
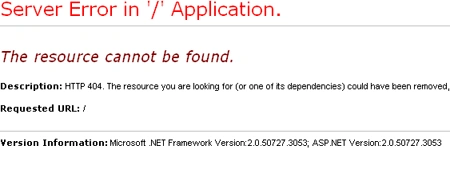
You debug the view page press "f5" they give a error it not found the resource.
Output :
Step 6 :
-
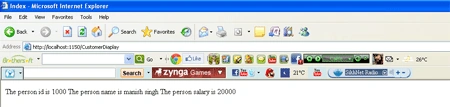
You assign the CustomerDiaplay class in URL after that they find the resource and give a output.
Output :
Vineet Kumar SainieditedPosted Nov 23, 2011, 5:41 PMEdited Nov 23, 2011, 5:43 PM
Hi Manish ,I want to know why we use MVC in asp.net. Please explain ? If we don't use MVC in our asp.net application then what is the effect in our application....