

Previously, I described Step 1 - How to: Setup SharePoint 2013 Virtual Machine on Windows Azure.
Step 2 - Install and Configure Domain Controller
In the last article we saw how to create the network components. In this article we will see how to install and configure the domain controller.
Create Domain Controller VM
Go to "New Virtual Machine" and from the "Gallery" choose "Windows Server 2012 DataCenter". Select the size as medium to begin with as shown below.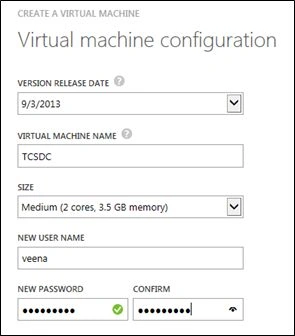
Configuring Domain Controller
Once the Domain Controller is provisioned, click on the "Connect" button and RDP into the DC machine. Click on "Add Roles and Features" and follow the procedure as shown below. In the Server Roles section, choose "Active Directory Domain Services".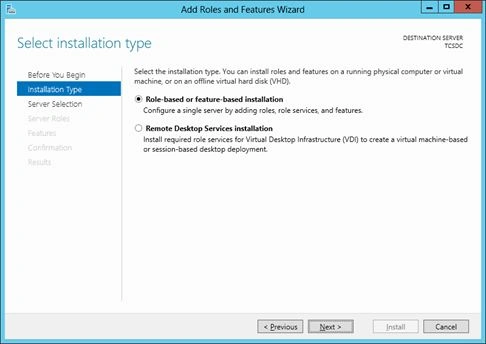
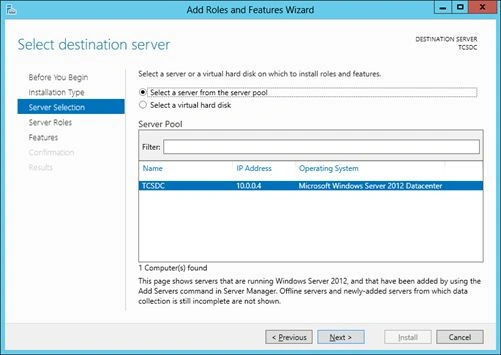
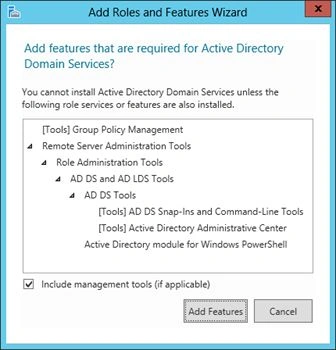
Click on "Add Features" and then on the "Confirmation" tab click on "Install". Once this is done you may be required to restart the server. Restart and again RDP into the DC Server. Near "Manage this server" click on the yellow triangle and click on "Promote to Domain Controller".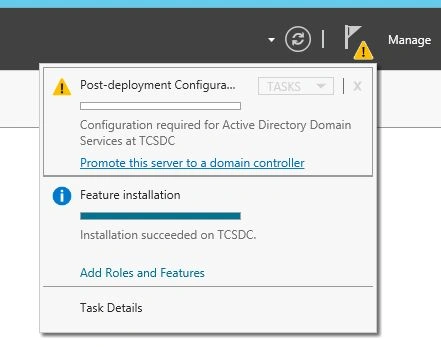
Follow the steps below. Add a new Forest. Mention the domain name you wish.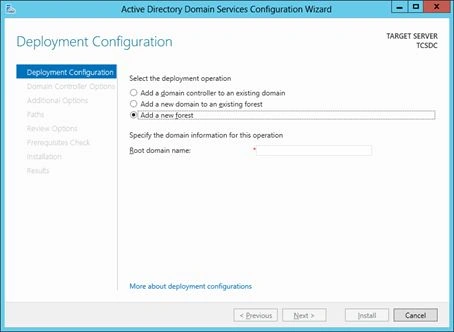
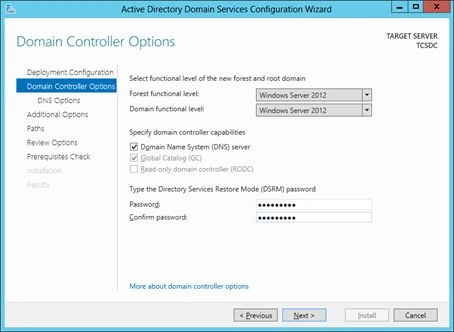
You can ignore the following DNS Options error. 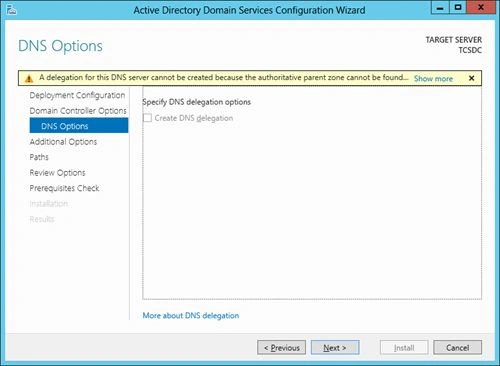
Change the paths if required of the ADDS Database, log and SYSVOL folders. If you have added extra external disks then this can point to them as well.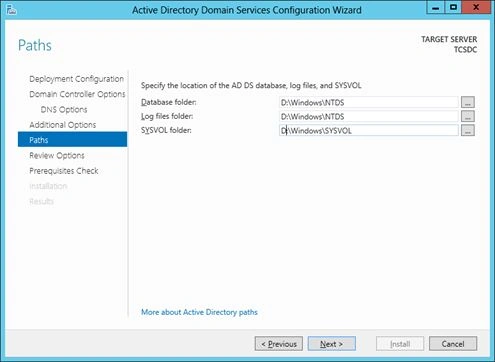
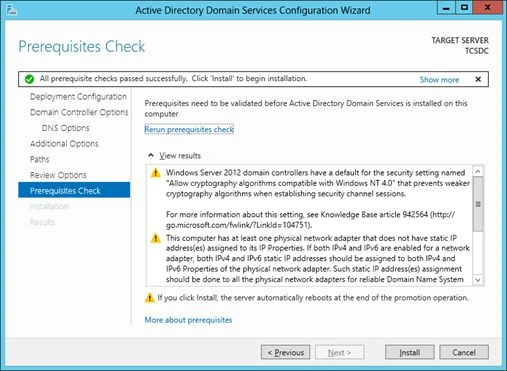
Once you click on "Install", the prerequisites will be installed and your DC Server is ready to add users.
Add new user accounts to the domain
As in on-premise installation we will add 4 users to this domain
- "sp_farm" to manage the SharePoint farm
- "sp_farm_db" to have sysadmin rights on SQL Server instances.
- "sp_install" to have domain administration rights needed for installing roles and features
- "sqlservice" to have an identity that SQL instances can run as
sp_install user configuration
We will specifically take this user siince there are some extra steps required to configure this user. The other 3 users are simple user creations. From "Action" --> "New" --> "User":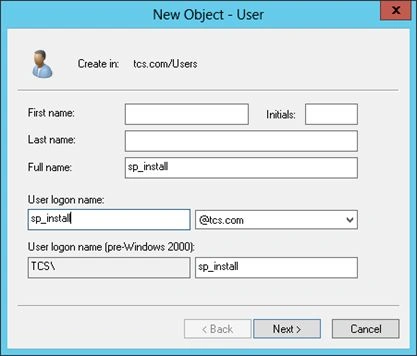
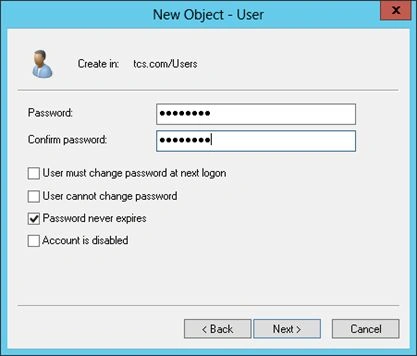
Add "sp_install" to the Domain Admin Group as shown below: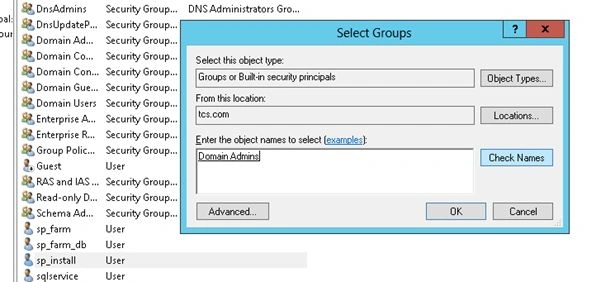
Go to "Domain" --> "Properties" --> "Security Tab" then click the "Advanced" button then select the "Pronciple" link then type "sp_install" as shown in the following procedure.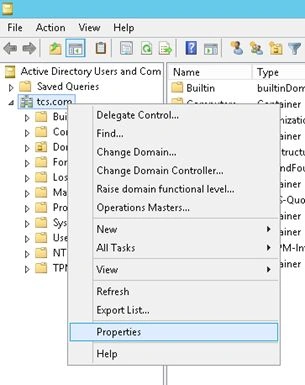
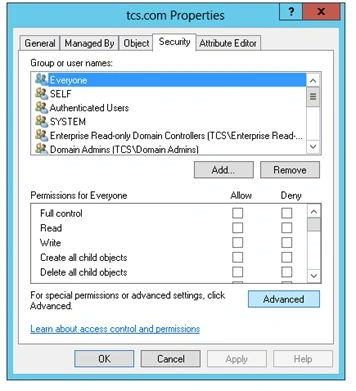
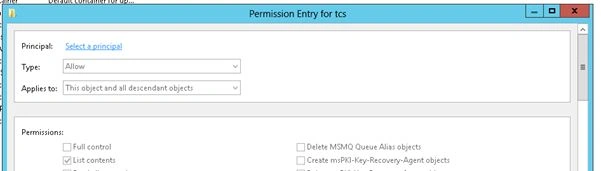
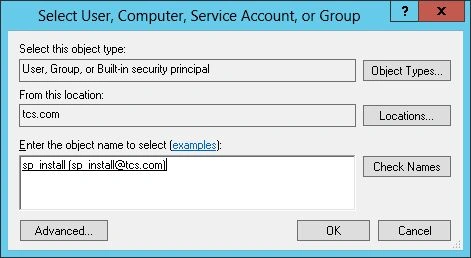
Select "Read All Properties" and "Create Computer Objects" as shown below.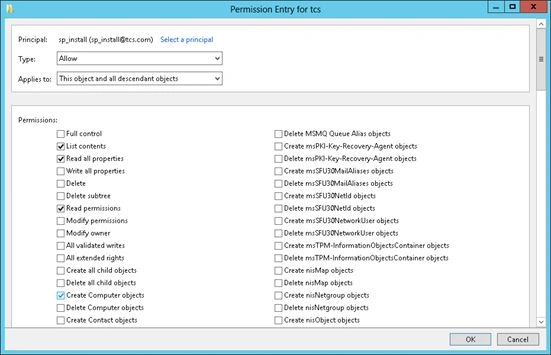
In the next article we will see how to install and configure SQL Server for SharePoint Server 2013 on Windows Azure.
Further Readings
Join the conversation! Your thoughts help the community grow.