

This tutorial covers how to create a button, add button click event handler, and how to format a button in WPF using C# and XAML.
Button control
The Button element represents a WPF Button control in XAML at design-time. The Width and Height attributes of the Button element represent the width and the height of a Button. The Content property of the Button element sets the text of a button control. The x:Name attribute represents the name of the control, which is a unique identifier of a control.
The code snippet in Listing 1 creates a Button control and sets the name, height, width, and content of the control.
- <Button x:Name="DrawCircleButton" Height="80" Width="150" Content="Draw Circle" >
Listing 1
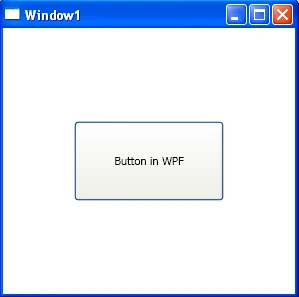
Figure 1
As you can see from Figure 1, by default the Button is place in the center of the page. We can place a Button control where we want by using the Margin, VerticalAlignment and HorizontalAlignment attributes that sets the margin, vertical alignment, and horizontal alignment of a control.
The code snippet in Listing 2 sets the position of the Button control in the left top corner of the page.
- <Button x:Name="DrawCircleButton" Height="30" Width="100"
- Content="Draw Circle"
- Margin="10,10,0,0" VerticalAlignment="Top"
- HorizontalAlignment="Left">
- </Button>
Listing 2
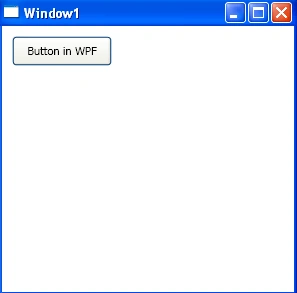
Figure 2
Adding a Button Click Event Handler
The Click attribute of the Button element adds the click event handler. The following code adds the click event handler for a Button.
- <Button x:Name="Random Number" Click="RandomNumber_Click">
- </Button>
The code for the click event handler looks like following.
- private void RandomNumber_Click(object sender, RoutedEventArgs e)
- {
- }
Now, whatever code you write in the click event handler that will be executed on the Button click. The code listed in Listing 3 creates a random number the Button click event handler.
- public void RandomNumber_Click(object sender, EventArgs e)
- {
- Random generator = new Random();
- int randomValue;
- randomValue = generator.Next(1, 10);
- textBlock1.Text += " " + randomValue.ToString();
- }
Listing 3
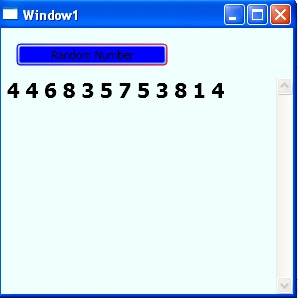
Now, let's apply some formatting to oyr control. Here is the final code of Windows.xaml (WPF application window).
- <Window x:Class="HelloWPF.Window1"
- xmlns="http://schemas.microsoft.com/winfx/2006/xaml/presentation"
- xmlns:x="http://schemas.microsoft.com/winfx/2006/xaml"
- Title="Window1" Height="300" Width="300">
- <Grid Background="Azure">
- <Button Height="23" Margin="15,15,125,0" Name="RandomNumber" VerticalAlignment="Top" Click="RandomNumber_Click" Background="Blue">Random Number
- </Button>
- <ScrollViewer Margin="0,50,0,0">
- <TextBlock Name="textBlock1" TextWrapping="Wrap" FontSize="20" FontWeight="Bold" />
- </ScrollViewer>
- </Grid>
- </Window>
Join the conversation! Your thoughts help the community grow.