

In this article, we will discuss the Menu Control in WPF. For this, follow these steps:
Step 1: First we create the Menus and a TextBox in the .xaml Page like this:
<Menu>
<MenuItem Header="File">
<MenuItem Header="New" />
<MenuItem Header="Open" Click="Open_Click" />
<MenuItem Header="Save" Click="Save_Click"/>
</MenuItem>
<MenuItem Header="Edit">
<MenuItem Header="Cut"/>
<MenuItem Header="Copy" />
<MenuItem Header="Paste" />
</MenuItem>
<MenuItem Header="Font">
<MenuItem Header="Bold" IsCheckable="True"
Checked="Bold_Checked"
Unchecked="Bold_Unchecked"/>
<MenuItem Header="Italic" IsCheckable="True"
Checked="Italic_Checked"
Unchecked="Italic_Unchecked"/>
<MenuItem Header="Thin" IsCheckable="True"
Checked="Thin_Checked"
/>
<MenuItem Header="Medium" IsCheckable="True"
Checked="Medium_Checked"
/>
<MenuItem Header="Increase Font Size"
Click="IncreaseFont_Click"/>
<MenuItem Header="Decrease Font Size"
Click="DecreaseFont_Click"/>
</MenuItem>
</Menu>
<TextBox Name="TextBox1" TextWrapping="Wrap"
Margin="0,55,55,0" Height="55" VerticalAlignment="Top">
My name is mahak Gupta
</TextBox>
The Output Will be: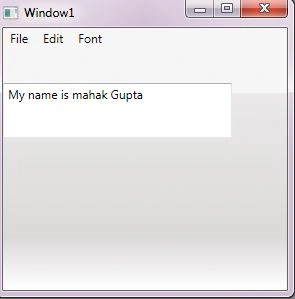
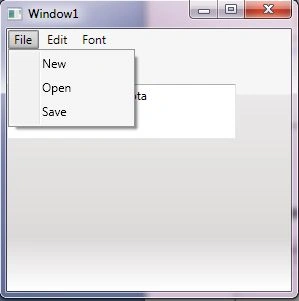
Step 2: In the previous code we write the events in the code. So first we start to write the code for the File Menu:
<MenuItem Header="File">
<MenuItem Header="New" />
<MenuItem Header="Open" Click="Open_Click" />
<MenuItem Header="Save" Click="Save_Click"/>
</MenuItem>
In the .cs Page:
private void Open_Click(object sender, RoutedEventArgs e)
Microsoft.Win32.OpenFileDialog dl1 = new Microsoft.Win32.OpenFileDialog();
dl1.FileName = "MYFileSave";
dl1.DefaultExt = ".txt";
dl1.Filter = "Text documents (.txt)|*.txt";
Nullable<bool> result = dl1.ShowDialog();
if (result == true)
{
string filename = dl1.FileName;
}
}
private void Save_Click(object sender, RoutedEventArgs e)
{
Microsoft.Win32.SaveFileDialog dl1 = new Microsoft.Win32.SaveFileDialog();
dl1.FileName = "MYFileSave";
dl1.DefaultExt = ".txt";
dl1.Filter = "Text documents (.txt)|*.txt";
Nullable<bool> result = dl1.ShowDialog();
if (result == true)
{
string filename = dl1.FileName;
}
}
So when we click on the , the output will be: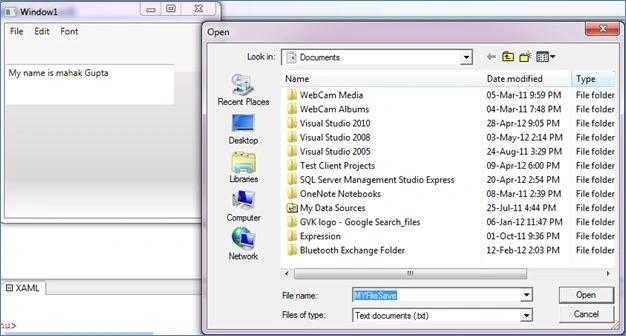
And on the Save: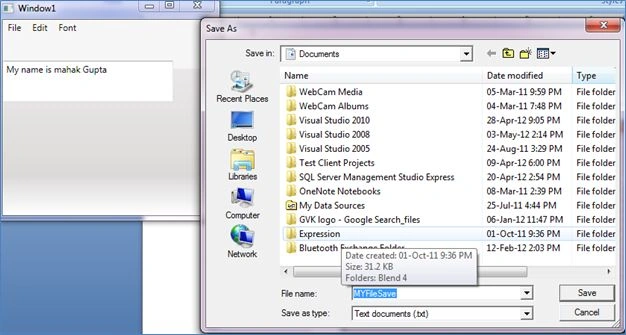
Step 3: Now we write the code for the Font Menu:
<MenuItem Header="Font">
<MenuItem Header="Bold" IsCheckable="True"
Checked="Bold_Checked"
Unchecked="Bold_Unchecked"/>
<MenuItem Header="Italic" IsCheckable="True"
Checked="Italic_Checked"
Unchecked="Italic_Unchecked"/>
<MenuItem Header="Thin" IsCheckable="True"
Checked="Thin_Checked"
/>
<MenuItem Header="Medium" IsCheckable="True"
Checked="Medium_Checked"
/>
<MenuItem Header="Increase Font Size"
Click="IncreaseFont_Click"/>
<MenuItem Header="Decrease Font Size"|
Click="DecreaseFont_Click"/>
</MenuItem>
Here we use the Checked event in some places, so the output will be like this: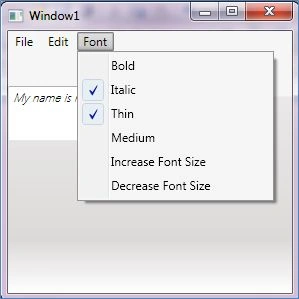
Now we write the code in the .cs page:
private void Bold_Checked(object sender, RoutedEventArgs e)
{
TextBox1.FontWeight = FontWeights.Bold;
}
private void Bold_Unchecked(object sender, RoutedEventArgs e)
{
TextBox1.FontWeight = FontWeights.Normal;
}
private void Italic_Checked(object sender, RoutedEventArgs e)
{
TextBox1.FontStyle = FontStyles.Italic;
}
private void Italic_Unchecked(object sender, RoutedEventArgs e)
{
TextBox1.FontStyle = FontStyles.Normal;
}
private void IncreaseFont_Click(object sender, RoutedEventArgs e)
{
if (TextBox1.FontSize < 20)
{
TextBox1.FontSize += 1;
}
}
private void DecreaseFont_Click(object sender, RoutedEventArgs e)
{
if (TextBox1.FontSize > 10)
{
TextBox1.FontSize -= 1;
}
}
private void Thin_Checked(object sender, RoutedEventArgs e)
{
TextBox1.FontWeight = FontWeights.Thin;
}
private void Medium_Checked(object sender, RoutedEventArgs e)
{
TextBox1.FontWeight = FontWeights.Medium;
}
In this example, we use the TextBox to show the output.
So when we click on the Italic Button, The output will be: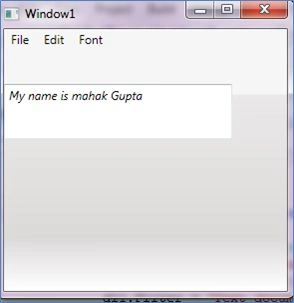
Dileep Kumar PatelPosted May 8, 2012, 8:18 AM
Fantastic Article Mahak Ji..
Shubham SrivastavaPosted May 7, 2012, 6:59 PM
Hi, can we add Menu Items from Database dynamically ?