

Enough of the analogy, now let's move on. In this part of the series, we shall take a look at the Rectangle element.
The Rectangle element is used to draw outlines or filled regions of a rectangular shape.
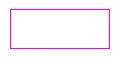
The following XAML markup snippet demonstrates how to draw an outline of a rectangle.
<Rectangle Width="100" Height="40" Stroke="Magenta" Margin="142,31,328,365"></Rectangle>
When you build and execute, the output will be as displayed in Figure below.
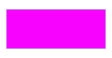
The following markup fills the rectangle with Magenta color instead of just drawing an outline
<Rectangle Width="100" Height="40" Fill="Magenta" Margin="142,31,328,365"></Rectangle>
When you build and execute, the output will be as displayed in Figure below.
You can further customize the properties of the Rectangle such as Stroke, StrokeThickness, RadiusX, and RadiusY.
<Rectangle Fill="PaleTurquoise" Margin="142,31,310,346" Stroke="Navy" StrokeThickness="4" RadiusX="20" RadiusY="140">
When you build and execute, the output will be as displayed in Figure below.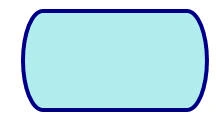
Now have a look at a fancy rectangle created with a LinearGradientBrush for its Fill property.
<Rectangle Margin="142,31,310,346">
<Rectangle.Fill>
<LinearGradientBrush StartPoint="0.5,0" EndPoint="0.5,1">
<GradientStop Color="Wheat" Offset="0.1" />
<GradientStop Color="Tomato" Offset="0.5" />
<GradientStop Color="Wheat" Offset="0.66" />
<GradientStop Color="Blue" Offset="1" />
</LinearGradientBrush>
</Rectangle.Fill>
</Rectangle>
When you build and execute, the output will be as displayed in Figure below.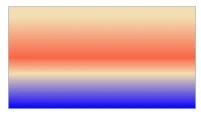
The following example dynamically adds three rectangle on top of one another based on a button click.
<Grid x:Name="LayoutRoot" Background="White">
<Grid.RowDefinitions>
<RowDefinition Height="Auto" />
<RowDefinition Height="*" />
</Grid.RowDefinitions>
<Button Content="Add Rectangle" Click="btnAdd_Click" x:Name="btnAdd" Width="100" Height="40"/>
<StackPanel x:Name="stkp1" Grid.Row="1" VerticalAlignment="Bottom"/>
</Grid>
In the code-behind, add:
int i = 0;
private void btnAdd_Click(object sender, RoutedEventArgs e)
{
i++;
// check if 3 rectangles are added
if (i == 3)
{
btnAdd.IsEnabled = false;
}
Rectangle rect = new Rectangle();
rect.Height = 50;
rect.Width = 100;
rect.Fill= new SolidColorBrush(Colors.Green);
rect.Stroke = new SolidColorBrush(Colors.Purple);
rect.StrokeThickness = 2;
stkp1.Children.Insert(0, rect);
}
The final outcome after the three rectangles are added one by one is shown in Figure below.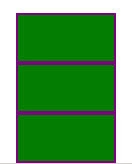
Conclusion: The second part of this series introduced the Rectangle element.
Join the conversation! Your thoughts help the community grow.