
Introduction: In this article we will explore the creation of a dropdown menu using jQuery in which we are using a stylesheet to give some effects. In this we will see how to style the entire dropdown in just css, and have the menu items change color when we mouse of them.
Step 1: Firstly we have to
take a web Application
- Go to Visual Studio 2010.
- Open the web Application.
- Click OK.
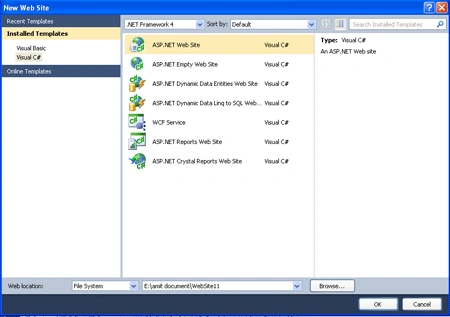
Step 2: Secondly you have to add a new page to the website
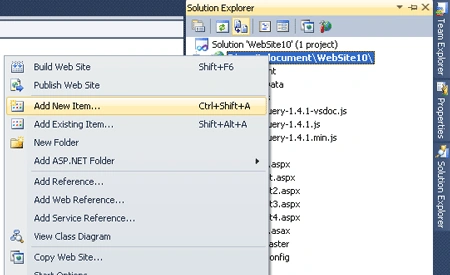
- Go to the Solution Explorer.
- Right Click o Project name.
- Select add new item.
- Add new web page and give it a name.
- Click OK.
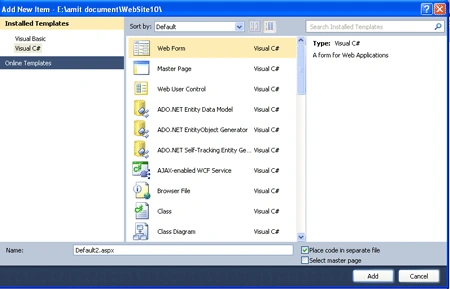
Step 3: In this step we are going to see that see from where the js reference will be added to the source page of the default2.aspx page.
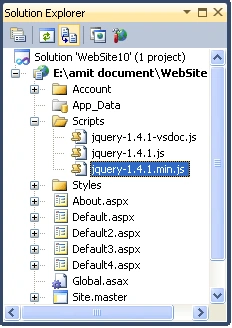
Step 4: Now we are going to write the script code which will be inside either on the head section or in the body section; it will depend upon you which way you like most to placed it.

Step 5: Here we will code for the stylesheet which is very useful for the menu like its hover property that is used on mousehover. We are using css for getting the stylesheet properties on the particular action. The code given below it will be added inside the head section of the source page of default2.aspx page.
StyleSheet Code:
<style
type="text/css">
ul
{
list-style:none;
padding:0px;
margin:0px
}
ul
li
{
display:inline;
float:left;
}
ul
li a
{
color:#ffffff;
background:#990E00;
margin-right:5px;
font-weight:100;
font-size:20px;
font-family:Comic
Sans MS;
text-decoration:none;
display:block;
width:210px;
height:25px;
line-height:25px;
text-align:center;
-webkit-border-radius:5px;
-moz-border-radius:5px;
border: 1px
solid #560E00;
}
ul
li a:hover
{
color:#cccccc;
background:#ffff66;
font-weight:bold;
text-decoration:none;
display:block;
width:210px;
text-align:center;
-webkit-border-radius:5px;
-moz-border-radius:5px;
border: 1px
solid #000000;
}
ul
li.s_links a
{
color:#000000;
background:#383838;
border-bottom:1px
solid #cccccc;
font-weight:100;
text-decoration:none;
display:block;
width:210px;
text-align:center;
margin-top:2px;
ul
li.s_links
a:hover
{
color:#000000;
background:#ccff66;
font-weight:100;
text-decoration:none;
display:block;
width:200px;
text-align:center;
}
ul li.s_links
{
display:none;
}
#container
{
margin:0px
auto;
width:800px;
}
.clear
{
clear:both;
}
.left
{
float:left;
}
.right
{
float:right;
}
</style>
Step 6: In this line we will write the jQuery code which will be added in the head section of the page which will be enclosed between the <script></script> tags given below.
jQuery Code:
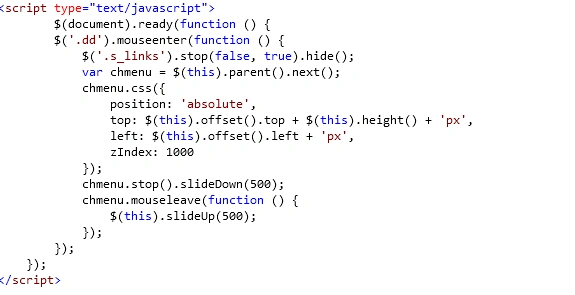
Code Description:
In this step we will see the handler of jQuery which is given below.

In this step we will run our code when the mouse enters (mouseenter method) an element with class set to dd, let see the given figure the menu link in our case:

Now we are going to make sure that we hide (hide()) all previously open dropdowns when mouse enters a menu link:

Take care the stop() function there, it helps us to show only one dropdown at a time when mouse is quickly hovered over various menu links. If we did not use it, each dropdown menu will remain visible unless we move our mouse arrow away explicitly.We then grab the actual dropdown menu to be shown with and store in into a variable:

After that, we are going to apply some css to the dropdown so that it appears exactly below the hovered menu link:
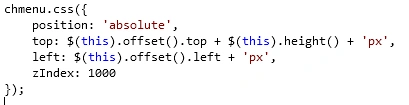
The code given above is very important as it
makes sure that dropdown appears exactly below the hovered menu link. With
position set to absolute, we can position the element at any place on the
document independently. We then get the
top position of the
hovered menu link with (this
refers to current hovered menu link) and add to it the
height
of it so that dropdown appears exactly below that link. We do something similar
for the left property. We then use the z-index property to make sure that
dropdown appears over everything else. code
chmenu.stop().slideDown(300)
will sliding it down at the speed of
500 miliseconds.
Now this far it was about to show the dropdown. It is time to hide it when the mouse leaves it. We do so with this piece of code:

Step 7: In this step we are going to combine all of the coding steps from step 4 to step 6, which is given below
Code:
<%@
Page Language="C#"
AutoEventWireup="true"
CodeFile="Default2.aspx.cs"
Inherits="Default2"
%>
<!DOCTYPE
html PUBLIC
"-//W3C//DTD XHTML 1.0 Transitional//EN"
"http://www.w3.org/TR/xhtml1/DTD/xhtml1-transitional.dtd">
<html
xmlns="http://www.w3.org/1999/xhtml">
<head
runat="server">
<title>Simple
Dropdown Menu Using jQuery</title>
<script
type="text/javascript"
src="Scripts/jquery-1.4.1.min.js"></script>
<script
type="text/javascript">
$(function () {
$('.dd').mouseenter(function
() {
$('.s_links').stop(false,
true).hide();
var chmenu = $(this).parent().next();
chmenu.css({
position: 'absolute',
top: $(this).offset().top + $(this).height()
+ 'px',
left: $(this).offset().left +
'px',
zIndex: 1000
});
chmenu.stop().slideDown(500);
chmenu.mouseleave(function () {
$(this).slideUp(500);
});
});
});
</script>
<style
type="text/css">
ul
{
list-style:none;
padding:0px;
margin:0px
}
ul
li
{
display:inline;
float:left;
}
ul
li a
{
color:#ffffff;
background:#990E00;
margin-right:5px;
font-weight:100;
font-size:20px;
font-family:Comic
Sans MS;
text-decoration:none;
display:block;
width:210px;
height:25px;
line-height:25px;
text-align:center;
-webkit-border-radius:5px;
-moz-border-radius:5px;
border: 1px
solid #560E00;
}
ul
li a:hover
{
color:#cccccc;
background:#ffff66;
font-weight:bold;
text-decoration:none;
display:block;
width:210px;
text-align:center;
-webkit-border-radius:5px;
-moz-border-radius:5px;
border: 1px
solid #000000;
}
ul
li.s_links a
{
color:#000000;
background:#383838;
border-bottom:1px
solid #cccccc;
font-weight:100;
text-decoration:none;
display:block;
width:210px;
text-align:center;
margin-top:2px;
ul
li.s_links
a:hover
{
color:#000000;
background:#ccff66;
font-weight:100;
text-decoration:none;
display:block;
width:200px;
text-align:center;
}
ul li.s_links
{
display:none;
}
#container
{
margin:0px
auto;
width:800px;
}
.clear
{
clear:both;
}
.left
{
float:left;
}
.right
{
float:right;
}
</style>
</head>
<body>
<div
id="container"
style="margin-top:40px;">
<ul>
<li><a
href="#"
class="dd">Home</a></li>
<li
class="s_links">
<a
href="default5.aspx">Contact</a>
<a
href="default6.aspx">Queries</a>
</li>
</ul>
<ul>
<li><a
href="#"
class="dd">Services</a></li>
<li
class="s_links">
<a
href="default7.aspx">Web
Applications</a>
<a
href="default8.aspx">Windows
Applications</a>
<a
href="default9.aspx">Software
Testing</a>
<a
href="$">Business
Intelligence</a>
<a
href="$">Training</a>
</li>
</ul>
<ul>
<li><a
href="#"
class="dd">Professionals</a></li>
<li
class="s_links">
<a
href="default.aspx">Mobile
Application</a>
<a
href="default4.aspx">.Net
Courses</a>
<a
href="default2.aspx">Android
Application</a>
<a
href="default3.aspx">Adobe
Flex Courses</a>
<a
href="#">jQuery</a>
</li>
</ul>
</div>
<br
clear="all"/>
</body>
</html>
Step 8: In this step we will see the design page named as default2.aspx which is given below.
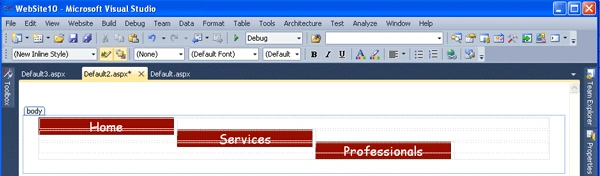
Step 9: At last we are going to run the application by pressing F5 and images related to the output is given below.
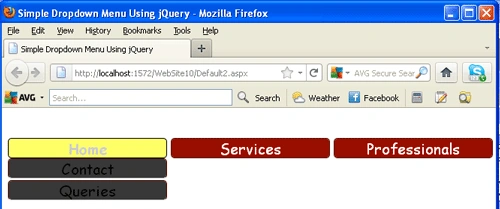
Output: This window will open like as we run the application
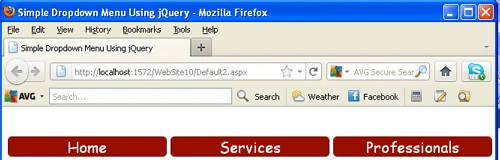
The first one output shows that mouse is over on the home menu and we will also see that it has changed their property.
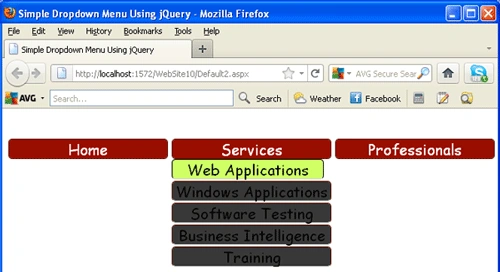
The second Output window shows the child element getting color changed with light green of the item on placing mouse over the second menu
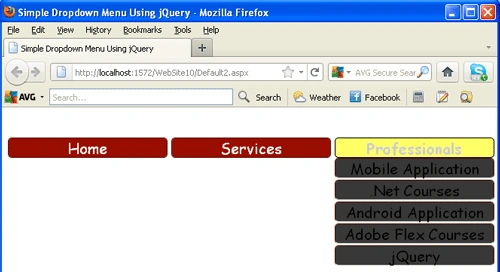
The third output window shows the child menu item and getting color yellow.
Gowtham RajamanickamPosted Apr 1, 2015, 4:33 AM
good