

Introduction
We have seen in previous articles how to install an assembly using both, the .NET Framework management console and the Global assembly cache tool provided by the NET Framework. Now we will se how to install a strong named assembly with the simplest manner.
We have seen in a previous article how one can install a given assembly using the .Net Framework management console the Mscorcfg.msc. Now, we proceed to achieve the same goal but using another tool witch is the Global assembly cache tool cagutil.exe provided by the .Net framework.
To do that, follow those steps:
First of all, let us develop a simple assembly. To do that, follow those steps
- Create a new class library project and name it myAssembly
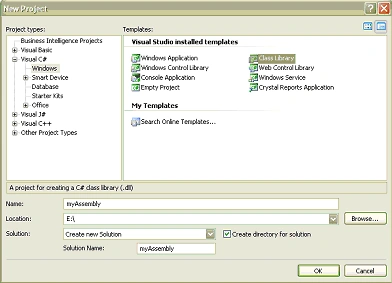
Figure 1
- Add this code to the editor
using System;
using System.Collections.Generic;
using System.Text;
using System.Windows.Forms;
namespace myAssembly
{
public class Class1
{
public Class1()
{
MessageBox.Show("You are using myAssembly");
}
}
}
- Save the project.
The GAC accepts only assemblies with strong names; there fore it is imperatively recommended to sign the assembly before adding it into GAC, otherwise when adding a none strongly assembly, a message indicates that the new assembly can not be added to the GAC appears and finally the action is failed. So, to sign myAssembly, go to myAssembly properties as shown bellow.
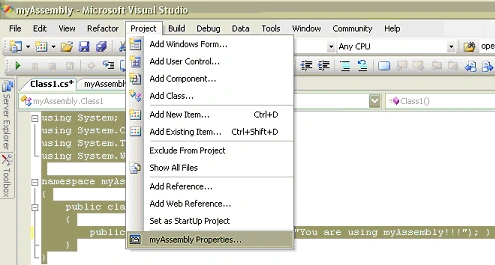
Figure 2
- Select the signing tab and then check sign the assembly checkbox
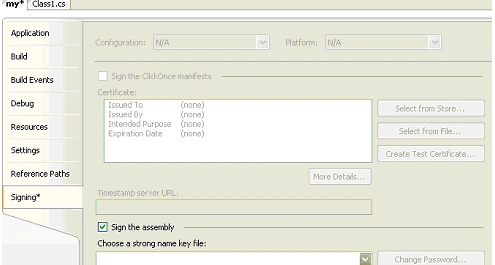
Figure 3
- Select New in the combo box as shown above. This dialog box appears
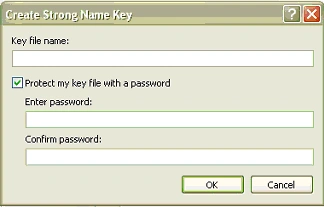
Figure 4
- Enter the key file name with twelve characters, then enter a password with more than six characters and confirm it, then click Ok.
A file looks like this is added to the application directory with *.snk as an extension witch is a Strong Name Key abbreviation. This file contains a random pair keys and it is provided to sign the assembly. This file can be generated also using the Strong name tool sn.exe provided by .NET framework.
- Browse to "C:\Windows\assembly" directory witch looks like bellow:
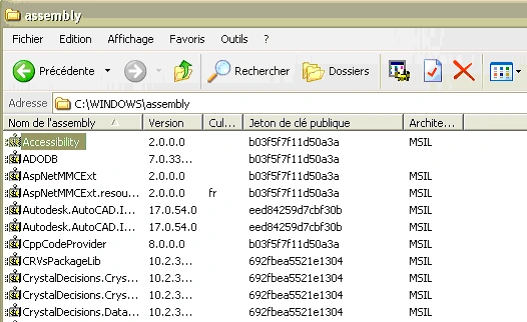
Figure 5
- Drag the assembly and drop it in this directory, that's all.
Join the conversation! Your thoughts help the community grow.