
Introduction
Today we want to share a experimental 3D image animation with jQuery and CSS3 animations. We'll be using CSS3 3D Transforms for Webkit only. CSS Transforms were first introduced in WebKit in 2007, and have now reached mass-adoption by all the major browser vendors. This is great news for web developers, especially in the case of 3D transforms which are hardware-accelerated, resulting in extremely smooth animations and responsive applications. jQuery is a great tool that helps our imagination turn ideas into reality. We can do almost everything we can think of with the help of this useful tool.
Step 1: First we have to create a Web Application.
- Go to Visual Studio 2010.
- New--> And select the Web Application.
- Give whatever name you want to.
- Click OK.
Step 2: Secondly you have to add a new page to the website.
- Go to the Solution Explorer.
- Right-click on the project name.
- Select add new item.
- Add new web page and give it a name.
- Click OK.
Step 3: Now add some image in the "Images" folder of the project.
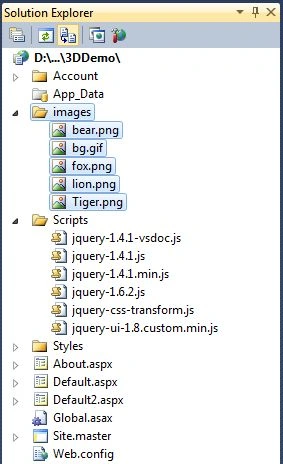
Step 4: In this step add the CSS code inside the <style> tag and placed it into the <head> section of your page.
<style type="text/css">
html, body
{
font-family: Verdana, Arial, sans-serif;
width: 100%;
height: 100%;
}
body
{
margin: 0px;
padding: 0px;
width: 100%;
height: 100%;
background-image: url('images/bg.gif');
background-repeat: repeat;
}
a
{
color: #fff;
}
.clearfix:before, .clearfix:after
{
content: "\0020";
display: block;
height: 0;
overflow: hidden;
}
.clearfix:after
{
clear: both;
}
.clearfix
{
zoom: 1;
}
h1, h2, h3
{
font-size: 2.5em;
color: #fff;
text-shadow: 2px 2px 2px #0080cc;
-webkit-text-stroke: 0.5px #0089db;
-moz-text-stroke: 0.5px #0089db;
text-stroke: 0.5px #0089db;
}
h3
{
font-size: 1.5em;
}
#content
{
width: 760px;
text-align: left;
margin: 0 auto;
position: relative;
}
.animal
{
position: absolute;
}
.animal .label
{
position: relative;
width: 150px;
height: 30px;
background-color: #fff;
background: -webkit-gradient( linear, 0 0, 0% 100%, from(#eee), to(#fff) );
background: -moz-linear-gradient( top left, #ccc, #fff );
border: 2px solid #009af5;
text-align: center;
color: #009af5;
font-size: 1.5em;
padding: 10px 0px 10px 0px;
-webkit-border-radius: 9px;
-moz-border-radius: 9px;
border-radius: 9px;
-webkit-box-shadow: 2px 2px 6px rgba(0,0,0,0.6);
-moz-box-shadow: 2px 2px 6px rgba(0,0,0,0.6);
box-shadow: 2px 2px 6px rgba(0,0,0,0.6);
cursor: pointer;
}
.animal .labelOver
{
background: -webkit-gradient( linear, 0 0, 0% 100%, from(#009af5), to(#006baa) );
background: -moz-linear-gradient( top left, #009af5, #006baa );
text-align: center;
color: red;
}
#myanimal
{
position: absolute;
font-size: 5em;
color: #8B008B;
}
</style>
Step 5: In this step we have to write the script reference to the aspx page; let us see from where you have to write the script code.
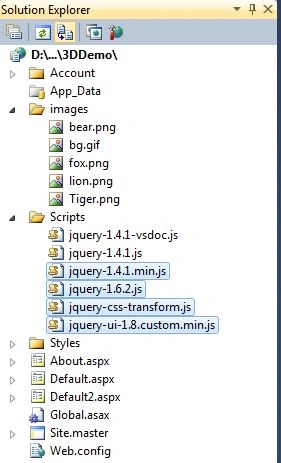
Right-click on selected files respectively -> copy and paste it inside <Head> section of your page; see step 6.
Step 6: Let us see the script code which
you have to add inside the <script></script> tags and that will be placed either
in <head> section or the <body> section as you prefer.
<script src="Scripts/jquery-1.4.1.min.js" type="text/javascript"></script>
<script src="Scripts/jquery-1.6.2.js" type="text/javascript" ></script>
<script src="Scripts/jquery-ui-1.8.custom.min.js" type="text/javascript" ></script>
<script src="Scripts/jquery-css-transform.js" type="text/javascript"></script>
Step 7: In this step we have to write the javascript code in the <body> tag
of our page which is given below.
<script type="text/javascript">
var log = function (msg) {
console.log(msg);
return this;
};
var mousePos = { x: 0, y: 0 };
var animals;
var i;
function frameStep() {
for (i = 0; i < animals.length; i++) {
var animal = animals[i];
var label = $(animal).children(".label");
if (!label.data("isMouseOver")) {
var angle = label.data("angle");
var startLeft = label.data("leftStart");
var startTop = label.data("topStart");
if ((angle += 0.002) >= 360) angle = 0;
label.css("left", (Math.cos(180 / Math.PI * angle) * 7 + startLeft) + "px");
label.css("top", (Math.sin(180 / Math.PI * angle) * 7 + startTop) + "px");
label.data("angle", angle);
var img = $(animal).children("img");
img.stop(false, true);
img.rotateY((img.offset().left + img.data("width") / 2 - mousePos.x) / -10 + "deg");
img.rotateX((img.offset().top + img.data("height") / 2 - mousePos.y) / 10 + "deg");
console.log(img.data("width"));
}
}
}
$(document).ready(function () {
animals = $(".animal").toArray();
$("#myanimal")
.hide()
.css("top", $(window).height() / 2 - parseFloat($("#myanimal").height()) / 2)
.translate3d("0px", "0px", "100px");
$(".animal img").each(function () {
$(this).data("width", $(this).width());
$(this).data("height", $(this).height());
$(this).translate3d("0px", "0px", "-50px");
});
$(".label").each(function () {
$(this).data("angle", 0)
.data("leftStart", parseFloat($(this).css("left")))
.data("topStart", parseFloat($(this).css("top")));
})
.mouseenter(function () {
var label = $(this);
if (!label.data("isMouseOver")) {
label.data("isMouseOver", true);
label.addClass("labelOver");
var img = $(this).siblings("img");
img.stop(false, true);
img.scale(0.8);
img.animate({ scale: 1, translate3d: "0px -70px -5px", rotateY: '0deg' }, { queue: false, duration: 1000, easing: "easeOutElastic" });
}
})
.mouseleave(function () {
var label = $(this);
var img = $(this).siblings("img");
if (label.data("isMouseOver")) {
label.removeClass("labelOver");
img.stop(false, true);
img.animate({ scale: 1, translate3d: "0px 0px -5px" }, { queue: false, duration: 100, complete: function () { label.data("isMouseOver", false); } });
}
})
.click(function (event) {
$("#myanimal").rotateY("-140deg");
$("#myanimal").rotateX("20deg");
$("#myanimal")
.stop(true, true)
.html($(event.target).parent().attr("id").toString().toUpperCase() + "!")
.css("left", $(window).width())
.show()
.animate({ rotateX: "0deg", rotateY: "0deg", left: $(window).width() / 2 - parseFloat($(this).width()) / 2 }, { easing: "easeOutElastic", duration: 2500 })
.fadeOut('fast');
});
$("body").mousemove(function (event) {
mousePos.x = event.pageX;
mousePos.y = event.pageY;
});
log("starting animation");
setInterval(frameStep, 33);
});
</script>
Step 8: In this step you will see the body code of the Default2.aspx page which is given below.
Code
<body>
<div id="content">
<div>
<div id="Tiger" class="animal" style="left: 50px; top: 210px;">
<img src="images/Tiger.png" />
<div class="label" style="left: 35px; top: -80px;">
CLICK ME</div>
</div>
<div id="lion" class="animal" style="left: 400px; top: 200px;">
<img src="images/lion.png" />
<div class="label" style="left: 30px; top: -80px;">
CLICK ME</div>
</div>
<div id="fox" class="animal" style="left: 100px; top: 580px;">
<img src="images/fox.png" />
<div class="label" style="left: 15px; top: -80px;">
CLICK ME</div>
</div>
<div id="bear" class="animal" style="left: 400px; top: 500px;">
<img src="images/bear.png" />
<div class="label" style="left: 15px; top: -80px;">
CLICK ME</div>
</div>
</div>
</div>
<h1 id="myanimal">ANIMAL!</h1>
</body>
Step 9: In this step we will see the complete code of the Default2.aspx page
which is given below.
Code
<%@
Page Language="C#"
AutoEventWireup="true"
CodeFile="Default2.aspx.cs"
Inherits="Default2"
%>
<!DOCTYPE html PUBLIC "-//W3C//DTD XHTML 1.0 Transitional//EN" "http://www.w3.org/TR/xhtml1/DTD/xhtml1-transitional.dtd">
<html xmlns="http://www.w3.org/1999/xhtml">
<head runat="server">
<title>A Simple 3D Animation Using jQuery and CSS3</title>
<script src="Scripts/jquery-1.4.1.min.js" type="text/javascript"></script>
<script src="Scripts/jquery-1.6.2.js" type="text/javascript"></script>
<script src="Scripts/jquery-ui-1.8.custom.min.js" type="text/javascript"></script>
<script src="Scripts/jquery-css-transform.js" type="text/javascript"></script>
<script type="text/javascript">
var log = function (msg) {
console.log(msg);
return this;
};
var mousePos = { x: 0, y: 0 };
var animals;
var i;
function frameStep() {
// animate labels
for (i = 0; i < animals.length; i++) {
var animal = animals[i];
var label = $(animal).children(".label");
if (!label.data("isMouseOver")) {
var angle = label.data("angle");
var startLeft = label.data("leftStart");
var startTop = label.data("topStart");
// animate label on circular path
if ((angle += 0.002) >= 360) angle = 0;
label.css("left", (Math.cos(180 / Math.PI * angle) * 7 + startLeft) + "px");
label.css("top", (Math.sin(180 / Math.PI * angle) * 7 + startTop) + "px");
label.data("angle", angle);
// rotate animal images based on mouse position if they are not currently animating
var img = $(animal).children("img");
img.stop(false, true);
img.rotateY((img.offset().left + img.data("width") / 2 - mousePos.x) / -10 + "deg");
img.rotateX((img.offset().top + img.data("height") / 2 - mousePos.y) / 10 + "deg");
console.log(img.data("width"));
}
}
}
$(document).ready(function () {
animals = $(".animal").toArray();
$("#myanimal")
.hide()
.css("top", $(window).height() / 2 - parseFloat($("#myanimal").height()) / 2)
.translate3d("0px", "0px", "100px");
$(".animal img").each(function () {
$(this).data("width", $(this).width());
$(this).data("height", $(this).height());
$(this).translate3d("0px", "0px", "-50px");
});
$(".label").each(function () {
$(this).data("angle", 0)
.data("leftStart", parseFloat($(this).css("left")))
.data("topStart", parseFloat($(this).css("top")));
})
.mouseenter(function () {
var label = $(this);
if (!label.data("isMouseOver")) {
label.data("isMouseOver", true);
label.addClass("labelOver");
var img = $(this).siblings("img");
img.stop(false, true);
img.scale(0.8);
img.animate({ scale: 1, translate3d: "0px -70px -5px", rotateY: '0deg' }, { queue: false, duration: 1000, easing: "easeOutElastic" });
}
})
.mouseleave(function () {
var label = $(this);
var img = $(this).siblings("img");
if (label.data("isMouseOver")) {
label.removeClass("labelOver");
img.stop(false, true);
img.animate({ scale: 1, translate3d: "0px 0px -5px" }, { queue: false, duration: 100, complete: function () { label.data("isMouseOver", false); } });
}
})
.click(function (event) {
$("#myanimal").rotateY("-140deg");
$("#myanimal").rotateX("20deg");
$("#myanimal")
.stop(true, true)
.html($(event.target).parent().attr("id").toString().toUpperCase() + "!")
.css("left", $(window).width())
.show()
.animate({ rotateX: "0deg", rotateY: "0deg", left: $(window).width() / 2 - parseFloat($(this).width()) / 2 }, { easing: "easeOutElastic", duration: 2500 })
.fadeOut('fast');
});
$("body").mousemove(function (event) {
mousePos.x = event.pageX;
mousePos.y = event.pageY;
});
// start animation
log("starting animation");
setInterval(frameStep, 33);
});
</script>
<style type="text/css">
html, body
{
font-family: Verdana, Arial, sans-serif;
width: 100%;
height: 100%;
}
body
{
margin: 0px;
padding: 0px;
width: 100%;
height: 100%;
background-image: url('images/bg.gif');
background-repeat: repeat;
}
a
{
color: #fff;
}
.clearfix:before, .clearfix:after
{
content: "\0020";
display: block;
height: 0;
overflow: hidden;
}
.clearfix:after
{
clear: both;
}
.clearfix
{
zoom: 1;
}
h1, h2, h3
{
font-size: 2.5em;
color: #fff;
text-shadow: 2px 2px 2px #0080cc;
-webkit-text-stroke: 0.5px #0089db;
-moz-text-stroke: 0.5px #0089db;
text-stroke: 0.5px #0089db;
}
h3
{
font-size: 1.5em;
}
#content
{
width: 760px;
text-align: left;
margin: 0 auto;
position: relative;
}
.animal
{
position: absolute;
}
.animal .label
{
position: relative;
width: 150px;
height: 30px;
background-color: #fff;
background: -webkit-gradient( linear, 0 0, 0% 100%, from(#eee), to(#fff) );
background: -moz-linear-gradient( top left, #ccc, #fff );
border: 2px solid #009af5;
text-align: center;
color: #009af5;
font-size: 1.5em;
padding: 10px 0px 10px 0px;
-webkit-border-radius: 9px;
-moz-border-radius: 9px;
border-radius: 9px;
-webkit-box-shadow: 2px 2px 6px rgba(0,0,0,0.6);
-moz-box-shadow: 2px 2px 6px rgba(0,0,0,0.6);
box-shadow: 2px 2px 6px rgba(0,0,0,0.6);
cursor: pointer;
}
.animal .labelOver
{
background: -webkit-gradient( linear, 0 0, 0% 100%, from(#009af5), to(#006baa) );
background: -moz-linear-gradient( top left, #009af5, #006baa );
text-align: center;
color: red;
}
#myanimal
{
position: absolute;
font-size: 5em;
color: #8B008B;
}
</style>
</head>
<body>
<div id="content">
<div>
<div id="Tiger" class="animal" style="left: 50px; top: 210px;">
<img src="images/Tiger.png" />
<div class="label" style="left: 35px; top: -80px;">
CLICK ME</div>
</div>
<div id="lion" class="animal" style="left: 400px; top: 200px;">
<img src="images/lion.png" />
<div class="label" style="left: 30px; top: -80px;">
CLICK ME</div>
</div>
<div id="fox" class="animal" style="left: 100px; top: 580px;">
<img src="images/fox.png" />
<div class="label" style="left: 15px; top: -80px;">
CLICK ME</div>
</div>
<div id="bear" class="animal" style="left: 400px; top: 500px;">
<img src="images/bear.png" />
<div class="label" style="left: 15px; top: -80px;">
CLICK ME</div>
</div>
</div>
</div>
<h1 id="myanimal">ANIMAL!</h1>
</body>
</html>
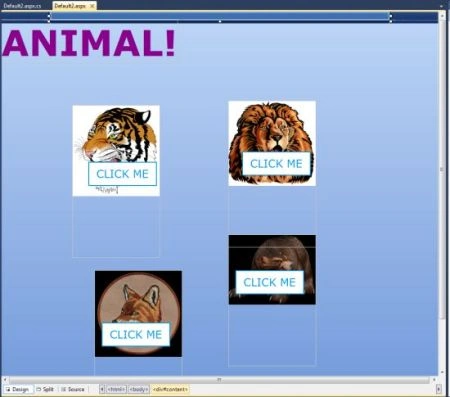
Step 10: In this step we will see the design of the Default2.aspx page which is given below.
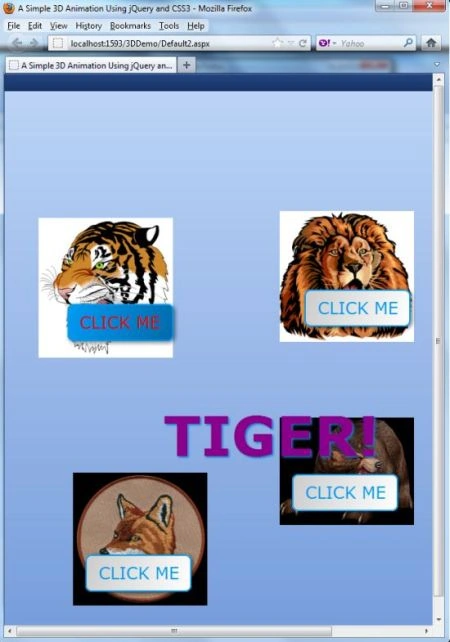
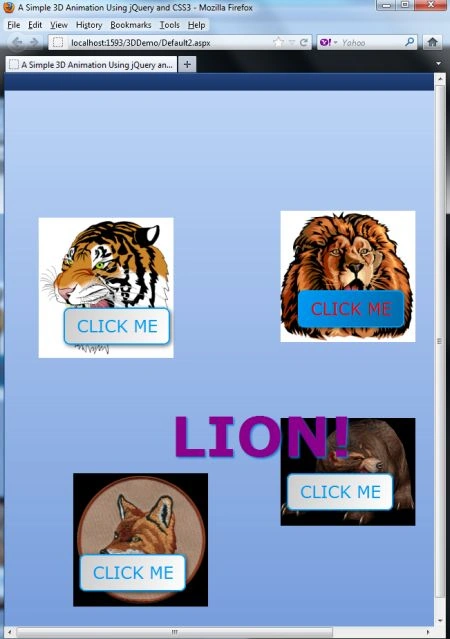
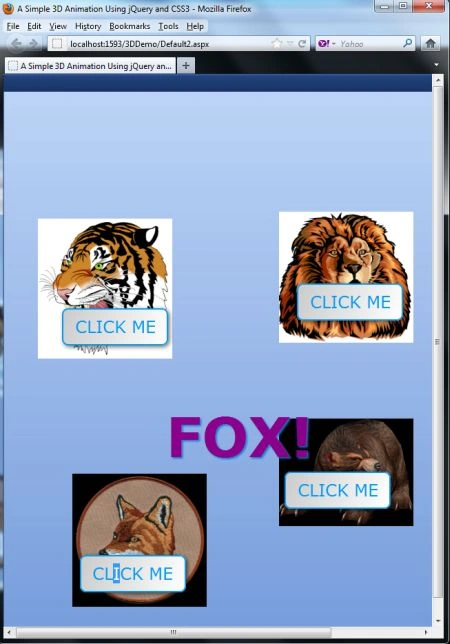
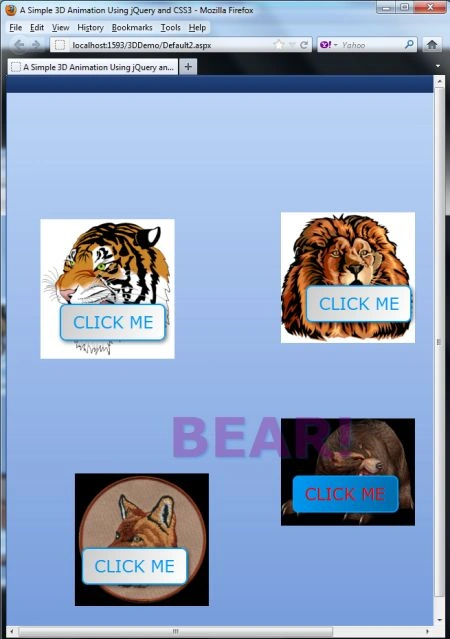
Step 11: In this step we are going to run the Default2.aspx page by pressing F5.
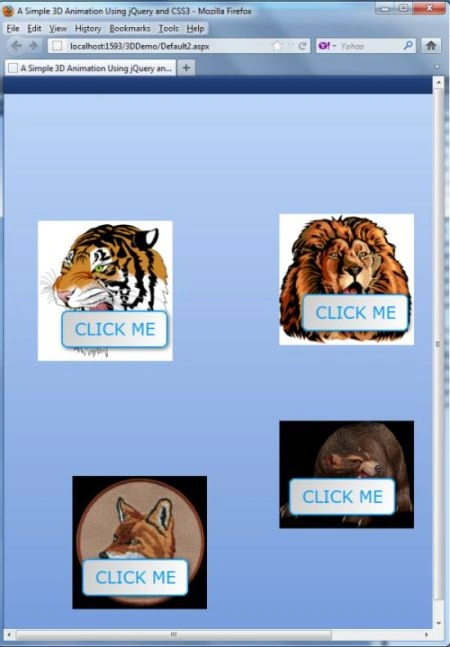
Now you can see the 3D animation effect for more MouseHover and click on the animal image.
Join the conversation! Your thoughts help the community grow.