

Summary
SharePoint Online(SPOL) allows remote applications to call the REST API with user impersonation. This article demonstrates how to access SPOL REST API and get the data from a SharePoint list in a tenant using Postman. However, outside of .NET the authentication piece is not so straightforward. App authentication solves this issue for registered apps but in this article, you will see how remote user authentication can be achieved, regardless of platform.
The goal of this article is to provide examples of the HTTP requests which need to be made in order to authenticate SharePoint Online. It then provides an example of using the same technique to read data from a SharePoint list just to make sure it all works.
Prerequisites
To play with this POC, you need the following:
- An Office 365 account. You can sign up for an Office 365 Developer subscription.
Note: If you already have a subscription, you can use an existing account from your Office 365 subscription.
- A SharePoint List with some data.
- To send HTTP requests I am going to use Postman. Click here to go through Postman Getting Started details.
- Fiddler to trace/debug
Note: The type of applications where this kind of approach may be necessary include: Java, PHP, or Informatica.
- Keep the Chrome Browser and Fiddler Running for this POC. But you don’t need to log in to SharePoint.
Steps Involved
Before we read the data from SPOL, The REST API authentication piece comes in a few steps:
- Generate Security Token
- Generate Access Token
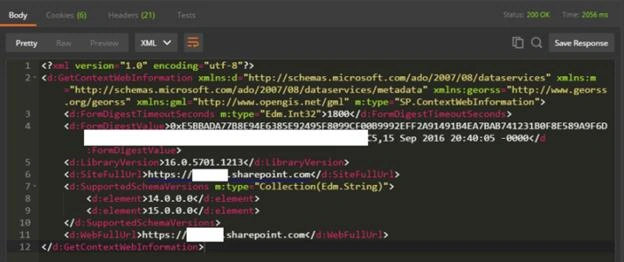
- Get Request Digest
Generate Security Token
The first step is to provide a username and password of a user with the Read access to the SharePoint List and the URL at which we want access to the SharePoint Online Security Token Service.
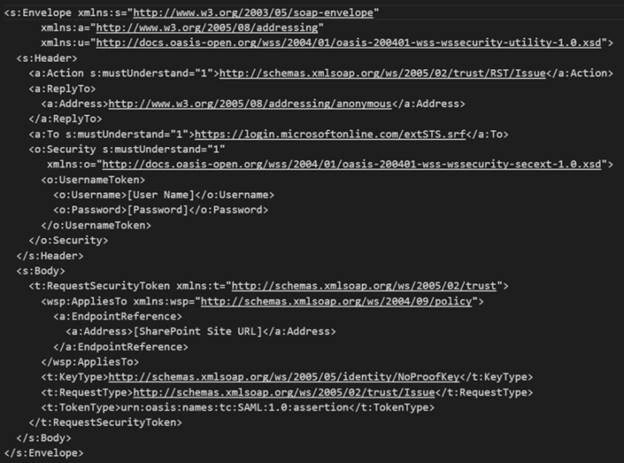
This is done by sending a POST request with the following XML as the request body to the URL,
Note
Replace the following values with your data.
[User Name] – SPOL Account Username (example: [email protected])
[Password] – SPOL Account Password
[SharePoint Site URL] – SharePoint site URL where your list exists
Postman Configurations
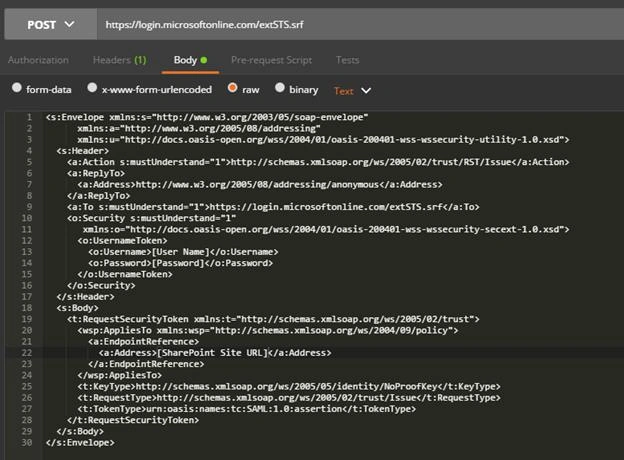
(Request Body)

(Request Header)
Set Content-Type to application/x-www-form-urlencoded
Now, hit the Send button to view the response. Your HTTP Response should be something like this:
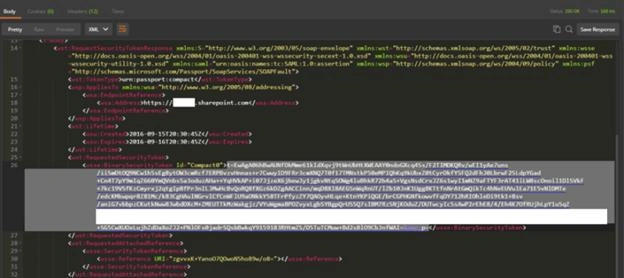
(Response)




Harry TPosted Dec 22, 2020, 9:28 AM
Some of the screenshots are too small and unreadable. Can you please make it clearer so I can read it?
s rPosted May 4, 2020, 12:15 PM
Nice article but, it no login to office 365 like powerbi or onedrive, has you any example to login to powerbi?
Urszula RyszawaPosted Mar 12, 2020, 7:47 AM
The article sounds very interesting, thank you. Could you attach a postman collection used in it? I don't want to rewrite the requests by hand.
Muthu KumarPosted Feb 14, 2019, 11:34 PM
Nice Article. Joseph