

This article explains how to add and show multiple pictures / images using a single PictureBox Control in a C# Windows Forms Project.
Step 1
Open Visual Studio.
Step 2
Create a New Project, rename the project if required (I have renamed it SinglePictureBox).
Step 3
Add 1 PictureBox control from the Toolbox on your blank form.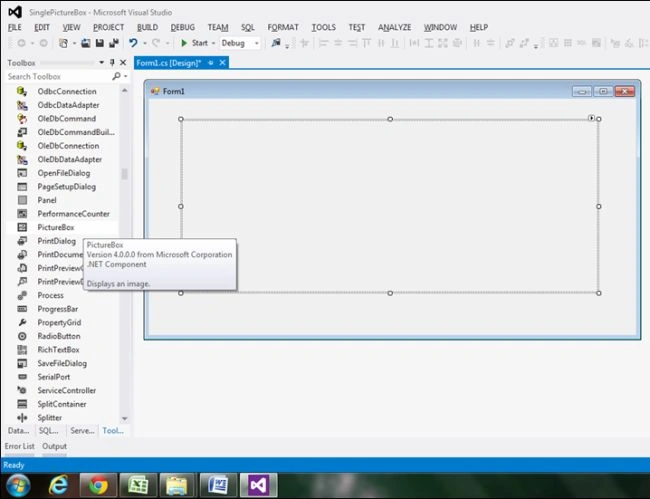
Step 4
Add 3 nose Button Controls from the toolbox to the form. (You can add fewer or more buttons as you desire.)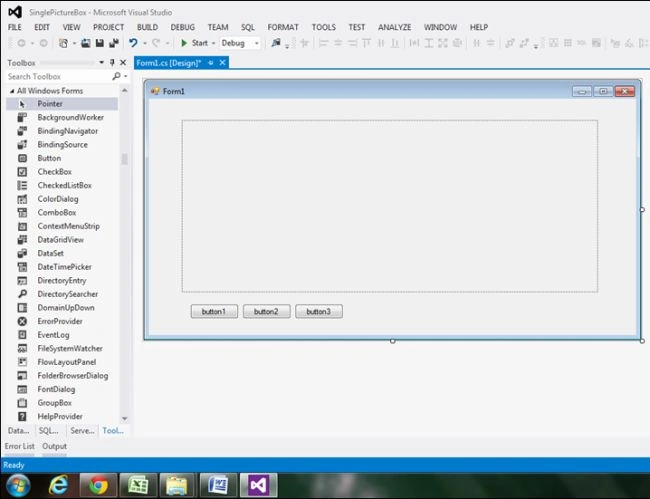
Our GUI is ready now. Before adding any images please rename their file names, like Img1, Img2 and Img3, so that it will easy to add and pick names in your code window, I renamed 3 images as specified above.
Step 5
Right-click on the Picture box, go to Properties.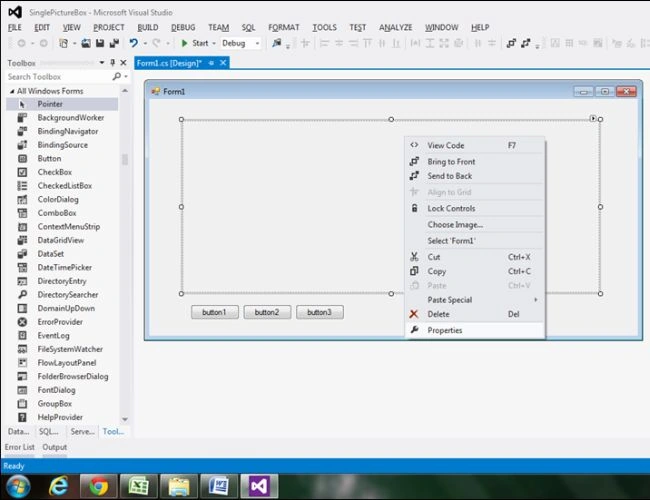
Select the "Image" property and select the "Import" option. You will get browse for adding image files, now select any 3 nose pictures. (In this project I have added 3 nose Button Controls so we need only 3 nose images also, you can add fewer or more as you desire.)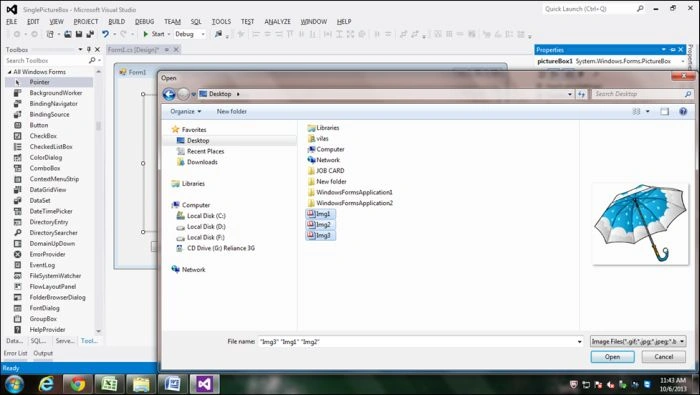
Step 6
After the addition of the image, select the option as "none" and press OK so that when you run your project then by default a Picture box will show as blank.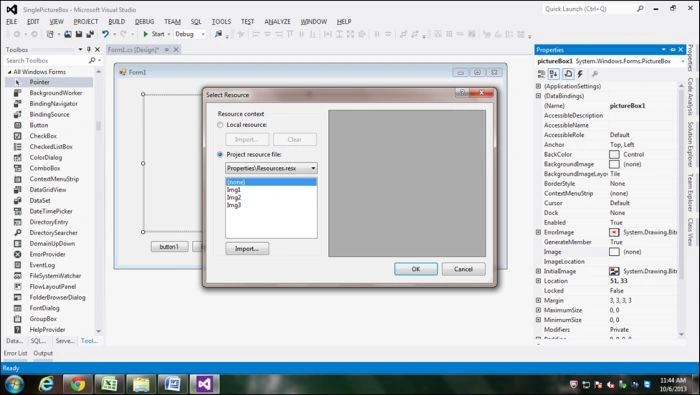
Now to code our app.
Right-click on your form and select View Code.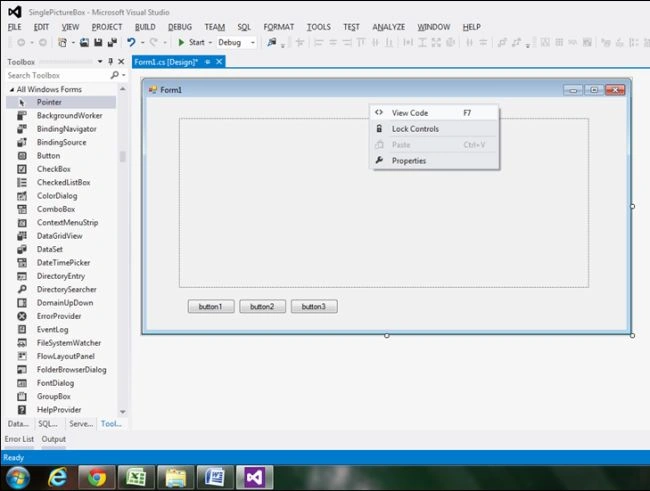
Your code window will open.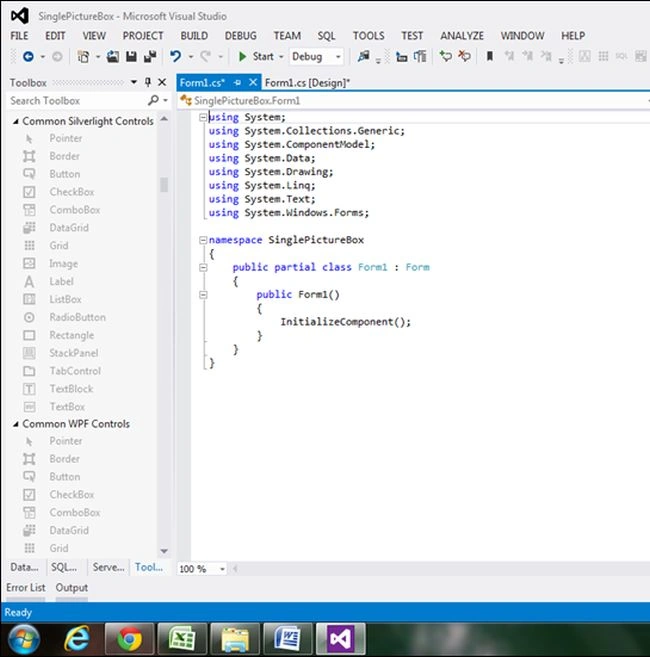
Step 7
Add a namespace to your code to pick image resources in each button, your namespace will look like this.
- using SinglePictureBox.Properties;

In the preceding code, SinglePictureBox is the project name since I renamed it when I created a new project, if you have given any different name to your project then you must use that name only instead on SinglePictureBox.
Now turn on your GUL (form design).
Step 8
Double-click on Button1 and code this in the click event.
- private void button1_Click(object sender, EventArgs e)
- {
- pictureBox1.Image = Resources.Img1;
- }
In the preceding code, Img1 will be displayed after button click.
Again double-click on Button2 and code this in the click event.
- {
- pictureBox1.Image = Resources.Img2;
- }
In the preceding code, Img2 will display after button click.
- {
- pictureBox1.Image = Resources.Img3;
- }
In the preceding code, Img3 will be displayed after button click.
Your coding is done and your final code will look like this.
- using System;
- using System.Collections.Generic;
- using System.ComponentModel;
- using System.Data;
- using System.Drawing;
- using System.Linq;
- using System.Text;
- using System.Windows.Forms;
- using SinglePictureBox.Properties;
- namespace SinglePictureBox
- {
- public partial class Form1: Form
- {
- public Form1()
- {
- InitializeComponent();
- }
- private void button1_Click(object sender, EventArgs e)
- {
- pictureBox1.Image = Resources.Img1;
- }
- private void button2_Click(object sender, EventArgs e)
- {
- pictureBox1.Image = Resources.Img2;
- }
- private void button3_Click(object sender, EventArgs e)
- {
- pictureBox1.Image = Resources.Img3;
- }
- }
- }
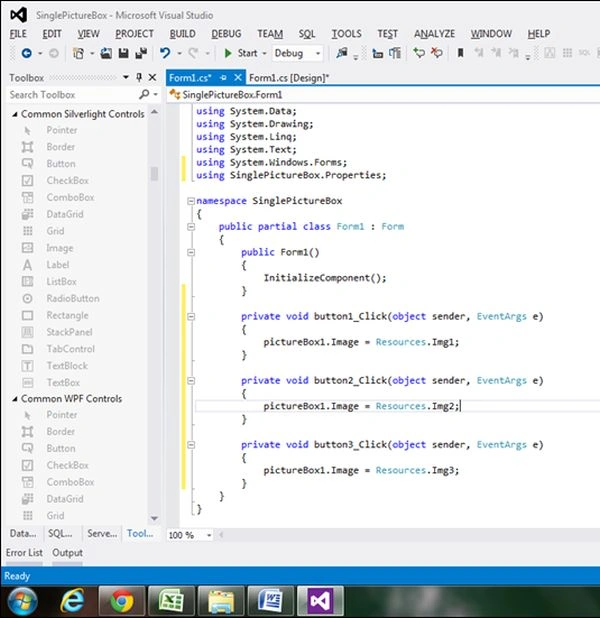
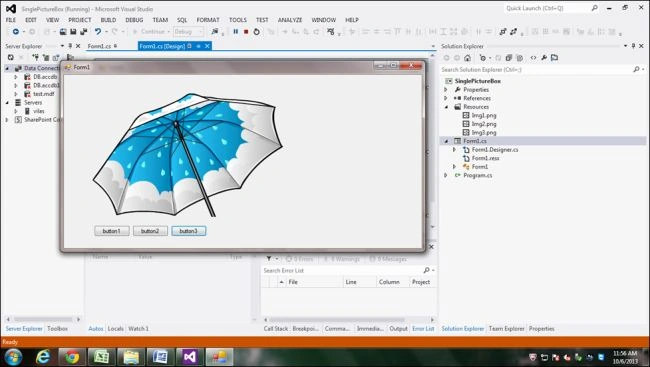
Now run you code and check that it works. Press all 3 nose buttons one by one and you will get all the images one by one in a single picture box.
Thank you. Please correct me if anything is wrong in the preceding article.
Nurakura JentroPosted Dec 31, 2019, 9:33 AM
Namespace does not work.
Christian AztecaPosted Jun 21, 2019, 3:16 PM
Hello, How Can I, upload image from my local folder, to Resource application with a button.
NitinPosted Jun 16, 2015, 5:26 AM
nice one
Vilas ShendePosted Jun 10, 2015, 4:33 AM
thanks van lai .
Van LaiPosted Jun 10, 2015, 3:11 AM
Nice one.
Vilas ShendePosted Jun 10, 2015, 2:01 AM
Thank you Mr. Kailash Chandra Behera
Former memberPosted Jun 10, 2015, 2:00 AM
nice
Jeetendra GundPosted Jun 10, 2015, 12:57 AM
Welcome Vilas Shende
Anurag SarkarPosted Jun 9, 2015, 2:48 AM
Its informative but i think you should try Web Forms & MVC.
Vilas ShendePosted Jun 9, 2015, 2:41 AM
Atul Gupta Sir, Thank you very much for review. Also I would like to say thanks 'Editorial Team' for their kind approval, as it's my 1st article on the C-Sharp.
Atul GuptaPosted Jun 8, 2015, 11:54 PM
Informative.............thanks for sharing!