

How To Add a Printer in Windows 10?
This article provides step by step instructions on how to add a printer in Windows 10.
Step 1. Go to Printers
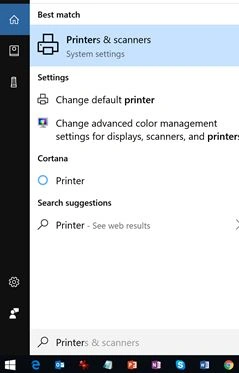
Enter WIN+S to open a Windows Search Box. Type “Printers” in it and you will see Printers & Scanners in the search results.
Select Printers & Scanners.
Step 2. Scan Your Printer
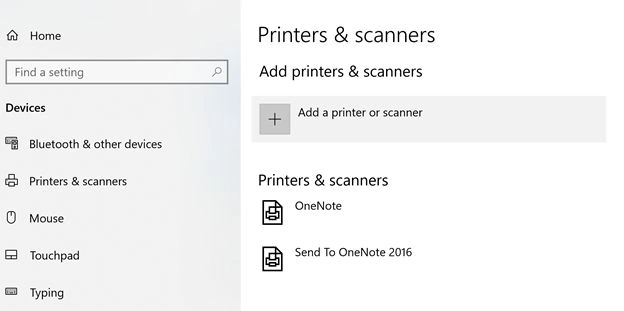
On the Printers & Scanners window, you will see a list of existing printers and scanners. There is also an option to add a printer or scanner – “Add a printer or scanner” with a + sign.
Click on the “+” sign.
Step 3. Add Device
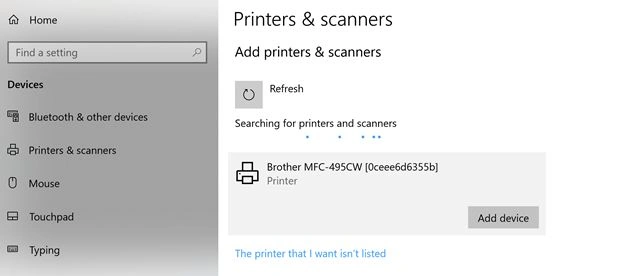
The above action will scan your new printer and show it in the list. Click on the “Add device” button.
Note
You need to make sure your printer is connected to the computer or is set up on your wireless network. If you do not see your printer on this list, it must not be on or it is not available on the wireless.
Step 4. Set as a Default Printer
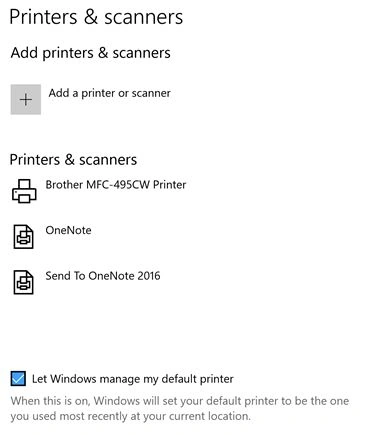
Windows 10 will automatically set up your new printer as the default printer. By default, “Let Windows manage my default printer” checkbox is checked. See below.
Note
If you have multiple printers, and this is not your default printer, you can uncheck it and set another printer as your default printer.
Watch this video to learn more about how to set up a new printer.
ROHAN MENDONCAPosted Feb 2, 2022, 10:09 AM
Hi Sir, Can I get that available list of printers just as in step 2 after clicking where it shows the available printers that can be used to connect this printer. Can I do this process in c#. Are there any libraries to do this
Arjun DhilodPosted Mar 21, 2019, 12:23 PM
Thank you for information sir