

Abstraction
Many new developers encounter a situation where there is a need to add dynamic control on the client side. This article will help them to understand how to add dynamic control on the client side using jQuery. Here I have described it using a step-by-step approach.
Initial chamber
Step 1
Open Visual Studio and create an empty website, provide a suitable name such as AddDynamicTextBox.
Step 2
In Solution Explorer you will get your empty website. Then add web forms.
For Web Form
AddDynamicTextBox (your empty website). Right-click and select Add New Item, then Web Form. Name it AddDynamicTextBox.aspx.
Design chamber
Step 3
Open AddDynamicTextBox.aspx file and write some code for the design of the application.
First add the jQuery plugin to your head section. Here I have used jquery-1.10.2.js plugin for demonstration purposes.
How to add in your page
- <script src="http://code.jquery.com/jquery-1.10.2.js"></script>
- <script type="text/javascript">
- $(document).ready(function () {
- $('#add').click(function () {
- var table = $(this).closest('table');
- console.log(table.find('input:text').length);
- if (table.find('input:text').length < 50) {
- var x = $(this).closest('tr').nextAll('tr');
- $.each(x, function (i, val) {
- val.remove();
- });
- table.append('<tr><td style="width:200px;" align="right">First Name <td> <input type="text" id="current Name" value="" /> </td><td style="width:200px;" align="right">Last Name <td> <input type="text" id="current Name" value="" /> </td></tr>');
- $.each(x, function (i, val) {
- table.append(val);
- });
- }
- });
- $('#del').click(function () {
- var table = $(this).closest('table');
- if (table.find('input:text').length > 1) {
- table.find('input:text').last().closest('tr').remove();
- }
- });
- });
- </script>
- <div>
- <table border="0" cellspacing="2">
- <tr>
- <td style="width: 200px;" align="right">Name
- <td>
- <input type="text" id="Job Name" value="" />
- </td>
- </td>
- </tr>
- <tr>
- <td align="right">Versions</td>
- <td>
- <select id="version" style="width: 350px;">
- <option value="">SELECT</option>
- </select>
- </td>
- </tr>
- <tr>
- <td align="right">Test Scripts</td>
- <td>
- <select id="testscripts" style="width: 350px;"></select>
- </td>
- </tr>
- <tr>
- <td align="right">datas</td>
- <td>
- <input type="button" id="add" value="Add" />
- <input type="button" id="del" value="Del" />
- </td>
- </tr>
- <tr>
- <td style="height: 3px" colspan="2"></td>
- </tr>
- </table>
- </div>
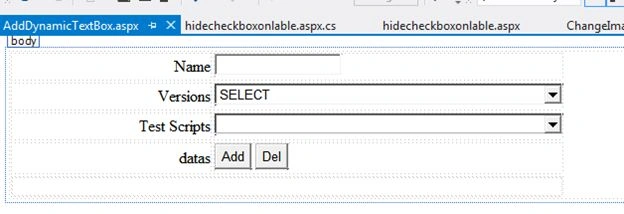
Now your page looks as in the following.
AddDynamicTextBox.aspx
- <%@ Page Language="C#" AutoEventWireup="true" CodeFile="AddDynamicTextBox.aspx.cs" Inherits="AddDynamicTextBox" %>
- <!DOCTYPE html>
- <html xmlns="http://www.w3.org/1999/xhtml">
- <head runat="server">
- <title>C# corner article</title>
- <script src="http://code.jquery.com/jquery-1.10.2.js"></script>
- <script type="text/javascript">
- $(document).ready(function () {
- $('#add').click(function () {
- var table = $(this).closest('table');
- console.log(table.find('input:text').length);
- if (table.find('input:text').length < 50) {
- var x = $(this).closest('tr').nextAll('tr');
- $.each(x, function (i, val) {
- val.remove();
- });
- table.append('<tr><td style="width:200px;" align="right">First Name <td> <input type="text" id="current Name" value="" /> </td><td style="width:200px;" align="right">Last Name <td> <input type="text" id="current Name" value="" /> </td></tr>');
- $.each(x, function (i, val) {
- table.append(val);
- });
- }
- });
- $('#del').click(function () {
- var table = $(this).closest('table');
- if (table.find('input:text').length > 1) {
- table.find('input:text').last().closest('tr').remove();
- }
- });
- });
- </script>
- </head>
- <body>
- <form id="form1" runat="server">
- <div>
- <table border="0" cellspacing="2">
- <tr>
- <td style="width: 200px;" align="right">Name
- <td>
- <input type="text" id="Job Name" value="" />
- </td>
- </td>
- </tr>
- <tr>
- <td align="right">Versions</td>
- <td>
- <select id="version" style="width: 350px;">
- <option value="">SELECT</option>
- </select>
- </td>
- </tr>
- <tr>
- <td align="right">Test Scripts</td>
- <td>
- <select id="testscripts" style="width: 350px;"></select>
- </td>
- </tr>
- <tr>
- <td align="right">datas</td>
- <td>
- <input type="button" id="add" value="Add" />
- <input type="button" id="del" value="Del" />
- </td>
- </tr>
- <tr>
- <td style="height: 3px" colspan="2"></td>
- </tr>
- </table>
- </div>
- </form>
- </body>
- </html>
AddDynamicTextBox.aspx.cs
- using System;
- using System.Collections.Generic;
- using System.Linq;
- using System.Web;
- using System.Web.UI;
- using System.Web.UI.WebControls;
- public partial class AddDynamicTextBox : System.Web.UI.Page
- {
- protected void Page_Load(object sender, EventArgs e)
- {
- }
- }
Here's a screenshot showing the interface before adding the TextBox.
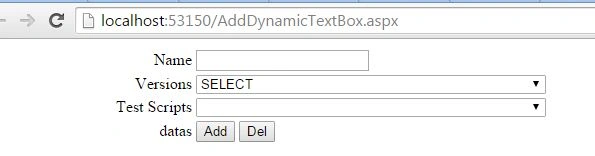
Figure 1
Here's a screenshot showing the interface after adding the TextBox.
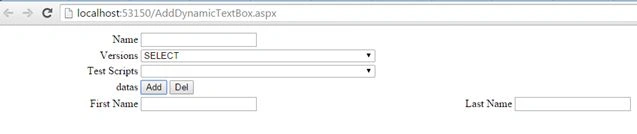
Figure 2
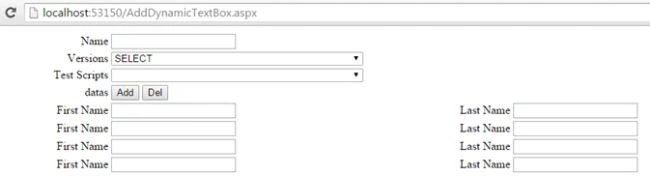
Figure 3
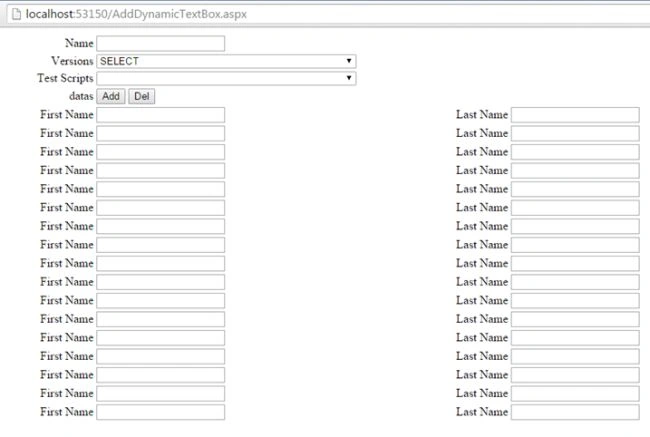
Figure 4
I hope you liked this. Have a good day. Thank you for reading.
Santhakumar MunuswamyPosted Aug 18, 2015, 2:37 PM
Good one
Mohammed IbrahimPosted Aug 17, 2015, 11:04 PM
nice one
Shridhar SharmaPosted Aug 17, 2015, 10:50 AM
good one
RakeshPosted Aug 17, 2015, 10:30 AM
Good work
Pankaj Kumar ChoudharyPosted Aug 17, 2015, 9:42 AM
Excellent work sir......
Nilesh JadavPosted Aug 17, 2015, 8:53 AM
Great Post sir
Sibeesh VenuPosted Aug 17, 2015, 8:48 AM
Nice Share
Rajeesh MenothPosted Aug 17, 2015, 8:29 AM
Good One
Karthikeyan KPosted Aug 17, 2015, 8:08 AM
Good one
Vaikesh K PPosted Aug 17, 2015, 7:59 AM
Nice One