
Do you have a PowerApp canvas app which you want to use as Teams in-meeting app?
This article is focused on how you can use your existing PowerApps canvas apps inside the Teams meetings as in-meeting apps.
Pre-requisites:
- Microsoft 365 account with Microsoft Teams and PowerApps license
- Power Apps canvas app created in mobile format
- Zip package of your Power Apps canvas app which will have 3 files (manifest.json, color.png, outline.png)
- Microsoft Teams
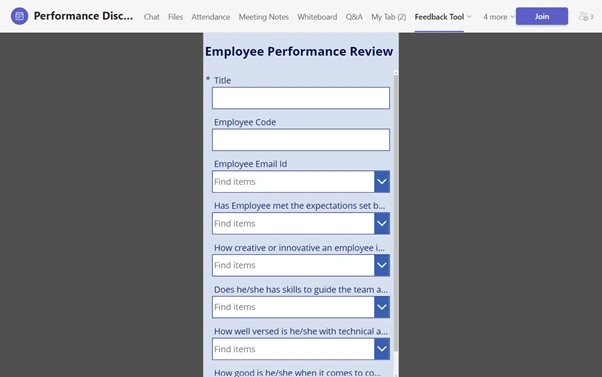
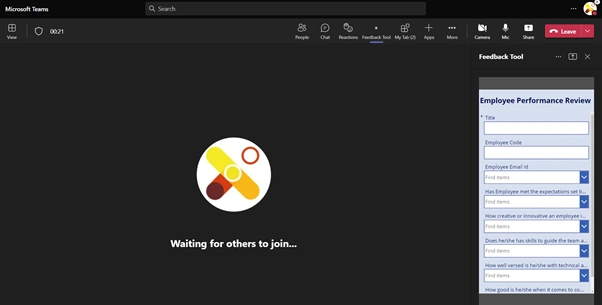
Let’s take a use-case of a sample app, below figure shows a sample Employee Performance Review canvas Power App created in Portrait format.
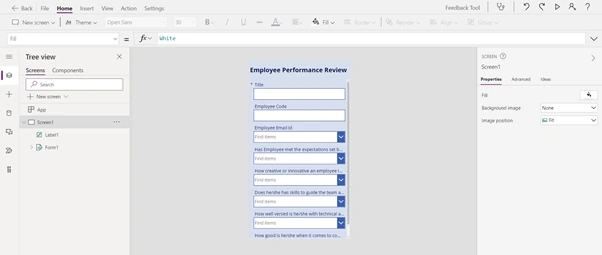
Fig – Sample Employee Performance Review App
Note
If you want to change the orientation of your PowerApp, follow these steps:
- Click on Settings from the top navigation bar.
- Go to Display, then click on Orientation.
As highlighted in the below figure, 1.1, you can change the orientation of your app from Landscape to Portrait or vice versa.
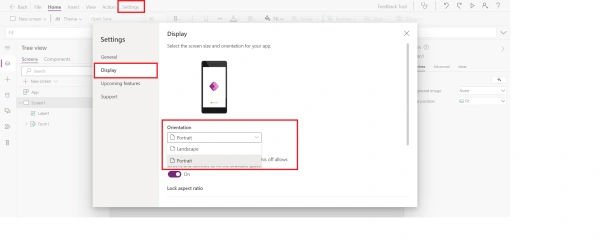
Fig 1.1 – Display orientation setting for PowerApps canvas app
Steps to add PowerApps canvas app to Teams in-meeting app
- Navigate to PowerApps home page: https://make.powerapps.com/.
- Select the app you want to add as in-meeting app.
- Click on “Add to Teams” as shown in Fig 1.2.
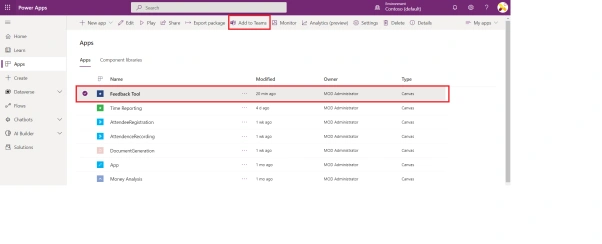
Fig 1.2 – Add PowerApps canvas app to Teams using Add to Teams from top navigation bar
When you click on Add to Teams, a panel will open like shown in Fig 1.3.
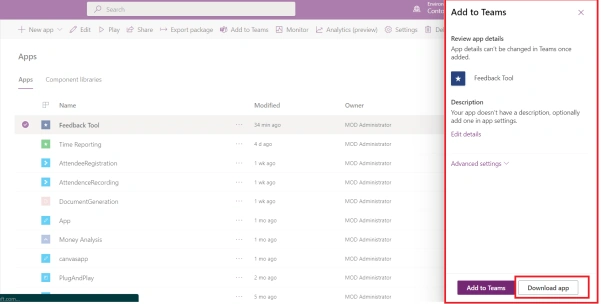
Fig 1.3 – Add to Teams Panel
If you click on Add to Teams inside the Panel, PowerApps will redirect you to Microsoft Teams and the App will open. When you will click on the Arrow button beside Add, you will see that this app can be added to only Team and chat scope, as shown in Fig 1.4.
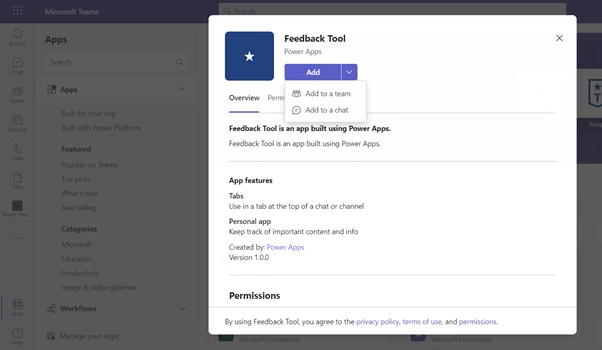
Fig 1.4 – Add to Teams from PowerApps adds the app only to Team and Chat scope
- So, we are not going to click on “Add to Teams” button in Fig 1.3, because it does not have meeting scope that we are looking for.
- Instead of clicking on “Add to Teams” in Fig 1.3, click onDownload App as shown in Fig 1.3.
- Download app will download a zip package for your app in your local file explorer.
- Navigate to the downloaded zip package, extract, and open the manifest.json file in code editor of your choice.
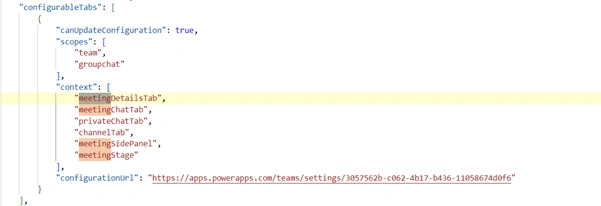
- In manifest.json file, check context in “configurableTabs” section. It should show meetingSidePanel, meetingChatTab, meetingDetailsTab, meetingChatTab, added as shown in Fig 1.5.
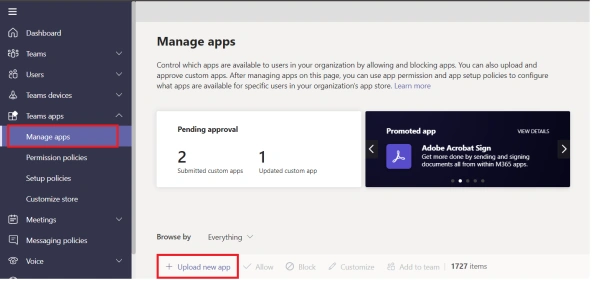
- If the below shown meeting contexts are not added, then add and save the manifest.json file and create a zip package of saved manifest.json file, color.png, outline.png file. If the meeting context is already added, then use the existing zip package for the later step.
Join the conversation! Your thoughts help the community grow.