
Follow the below listed steps, to add a workflow:
Step 1: Open your project in Visual Studio.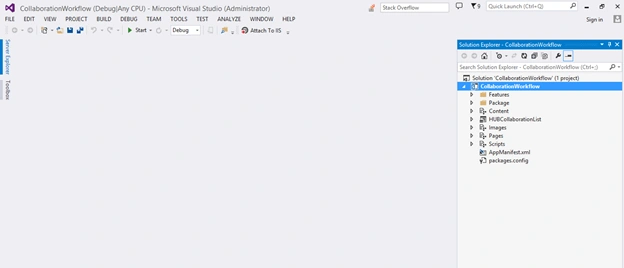
Step 2: Right click on your project and click on “Add”, as shown in the below picture.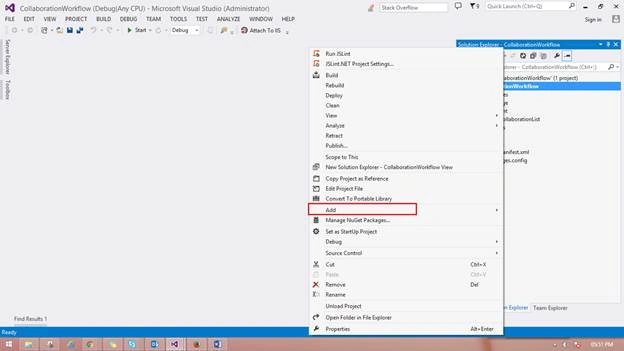
Step 3: Then, click on “New Item” in the window, to select the “workflow” template.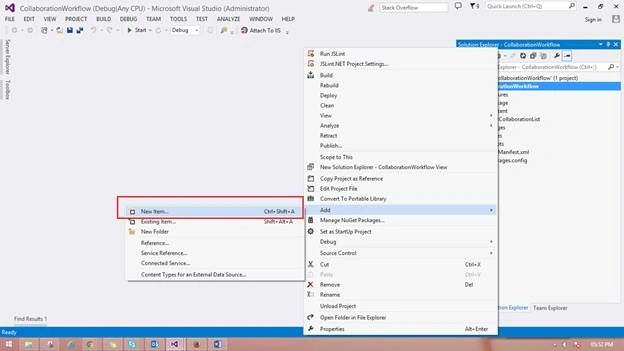
Step 4: On pop up, select the workflow, as show in below image: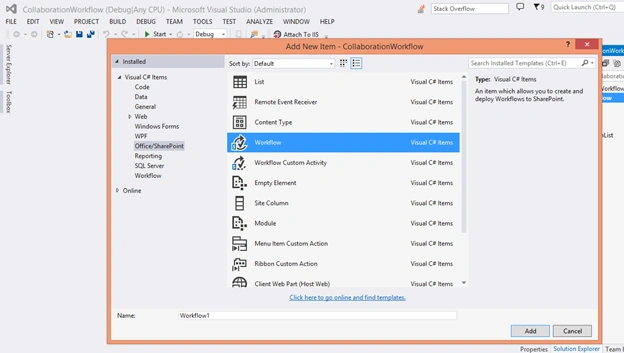
Step 5: Now, provide the name of the workflow as per your choice and click on Add button.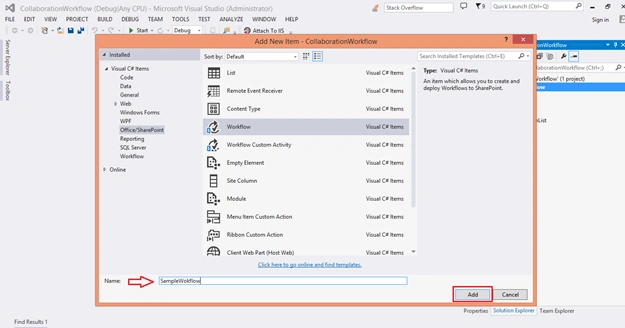
Step 6: Select the type of your workflow and then, click next, to proceed.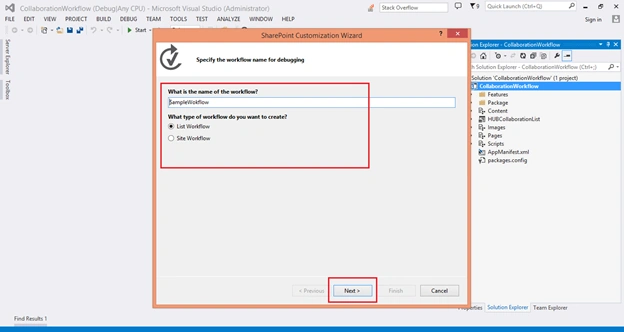
Step 7: Now, provide the list name, if you want to add your app to the web workflow. Otherwise, uncheck the check box, so that you can map the host web list and click Next.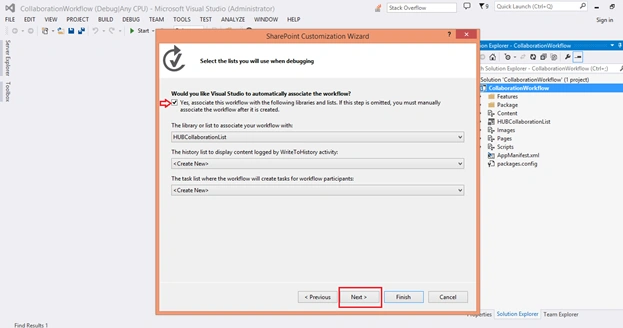
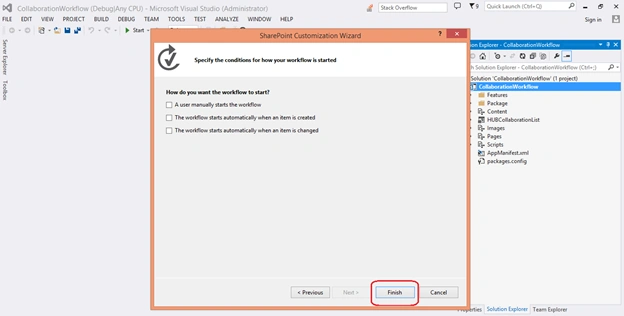
Step 8: Then, select the option of how you want the workflow to start and finally, click on Finish, to create a workflow.
App workflow will be created successfully, as show in the below image: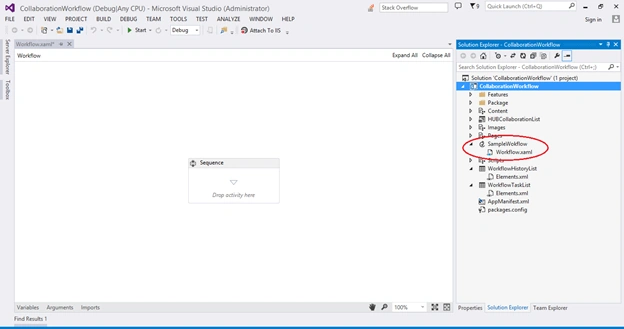
Then, you can add the activity from the toolbox. Without any coding, we can achieve the workflow process in SharePoint online.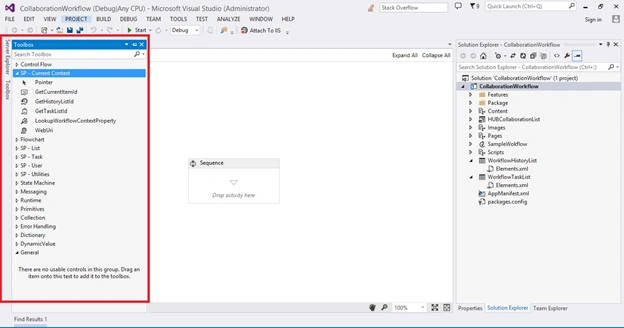
Summary
In this article, we have explored how to add a workflow in a SharePoint hosted app, using Visual Studio. I hope this article is useful to the SharePoint beginners.

Add The Workflow In a SharePoint Hosted App
Join the conversation! Your thoughts help the community grow.
Sign in to leave a comment
It is the same account you read, post and publish with — and you will come straight back to this page.
venkat nPosted Jun 19, 2017, 3:55 AM
Hi AshokI can connect to my office 365 online SP site with Designer(2013) locally, but when i go to create an SP project in VS(2012) locally and select the same address for debugging as I used with Designer, it won't validate that address can you give the reasons and explain me how to open the site in visual studio.
Kaviya BalasubramanianPosted Jul 12, 2016, 9:50 AM
Thank u kalu
kalu singh raoPosted Jul 12, 2016, 1:39 AM
Nice...