

This article shows how to add a client screen to a LightSwitch Application (Visual C#) in Visual Studio 2012.
The following is the procedure for adding a client screen
Step 1
Open the Solution Explorer.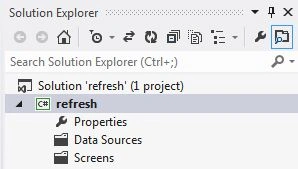
Step 2
In the Solution Explorer, right-click on the server and choose "Add Table".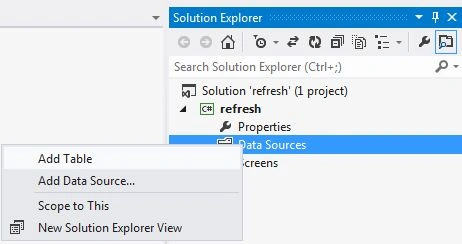
Step 3
The table appears.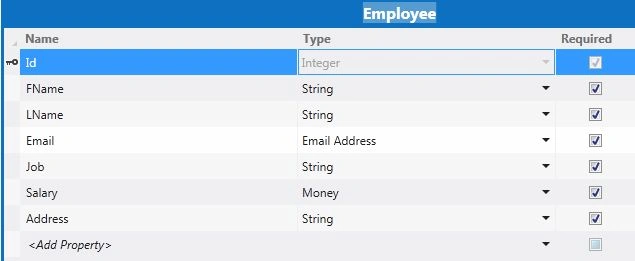
Step 4
In the Solution Explorer, right-click on the project name (Application) and choose the "Add client".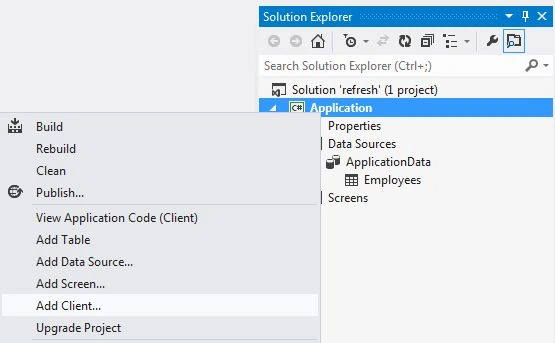
Step 5
The Add Client dialog box appears on the screen. Select "HTML client" and provide a name and click "OK". 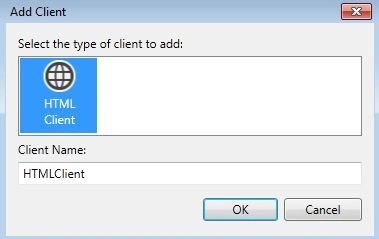
Step 6
You need to upgrade the project to add a new client. So click "OK" to continue. 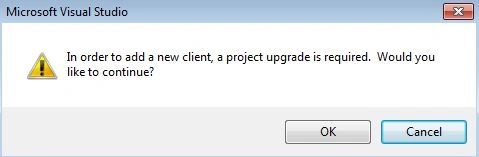
Step 7
We will notice that the HTML Client Screen is added to the Solution Explorer.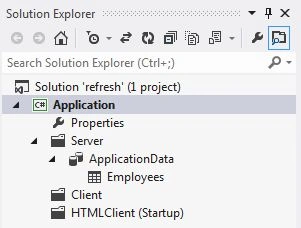
Step 8
In the Solution Explorer right-click on the HTML Client Screen and choose "Add Screen".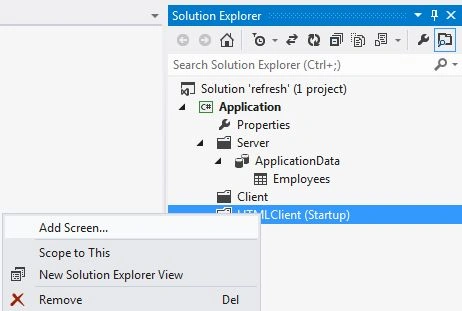
Step 9
The Add New Screen dialog box appears. Select the "Browse Data Screen" from the Screen Template, provide the screen information and click the "OK" button.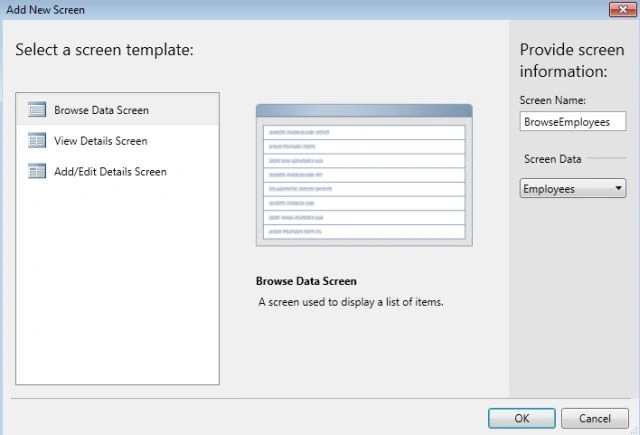
Step 10
The Browse Screen Designer appears.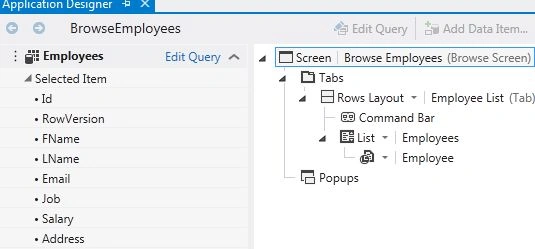
Step 11
Press F5 to run the application. As I have not provided any data until now.
Join the conversation! Your thoughts help the community grow.