

Introduction
This article explains Areas in the ASP. NET Web API. Areas are used for the management of the project. They are used in large projects. We create more than one area in a project. In this article, you will see the creation of areas.
Create the Web API application first
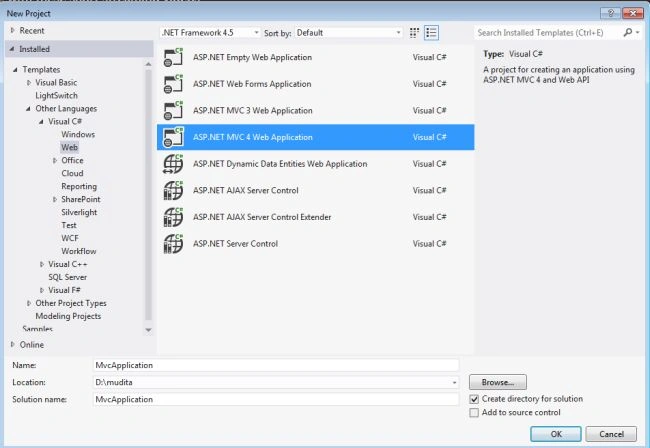
- Start Visual Studio 2012 and select "New Project" from the Start Page.
- In the Template window, select "Installed template" -> "Visual C#" -> "Web".
- Choose "ASP. NET MVC 4 Web Application" then change its name.
- Click on the "OK" button.
- From the MVC4 Project Window select Web API.
Add the "Area" to the project
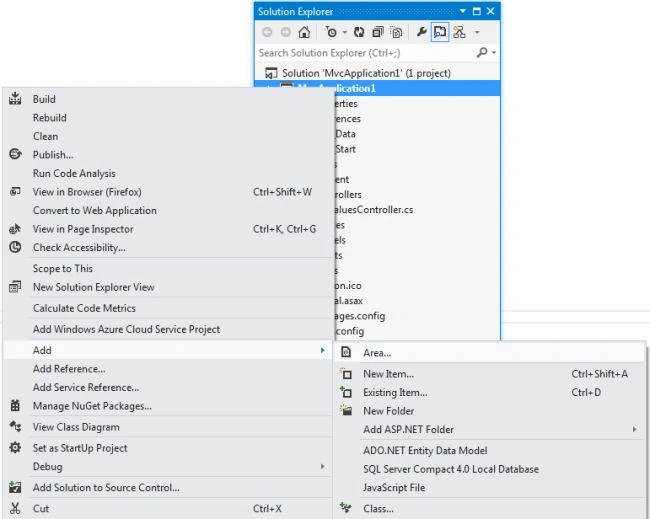
- In the "Solution Explorer".
- Right-click on the Project.
- Select "Add"->"Area".
- Name the area "Collect".
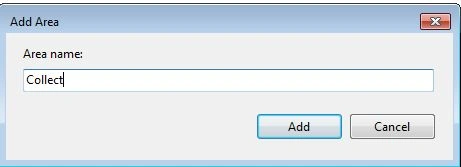
- Click on the "OK" button.
Here add a file "CollectAreaRegistration.cs". Its code looks as in the following:
- using System.Web.Mvc;
- namespace MvcApplication1.Areas.Collect
- {
- public class CollectAreaRegistration : AreaRegistration
- {
- public override string AreaName
- {
- get
- {
- return "Collect";
- }
- }
- public override void RegisterArea(AreaRegistrationContext context)
- {
- context.MapRoute(
- "Collect_default",
- "Collect/{controller}/{action}/{id}",
- new { action = "Index", id = UrlParameter.Optional }
- );
- }
- }
- }
There is a class "CollectAreaRegistration" and this class is inherited from the "AreaRegistration" class.
Here is an "AreaName" that returns the name of the area that was provided when the Area was added.
In the code above the "RegisterArea" method invokes the "Maproute" method for providing the new route to the Area "Collect".
Create a Controller
-
In the "Solution Explorer".
-
Select the "Area" folder then select "Controller".
-
Right-click on the controller then select "Add" -> "Controller".
-
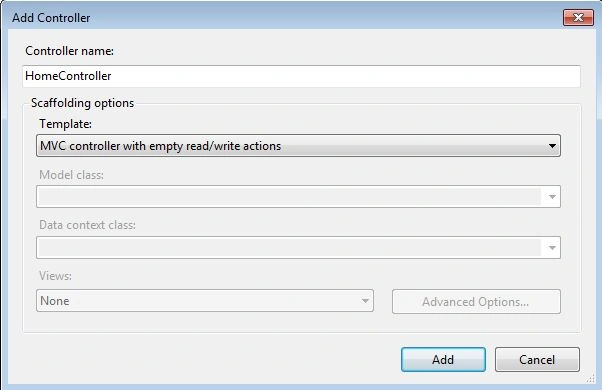
Open a window, change the name to "HomeController" and Select "MVC controller with empty read/write actions" from the template.
-
Click on the "OK" button.
Ravi PatelPosted Feb 28, 2019, 12:46 AM
Change the article name as-> Adding Areas in ASP.Net Web MVC