

As a general user I have never come across a security tool to encrypt my data except Bit Locker in Windows. Unfortunately, Bit Locker never worked for me. Though, we have compression tools like WinZip or WinRAR that actually compress the data. In fact, what they do is different from encryption/decryption.
You have many third-party solutions to do it. And the most popular one is TrueCrypt.
So, today we will make that kind of software/tool to do those odd jobs.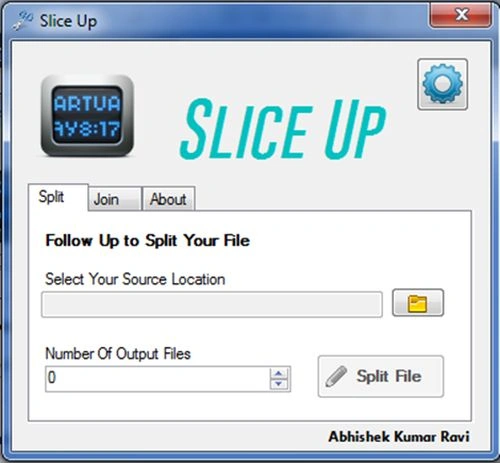
So, prepare yourself to create a look-alike tool.
Background
In background knowledge we need a basic C# idea and a few .NET framework classes.
So, I must say it is a Beginner Level Project.
Let us look up in Solution Explorer.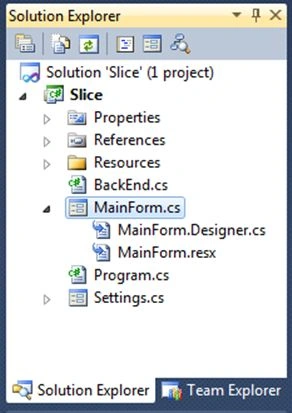
In this project, we have two forms (named MainForm and Settings). Additionally, we have a Resource folder that actually holds an image file and icons used in the project.
There is a back-end class that does the actual job of the project (or, I declare the class as "KERNEL").
Procedure
Step 1
First, we will start from MainForm.cs.
It looks like: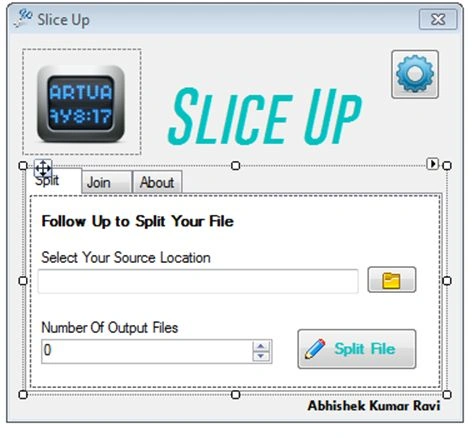
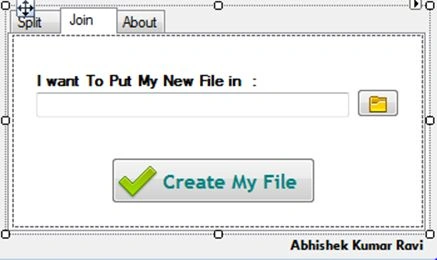
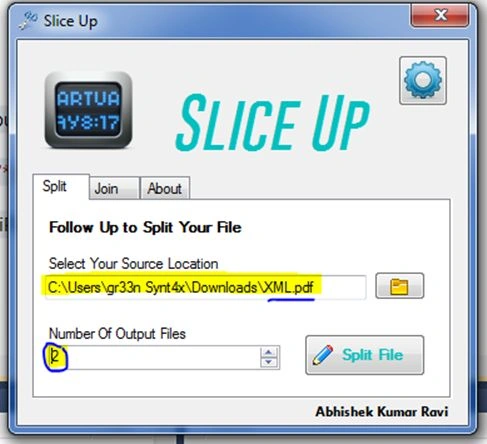
The main part of this portion is a TabControl where we have three tabs: Split, Join and About.
In the Split section, we will do our encoding. Actually, it splits your desired file (that you will select) into a number of encrypted files.
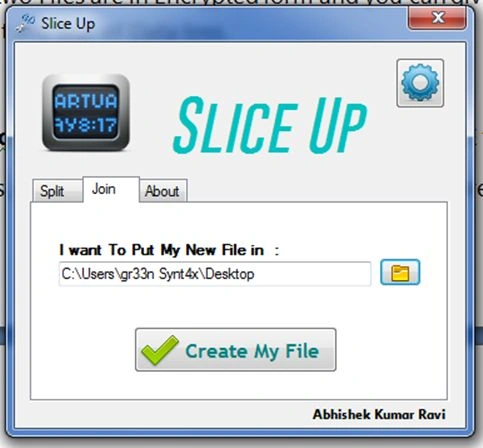
Then, in the Join portion we combine the encrypted files into one file (the same as initially).
Step 2
Let’s start the coding section from the Join portion.
With this, we select our desired file that we want to be encrypted in the near future.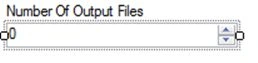
For this, we want an OpenFileDialog, TextBox and a Button.
In the Button, we code:
private void browseButton_Click(object sender, EventArgs e)
{
//Browse Button
//No. Of Days : Numeric Up Down
if (noOfFileUpDown.Value != 0)
SplitButton.Enabled = true;
// TextBox Disabled
sourceLocationTextBox.Enabled = true;
if (sourceFileDialog.ShowDialog() == DialogResult.OK)
{
sourceLocationTextBox.Text = sourceFileDialog.FileName.ToString();
}
}
Explanation
"noOfFileUpDown" is a Numeric Up Down control and it sets the total number of distributions of your selected file.
So, the "Split" button will be enabled when you assign at least 1 (specifically, it should not be equal to 0) to the NumericUpDown control.
Next, we enable the TextBox that stores the path of the selected file.
Finally, if the Dialog Result is Ok then it will assign the selected file’s path to the TextBox else not.
Step 3
The Numeric Up Down control that decides how many divisions of selected file.
In the code:
private void noOfFileUpDown_ValueChanged(object sender, EventArgs e)
{
if (sourceLocationTextBox.Enabled==true)
SplitButton.Enabled = true;
}
Explanation
It it is enabled when the user selects a File from the Open File Dialog.
Step 4
When the user clicks this button then it Pops-up the Settings Form.
For that, the code will be:
private void settingButton_Click(object sender, EventArgs e)
{
Settings sett = new Settings();
sett.Show();
}
Where "Setting" is the name of the form (technically, it is the name of the class).
And, the show() method will pop-up the form.
Step 5
Let’s move to the Settings form.
And, its job is to set the default location for the destination (or, location for the output files). 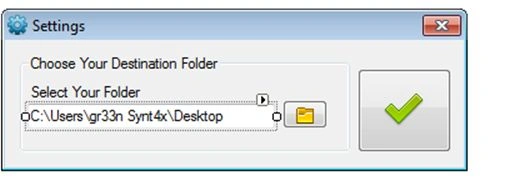
Here, we have used a TextBox, two Buttons and a Folder Dialog.
Note: I have a default text value as my Desktop path, you can have your own.
So, the code for the yellow Button will be (in other words Browse):
private void folderBrowse_Click(object sender, EventArgs e)
{
folderDisplayTextBox.Enabled = true;
if (folderBrowserDialog1.ShowDialog() == DialogResult.OK)
{
folderDisplayTextBox.Text = folderBrowserDialog1.SelectedPath;
BackEnd.outputFolder = folderDisplayTextBox.Text.ToString();
}
}
The same as done earlier, assign the selected path of the folder. So, I am skipping the explanation part for this code.
Step 6
Before I move to the Check button (green one) I want to show you the so called Kernel class (BackEnd.cs) where I have defined a few public property variables.
public static string folderDetination { get; set; }
public static string fileSource { get; set; }
public static int noOfFiles { get; set; }
public static string outputFolder { get; set; }
public static String extension { get; set; }
I want you to become aware of these property variables that are static in nature. And, I will use these frequently.
Step 7
Back to the "Setting.cs" form, where we have a Big button (check) that finishes the job.
Let’s see what is there.
private void button1_Click(object sender, EventArgs e)
{
// Ok Button
BackEnd myBackEnd = new BackEnd();
// myBackEnd.folderDetination = folderDisplayTextBox.Text.ToString();
BackEnd.folderDetination = folderDisplayTextBox.Text.ToString();
MessageBox.Show("Your Destination Path is : " + BackEnd.folderDetination);
//Close The Form
this.Close();
}
Here, we have assigned the folderDisplayTextBox (only TextBox) to the BackEnd’s Property that I have shown you in the previous step.
Doing this, we can use this value in the MainForm for processing.
At last, we call the Close() method to close the form.
Step 8
Back to the Main form, we have Split still there.
So, let’s code that which will call a user-defined SplitMethod() in the BackEnd class to do the split.
And, this method requires three arguments.
The first is the folder destination where we will finally put the split file (in other words the output files).
Then the second argument will be the source file that will be split.
And the last argument will be how many divisions there will be of the selected file.
So, let’s see how the code looks like for this.
private void SplitButton_Click(object sender, EventArgs e)
{
//Split Button Clicked
BackEnd.fileSource = sourceLocationTextBox.Text.ToString();
BackEnd.noOfFiles = int.Parse(noOfFileUpDown.Value.ToString());
//MessageBox.Show("Source : " + BackEnd.fileSource + " -- No. Of Files is : " + BackEnd.noOfFiles + " and -- Your Destination : " + BackEnd.folderDetination);
bool status = BackEnd.SplitMethod(BackEnd.folderDetination, BackEnd.fileSource, BackEnd.noOfFiles);
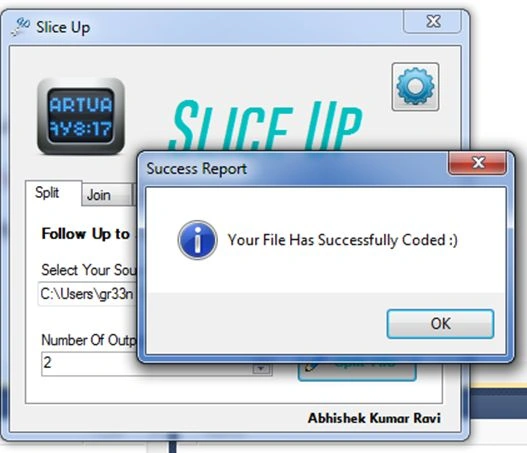
if (status == true)
MessageBox.Show("Your File Has Successfully Coded :)", "Success Report", MessageBoxButtons.OK, MessageBoxIcon.Information);
Vishal YadavPosted Jul 17, 2014, 3:22 AM
the most powerful tool