

This is the continues of Angular 8 - CRUD Operations - Part One. In this article, we will learn about Angular Routing and Angular Services and How to make a Web API with entity framework using NORTHWND SQL Server database.
Angular Routing
The Angular Router is used to navigate between views or pages that are triggered by the user's actions. The navigation or view changes happen when the user clicks on the link, click on the button, or enters the URL from the browser address bar.
In this sample, I am converting my website which was built in AngularJS into Angular 8. So, navigations are according to my website need.
First you need to create a few components using CLI command,
ng generate component blog
ng generate component article
Now go to app-routing.module.ts file and add the component references and redirect routing.
- import { NgModule } from '@angular/core';
- import { Routes, RouterModule } from '@angular/router';
- import { EmployeeComponent } from './employee/employee.component'
- import { AboutComponent } from './about/about.component'
- import { ContactComponent } from './contact/contact.component'
- import { BlogComponent } from './blog/blog.component'
- import { ArticleComponent } from './article/article.component'
- import { CodingComponent } from './coding/coding.component'
- import { SnippetComponent } from './snippet/snippet.component'
- import { PageNotFoundComponent } from './page-not-found/page-not-found.component';
- const routes: Routes = [
- {path: 'employee', component: EmployeeComponent},
- {path: 'about', component: AboutComponent},
- {path: 'contact', component: ContactComponent},
- {path: 'blog', component: BlogComponent},
- {path: 'article', component: ArticleComponent},
- {path: 'coding', component: CodingComponent},
- {path: 'snippet', component: SnippetComponent},
- { path: '', redirectTo: '/home', pathMatch: 'full' },
- { path: '**', component: PageNotFoundComponent }
- ];
- @NgModule({
- imports: [RouterModule.forRoot(routes)],
- exports: [RouterModule]
- })
- export class AppRoutingModule { }
Add a new navbar component and add the following code,
- <nav class="navbar navbar-expand-lg navbar-dark bg-dark">
- <a class="navbar-brand logo" href="#">DotNetBuild</a>
- <button class="navbar-toggler" type="button" data-toggle="collapse" data-target="#navbarSupportedContent" aria-controls="navbarSupportedContent" aria-expanded="false" aria-label="Toggle navigation">
- <span class="navbar-toggler-icon"></span>
- </button>
- <div class="collapse navbar-collapse" [ngClass]="{ 'show': navbarOpen }" id="navbarSupportedContent">
- <ul class="navbar-nav mr-auto">
- <li class="nav-item active">
- <a class="nav-link" routerLink="" routerLinkActive="active">Home <span class="sr-only">(current)</span></a>
- </li>
- <li class="nav-item">
- <a class="nav-link" routerLink="/employee" routerLinkActive="active">Employee</a>
- </li>
- <li class="nav-item">
- <a class="nav-link" routerLink="/blog" routerLinkActive="active">Blogs</a>
- </li>
- <li class="nav-item">
- <a class="nav-link" routerLink="/article" routerLinkActive="active">Articles</a>
- </li>
- <li class="nav-item">
- <a class="nav-link" routerLink="/coding" routerLinkActive="active">Coding Tips</a>
- </li>
- <li class="nav-item">
- <a class="nav-link" routerLink="/snippet" routerLinkActive="active">Code Snippet</a>
- </li>
- <li class="nav-item">
- <a class="nav-link" routerLink="/about" routerLinkActive="active">About Us</a>
- </li>
- <li class="nav-item">
- <a class="nav-link" routerLink="/contact" routerLinkActive="active">Contact Us</a>
- </li>
- </ul>
- <ul class="navbar-nav ">
- <li class="nav-item">
- <a class="nav-link" href="#"><fa-icon [icon]='faSearch'></fa-icon></a>
- </li>
- <li class="nav-item">
- <a class="nav-link" href="#"><fa-icon [icon]='faBell'></fa-icon></a>
- </li>
- <li class="nav-item">
- <a class="nav-link" href="#"><fa-icon [icon]='faUser'></fa-icon></a>
- </li>
- <li class="nav-item dropdown">
- <a class="nav-link dropdown-toggle" data-toggle="dropdown" href="#" role="button" aria-haspopup="true"
- aria-expanded="false">User1</a>
- <div class="dropdown-menu">
- <a class="dropdown-item" href="#">User2</a>
- <a class="dropdown-item" href="#">User3</a>
- <a class="dropdown-item" href="#">Kids</a>
- </div>
- </li>
- </ul>
- </div>
- </nav>
Go to app.component.html and navbar component and router-outlet and app-footer.
- <div>
- <app-navbar></app-navbar>
- </div>
- <div class="container">
- <router-outlet></router-outlet>
- </div>
- <div>
- <app-footer></app-footer>
- </div>
In the given html, I have used Bootstrap, Font awesome and AngularJS Material.
Let's add the following styles and java scripts into the application before going further.
Go to Terminal and install the following,
npm install bootstrap –-save
npm install jquery –save
npm install --save @angular/material
npm install font-awesome --save
npm install jquery –save
npm install --save @angular/material
npm install font-awesome --save
Once you have installed everything then you will find these files in your node module folder,
node_modules/jquery/dist/jquery.min.js
node_modules/bootstrap/dist/css/bootstrap.min.css
node_modules/bootstrap/dist/js/bootstrap.min.js
node_modules/bootstrap/dist/css/bootstrap.min.css
node_modules/bootstrap/dist/js/bootstrap.min.js
Then you have to update your angular.json file,
- "styles": [
- "src/styles.scss",
- "node_modules/bootstrap/dist/css/bootstrap.min.css"
- ],
- "scripts": [
- "node_modules/jquery/dist/jquery.min.js",
- "node_modules/bootstrap/dist/js/bootstrap.min.js"
- ]
Run the application to see the output,
Provide the following command to run.
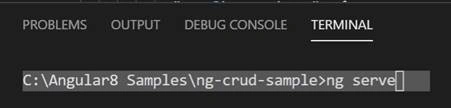
Give http://localhost:4200/ in browser.

If you click on any menu, every menu will redirect to the provided endpoint.
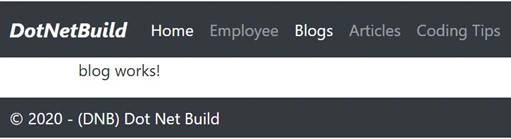
We are done here with the routing part, now let's build a Web API with Entity framework and SQL Server database.
Web API
The ASP.NET Web API is an extensible framework for creating HTTP based services that can be accessed in different applications on different platforms such as web, windows, mobile etc. It works the same way as ASP.NET MVC web applications do, except that it sends data as a response instead of html view. It supports HTTP protocol only.
Let’s create a Web API using Visual Studio 2019.
- Start Visual Studio 2019
- Create a New WEB Projects and Select Web API
- Give a name and browse location
- Click OK
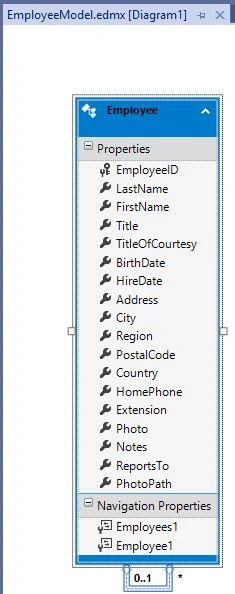
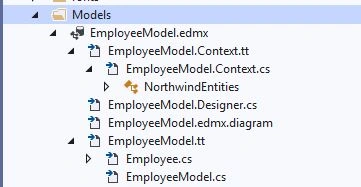
Once the project is created, right click on Models and click on Add >> Add New Item and select ADO.NET Entity Data Model from installed Data templates. Follow these steps,
- Provide name of model
- Choose EF designer from database model contents and click next
- Choose you data connection, make new if not available
- Provide server name and select database from list
- Test connection and click next
- Select entity framework version
- Choose database tables and give model namespace and click finish


Join the conversation! Your thoughts help the community grow.