

Introduction

In this article, we will see how to create a simple CRUD application for ASP.NET Core Blazor using Entity Framework and Web API. Blazor is a new framework introduced by Microsoft. I love to work with Blazor as this makes our SPA full stack application development in a more simple way and yes, now, we can use only one language, C#. Before Blazor, we were using ASP.NET Core with the combination of Angular or ReactJS. Now, with the help of Blazor support, we can create our own SPA application directly with C# Code.
In this article, we will see about creating a CRUD Web Application using ASP.NET Core Blazor.
- C: (Create): Insert new Student Details into the database using ASP.NET Core, Blazor, EF and Web API.
- R: (Read): Select Student Details from the database using ASP.NET Core, Blazor, EF and Web API.
- U: (Update): Update Student Details to the database using ASP.NET Core, Blazor, EF and Web API
- D: (Delete): Delete Student Details from the database using ASP.NET Core, Blazor, EF and Web API.
We will be using Web API and EF to perform our CRUD operations. Web API has the following four methods as Get/Post/Put and Delete, where:
- Get is to request for the data. (Select)
- Post is to create a data. (Insert)
- Put is to update the data. (Update)
- Delete is to delete data. (Delete)
Prerequisites
Make sure, you have installed all the prerequisites on your computer. If not, then download and install them all, one by one. Note that since Blazor is a new framework we must have installed the preview of Visual Studio 2017 (15.7) or above.
- Install the .NET Core 2.1 Preview 2 SDK. (You can find all versions from this link)
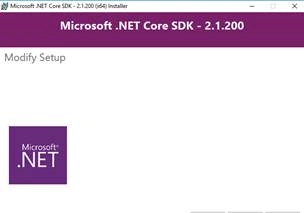
- Install the latest preview of Visual Studio 2017 (15.7).
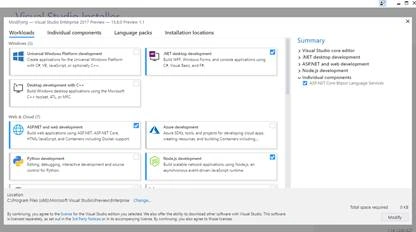
- Install the NET Core Blazor Language Services for Blazor Extensions.
Step 1 - Create a database and a table
We will be using our SQL Server database for our WEB API and EF. First, we create a database named StudentsDB and a table as StudentMaster. Here is the SQL script to create a database table and sample record insert query in our table. Run the query given below in your local SQL Server to create a database and a table to be used in our project.
- USE MASTER
- GO
- -- 1) Check for the Database Exists .If the database is exist then drop and create new DB
- IF EXISTS (SELECT [name] FROM sys.databases WHERE [name] = 'StudentsDB' )
- DROP DATABASE StudentsDB
- GO
- CREATE DATABASE StudentsDB
- GO
- USE StudentsDB
- GO
- -- 1) //////////// StudentMasters
- IF EXISTS ( SELECT [name] FROM sys.tables WHERE [name] = 'StudentMasters' )
- DROP TABLE StudentMasters
- GO
- CREATE TABLE [dbo].[StudentMasters](
- [StdID] INT IDENTITY PRIMARY KEY,
- [StdName] [varchar](100) NOT NULL,
- [Email] [varchar](100) NOT NULL,
- [Phone] [varchar](20) NOT NULL,
- [Address] [varchar](200) NOT NULL
- )
- -- insert sample data to Student Master table
- INSERT INTO [StudentMasters] ([StdName],[Email],[Phone],[Address])
- VALUES ('Shanu','[email protected]','01030550007','Madurai,India')
- INSERT INTO [StudentMasters] ([StdName],[Email],[Phone],[Address])
- VALUES ('Afraz','[email protected]','01030550006','Madurai,India')
- INSERT INTO [StudentMasters] ([StdName],[Email],[Phone],[Address])
- VALUES ('Afreen','[email protected]','01030550005','Madurai,India')
- select * from [StudentMasters]
Step 2 - Create ASP.NET Core Blazor Application
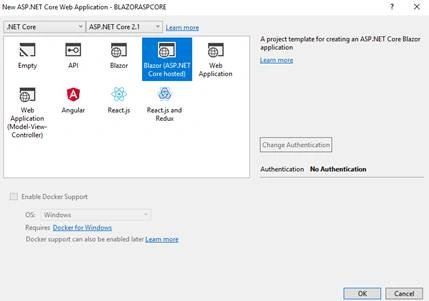
After installing all the prerequisites listed above and ASP.NET Core Blazor Language Services, click Start >> Programs >> Visual Studio 2017 >> Visual Studio 2017 on your desktop. Click New >> Project. Select Web >> ASP.NET Core Angular Web Application. Enter your project name and click OK.
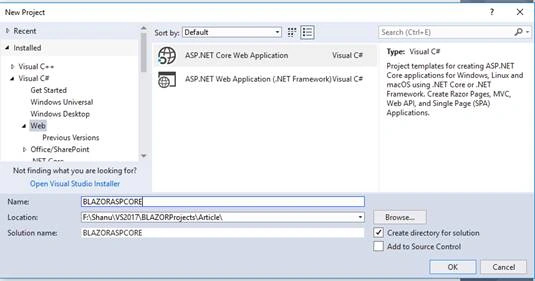
Select Blazor (ASP.NET Core hosted) and click ok
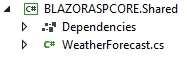
After creating ASP.NET Core Blazor Application, wait for a few seconds. You will see the below structure in solution explorer.
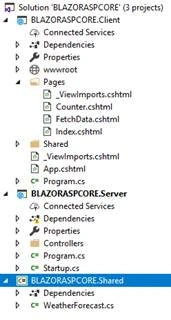
What is new in ASP.NET Core Blazor solution?
When we create our new ASP.NET Core Blazor application we can see there will be 3 projects that will be automatically created in the Solution Explorer.
Client Project
The first project created as a Client project is our Solutionname.Client and here, we can see our solution name as “BlazorASPCORE”. This project will be mainly focused on all the client-side views. Here, we will be adding all our page views to be displayed at the client side in the browser.
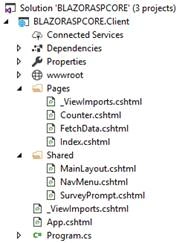
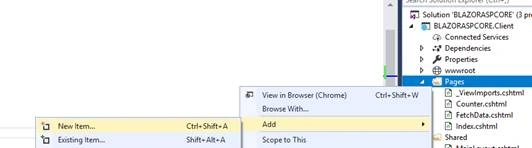
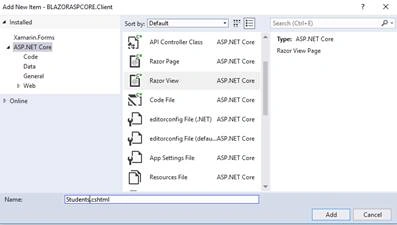
We can see a few sample pages have been already added here and we can also see a shared folder like our MVC application where we will be having the Shared folder and Layout page for the Master page. Here, in Blazor, we have the MainLayout which will be working like the Master page and NavMenu for the left side menu display.
Server Project
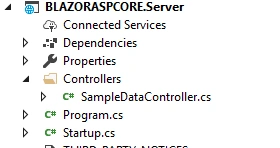
As the name indicates, this project will be used as a Server project. This project is mainly used to create all our Controllers and WEB API Controllers to perform all business logic and perform CRUD operation using WEB API’s. In our demo application, we will be adding a Web API in this Server project and all the WEB API in our Client application. This Server project will be work like getting/set the data from Database and from our Client project we bind or send the result to this server to perform the CRUD operation in the database.
Shared Project
As the name indicating this project work like a shred project. This project works as a Model for our Server project and for the Client project. The Model declared in this Shared project will be used in both the Server and in the Client project. We also install all the packages needed for our project here; for example, to use the Entity Framework, we install all the packages in this Shared project.
Run to test the application
When we run the application, we can see that the left side has navigation and the right side contains the data. We can see as the default sample pages and menus will be displayed in our Blazor web site. We can use the pages or remove it and start with our own page.
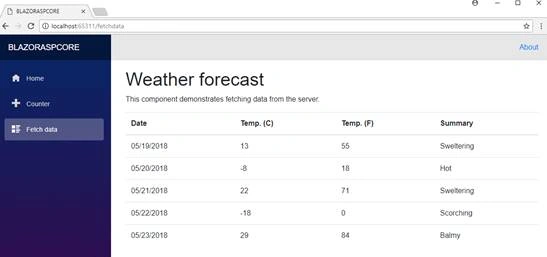
Now let’s see how to add new page perform the CRUD operation for maintaining student details.
Using Entity Framework
To use the Entity Framework in our Blazor application we need to install the below packages
Install the Packages
Go to Tools and then select -> NuGet Package Manager -> Package Manager Console.
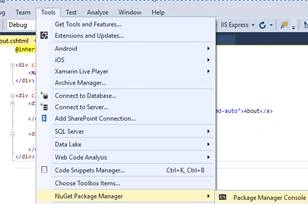
You can see the Console at the bottom of the VS 2017 IDE and on the right side of the combo box on the console, select the Default project as your shared project” Select Shared”.

- You can see the PM> and copy and paste the below line to install the Database Provider package. This package is used to set the database provider as SQL Server.
Install-Package Microsoft.EntityFrameworkCore.SqlServer

We can see as the package is installed in our Shared folder.
Install the Entity Framework -
- You can see the PM> and copy and paste the below line to install the EF package.
Install-Package Microsoft.EntityFrameworkCore.Tools

To Create DB Context and set the DB Connection string
- You can see the PM> and copy and paste the below line set the Connection string and create DB Context. This is an important part as we give our SQL Server name, Database Name and SQL server UID and SQL Server Password to connect to our database for performing the CRUD operation. We also give our SQL Table name to create the Model class in our Shared project.
- Scaffold-DbContext "Server= YourSqlServerName;Database=StudentsDB;user id= YourSqlUID;password= YourSqlPassword;Trusted_Connection=True;MultipleActiveResultSets=true" Microsoft.EntityFrameworkCore.SqlServer -OutputDir Models -Tables StudentMasters

Press enter create a connection string, Model Class, and Database Context.
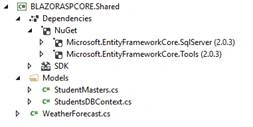
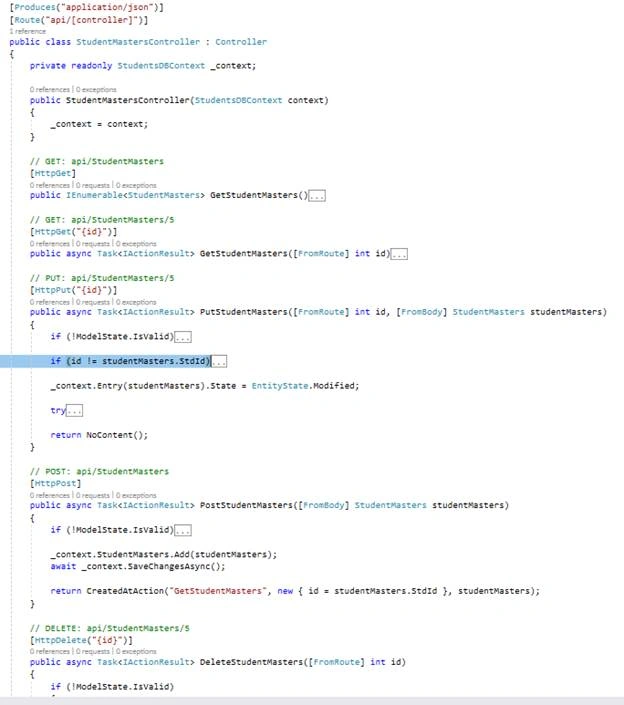
We can see StudentMasters Model class and StudentsDBContext class has been created in our Shared project. We will be using this Model and DBContext in our Server project to create our Web API to perform the CRUD operations.
Creating Web API for CRUD operation
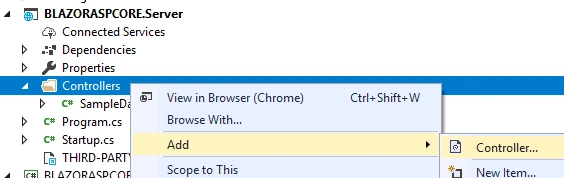
To create our WEB API Controller, right-click Controllers folder. Click Add New Controller.
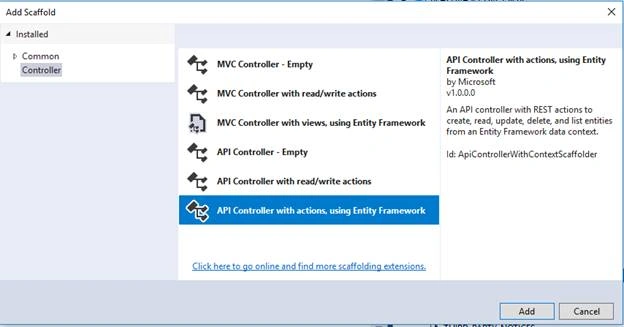
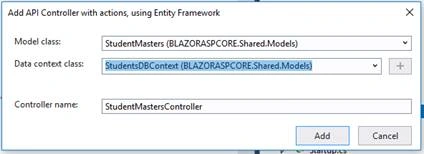
Here we will be using Scaffold method to create our WEB API .We select API Controller with actions, using Entity Framework.
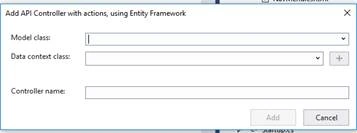
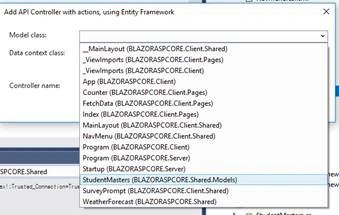
Select our Model and DatabaseContext from the Shared project.

Rose sPosted May 29, 2019, 7:00 AM
Hi, this is very good sharing to learn Blazor. kindly provide step by step CRUD Operation with latest Blazor extension Using .NET Core 3.0 and Visual Studio 2019.
anil yadavPosted Aug 5, 2018, 12:53 PM
Fantastic work with step by step explanation .One thing I want to ask is it possible with vs community because I am using vs community 15.6
Murugan KPosted Jul 29, 2018, 4:00 AM
Good job Syed
Satyaprakash SamantarayPosted May 21, 2018, 4:57 AM
Nice article and very well explained. Thanks for sharing
Naresh SinghalPosted May 21, 2018, 12:13 AM
Fantastically explained , Awesome !! All in one... thanks for sharing Syed Shanu