

Introduction
Web API is the best fit to create a resource-oriented service using HTTP/Restful and it works well with MVC-based applications. For more details, visit this link.
Description
In this session, I will show you the steps to upload files in the ASP.NET Web API using HttpClient and Download files from the folder in ASP.NET Web API.
In this session, I will show you the steps to upload files in the ASP.NET Web API using HttpClient and Download files from the folder in ASP.NET Web API.
Before going through this session, visit my previous sessions,
- Part 1 - ASP.NET Web API Using MVC And Entity Framework
- Part 2 - ASP.NET Web API Using MVC, Entity Framework And jQuery For Retrieve Data
- Part 3 - Reuse The Model Classes Of Entity Data Model (.edmx) To Multiple Projects Using Class Library In ASP.NET Web API
- Part 4 - ASP.NET Web API Using MVC, Entity Framework And HttpClient For Retrieve Data
- Part 5 - ASP.NET Web API Using MVC, Entity Framework And jQuery For Get and Post With Validation
- Part 6 - ASP.NET Web API Using MVC, Entity Framework And HttpClient For Get And Post With Validation
- Part 7 - ASP.NET Web API Using MVC And jQuery To Upload And Download Files
Steps to be followed.
Step 1
Add an Action to the HomeController (in MVC Client application) for getting the View for upload file.
Code Ref
- public ActionResult Part6()
- {
- return View();
- }
Step 2
Add another action for POST action for upload file to web API using HttpClient.
Code Ref
- [HttpPost]
- public ActionResult Part6(HttpPostedFileBase file)
- {
- using (var client = new HttpClient())
- {
- using (var content = new MultipartFormDataContent())
- {
- byte[] Bytes = new byte[file.InputStream.Length + 1];
- file.InputStream.Read(Bytes, 0, Bytes.Length);
- var fileContent = new ByteArrayContent(Bytes);
- fileContent.Headers.ContentDisposition = new System.Net.Http.Headers.ContentDispositionHeaderValue("attachment") { FileName = file.FileName };
- content.Add(fileContent);
- var requestUri = "http://localhost:47250/api/Upload";
- var result = client.PostAsync(requestUri, content).Result;
- if (result.StatusCode == System.Net.HttpStatusCode.Created)
- {
- List<string> m = result.Content.ReadAsAsync<List<string>>().Result;
- ViewBag.Success = m.FirstOrDefault();
- }
- else
- {
- ViewBag.Failed = "Failed !" + result.Content.ToString();
- }
- }
- }
- return View();
- }
In this section, I have added Web API Url to upload files and download files from it.
- var requestUri = "http://localhost:47250/api/Upload";
When developing an ASP.NET Web API controller method that allows downloading a file, it is considered a good practice to set a "Content-Disposition" header to guide a browser of a name of a file being downloaded.
There are two different ways to approach this simple task. First is to add a new HTTP header to the HTTP response using string values for the header's name and value. The second is to try and use the .NET Framework's infrastructure methods that presumably should make this task easier.
The first method seems to be very simple but potentially dangerous: one would need to hard-code string values and be totally responsible for the values to be properly formatted according to the W3C standards.- var fileContent = new ByteArrayContent(Bytes);
- fileContent.Headers.Add("Content-Disposition", "attachment; filename=fileName.ext");
- var fileContent = new ByteArrayContent(Bytes);
- fileContent.Headers.ContentDisposition = new System.Net.Http.Headers.ContentDispositionHeaderValue("attachment") { FileName = file.FileName };
- content.Add(fileContent);
- var requestUri = "http://localhost:47250/api/Upload";
- var result = client.PostAsync(requestUri, content).Result;
- if (result.StatusCode == System.Net.HttpStatusCode.Created)
- {
- List<string> m = result.Content.ReadAsAsync<List<string>>().Result;
- ViewBag.Success = m.FirstOrDefault();
- }
- else
- {
- ViewBag.Failed = "Failed !" + result.Content.ToString();
- }
Add view for the Action & design. Right Click on Action Method (here right click on form action) > Add View... > Enter Name > Add.
Code Ref
- @{
- ViewBag.Title = "Part6";
- }
- <style>
- table {
- font-family: arial, sans-serif;
- border-collapse: collapse;
- width: 100%;
- }
- td, th {
- border: 1px solid #dddddd;
- text-align: left;
- padding: 8px;
- }
- tr:nth-child(even) {
- background-color: #dddddd;
- }
- .button {
- background-color: #4CAF50;
- border: none;
- color: white;
- padding: 15px 32px;
- text-align: center;
- text-decoration: none;
- display: inline-block;
- font-size: 16px;
- margin: 4px 2px;
- cursor: pointer;
- }
- .button4 {
- border-radius: 9px;
- }
- </style>
- <fieldset>
- <legend style="font-family:Arial Black;color:blue">Upload And Download Files Here</legend>
- <div class="container">
- <div>
- @if (ViewBag.Success != null)
- {
- <div class="alert alert-success" role="alert">
- <strong>Well done !</strong> Successfully uploaded. <a href="@ViewBag.Success" target="_blank">Download File</a>
- </div>
- }
- else if (ViewBag.Failed != null)
- {
- <div class="alert alert-error" role="alert">
- <strong>Error !</strong> @ViewBag.Failed
- </div>
- }
- </div>
- @using (Html.BeginForm("Part6", "Home", FormMethod.Post, new { role = "form", enctype = "multipart/form-data" }))
- {
- <div class="form-group">
- <input type="file" id="file" name="file" class="btn btn-primary" />
- </div>
- <input type="submit" value="Submit" class="button button4" />
- }
- </div>
- </fieldset>
Here in form post method I have added controls as shown beow.
- @using (Html.BeginForm("Part6", "Home", FormMethod.Post, new { role = "form", enctype = "multipart/form-data" }))
- {
- <div class="form-group">
- <input type="file" id="file" name="file" class="btn btn-primary" />
- </div>
- <input type="submit" value="Submit" class="button button4" />
- }
- @if (ViewBag.Success != null)
- {
- <div class="alert alert-success" role="alert">
- <strong>Well done !</strong> Successfully uploaded. <a href="@ViewBag.Success" target="_blank">Download File</a>
- </div>
- }
- else if (ViewBag.Failed != null)
- {
- <div class="alert alert-error" role="alert">
- <strong>Error !</strong> @ViewBag.Failed
- </div>
- }
OUTPUT
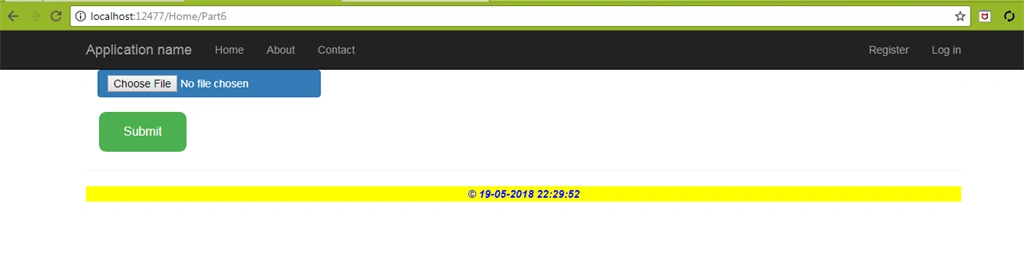
File upload page is shown like this.
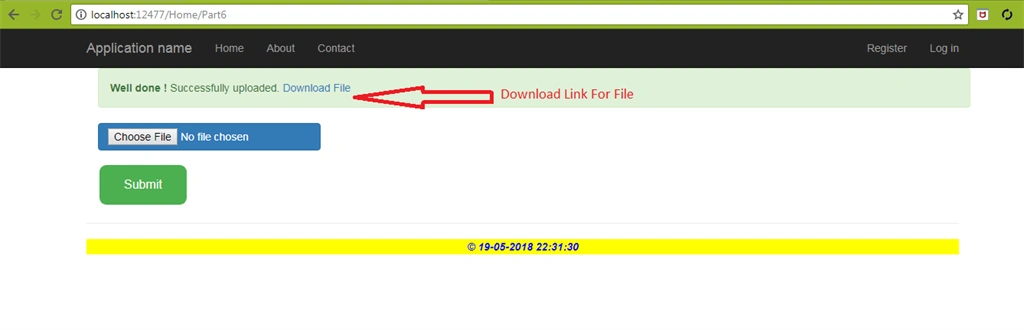
Download link file after successful upload in Asp.Net Web API.
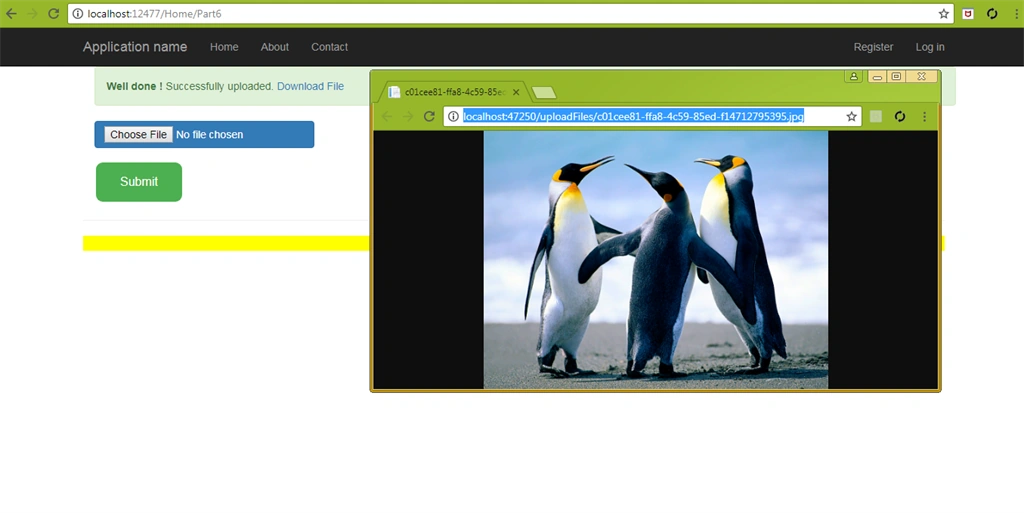
After file download it is shown like this.
SUMMARY
- Upload files using HttpClient In Web API and Download files from it.
- Implementation of ContentDispositionHeaderValue Class.
eswar raoPosted Aug 25, 2020, 2:43 AM
Its copied code from other web site
Kumar HarshPosted Sep 3, 2018, 6:38 AM
Please help me clear my doubts.
Kumar HarshPosted Sep 3, 2018, 6:37 AM
Hi Satya, Nice article. .I have one small doubts.here when you post data to http://localhost:47250/api/Upload then on theother end there is method called Upload which receive the send request and process it. In .net technologies is there any way where we can post file directly to http url folder like we do in CURL