

Introduction
Windows 10 is coming on the 29th of July 2015. Microsoft introduced many new features in Windows 10. The Start menu is back, the new browser Microsoft Edge is introduced that was also known as Project Spartan, Cortana, and many more features. As we know, for any device and software, maintenance is a primary requirement. Because if we have proper maintenance then it will work faster and smoother. So in this article, we will learn about automatic maintenance in Windows 10.
In Windows 10 we have many options for increasing system performance. We use the system utilities for maintenance. There are many functions in the system utilities, like Firewalls, Windows Update, virus protection, spyware and unwanted software protection, internet security settings, a scanning system and many more. All these settings are done manually by you but it is not easy to do them daily. So there is also an option for automatic maintenance. This feature maintains your system automatically when you are not attending your system. So now I will explain how to use the automatic maintenance in Windows 10 in a step-by-step approach.
Step 1
Go the Start menu and click on the Control Panel. One thing is noticeable here, that your Control Panel will be in Icon View mode. For that just click on the View by the link that is given at the corner when you open the Control Panel.
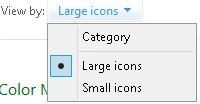
Figure 1. Change Category of Control Panel.
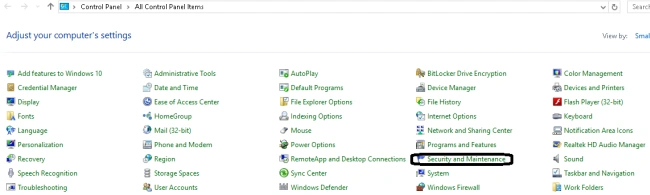
Figure 2. Security and Maintenance.
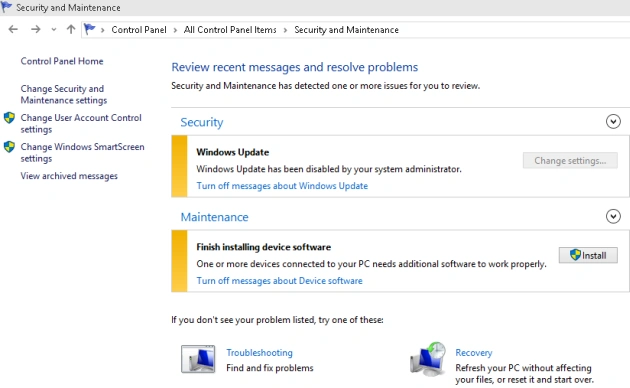
Figure 3. Maintenance
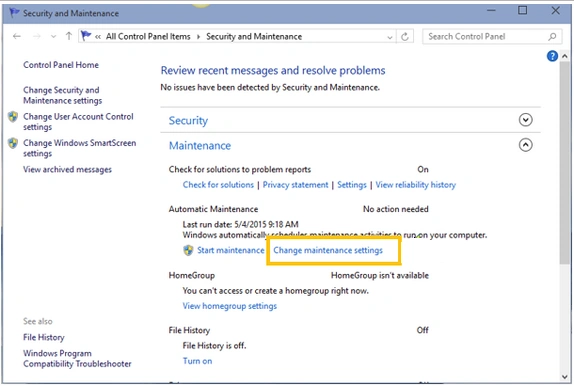
Figure 4. Maintenance settings.
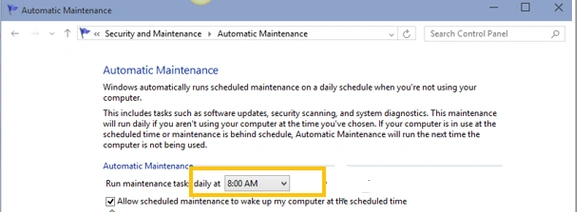
Figure 5. Scheduled Maintenance.
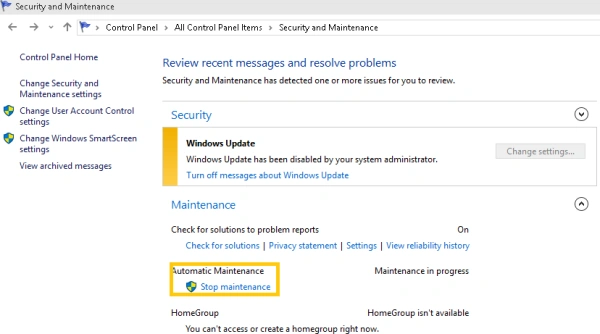
Figure 6. Stop Maintenance
Summary
In this article, we learned about Automatic Maintenance Settings in Windows 10.
NitinPosted Jun 11, 2015, 7:36 AM
good one
Santhakumar MunuswamyPosted Jun 9, 2015, 2:41 PM
Thanks for sharing