

Most of us use our beloved Azure Management Portal to create all our Azure App Services. Every time you create any Azure service, you need to do the following different steps to create the resources manually. Below are a few of the disadvantages of using the Azure Management Portal to create the Azure resources.
- It’s time consuming as it might have to perform each step such as providing low level details, selecting / creating the resource groups, App Service plans etc. manually.
- You cannot reuse the steps when you want to replicate your environment.
- There can be scope for human errors if you create the resources manually.
The solution for all of the above disadvantages is to automate the process of creating the Azure resources using ARM templates.
For more information about ARM templates, please have a look here.
Let’s make this discussion very simple and precise by creating and deploying the ARM template using Visual Studio.
- Open Visual Studio and create a new project by selecting “Azure Resource Group” template. If you don’t see the “Azure Resource Group” template, you will need to download and install the Azure SDK for .NET.

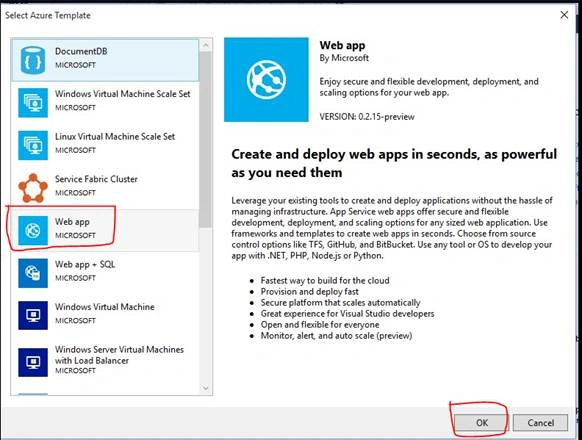
- Clicking OK in the previous step will open up the following popup “Select Azure Template”. Azure SDK provides some pre-defined templates, which we can directly use and even customize based on our requirement. For this discussion, let’s select “Web App” as shown below and click OK button.
- Clicking OK in the previous step will create a new project in the Visual Studio as shown below.
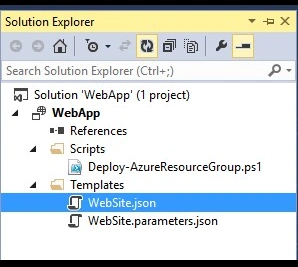
- For this simple scenario of creating the Web App, Visual Studio creates the following files. For more complex templates, it would create multiple files.
Scripts/Deploy-AzureResourceGroup.ps1 This is the PowerShell script that invokes PowerShell commands to deploy to Azure Resource Manager. Templates/WebSite.json This is the deployment template file which contains the details about all the Azure resources that will be created when you deploy the template. Basically, this template file will have details about all the infrastructure. Templates/WebSite.parameters.json This is the Parameter file which contains the values that needs to be passed to the deployment template.
As we are using built in templates, we don’t need to do anything else. That’s it. Let’s now deploy the Infrastructure that we defined using the JSON files.
Right click the project, select “Deploy -> “New Deployment” as shown below.
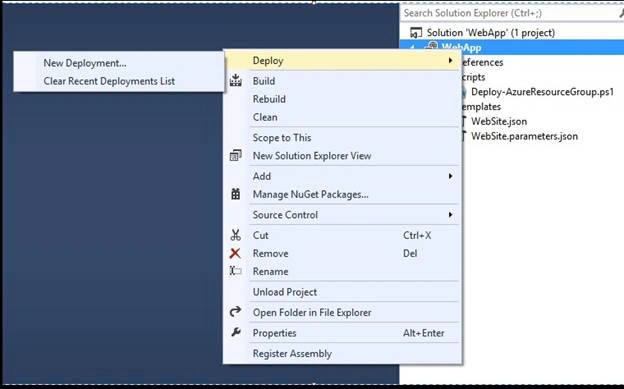
Clicking on the “New Deployment” button in the previous step will open up the following window where you need to provide few details that are required to create and deploy the App Service in Azure.
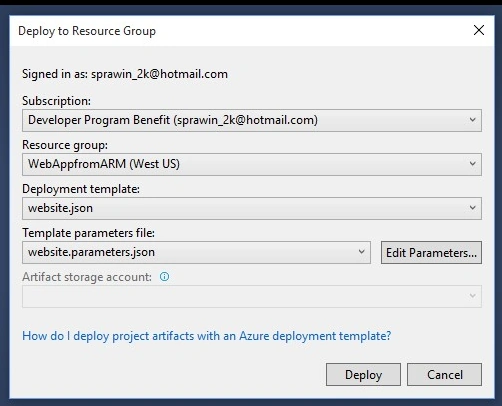
You need to sign-in using your Azure Subscription credentials.
- Subscription - You need to select the subscription in which you would like to deploy the service.
- Resource Group - Name of the Resource Group where you would like to create the service.
- Deployment Template - Select the deployment file which has all the details of our infrastructure.
- Template Parameters File - Select the Template Parameter files.
We will discuss more about the Template JSON file and the Template Parameters file in our coming articles.
After providing all the details, click on “Deploy” button. It will prompt you to provide the hosting App Service Plan name as the default value in the Parameters file is null. We will learn, how to pass it in the .JSON file in our future articles. For now, I gave “Free” in the “hostingPlanName” and selected “F1” in the “skuName”
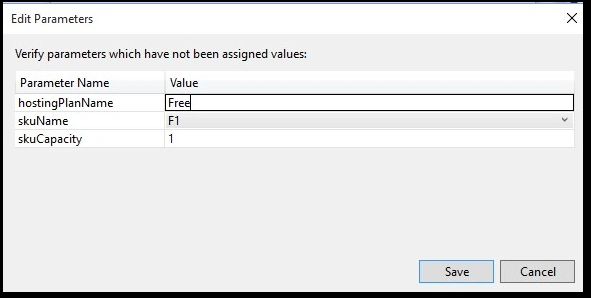
Now, click “Save” button. Visual Studio will launch the PowerShell console and run couple of PowerShell commands in the background for executing the Infrastructure code that we created using the default templates available in the Visual Studio.
Below is the screen capture of the Output window from my Visual Studio.
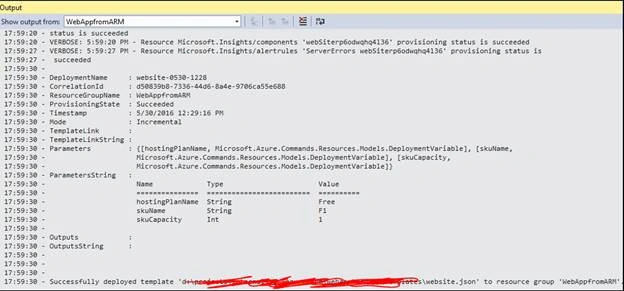
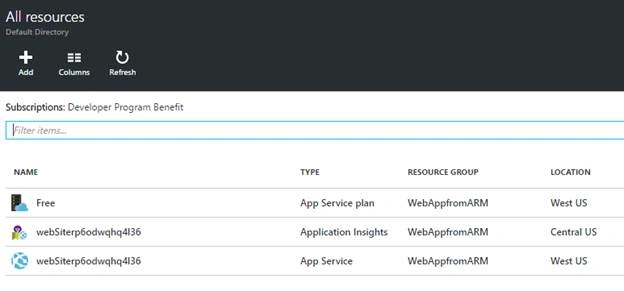
That’s it. Our App Service along with the App Service Plan is created in Azure for the selected subscription. For reference, the screenshot is shown below:
Praveen SreeramPosted Jul 12, 2016, 8:14 AM
Thanks kalu singh rao
kalu singh raoPosted Jul 12, 2016, 1:30 AM
Nice...
Praveen SreeramPosted Jun 6, 2016, 10:04 AM
Thanks Sonu Chaudhary
Sonu ChaudharyPosted Jun 6, 2016, 9:58 AM
good one...
Praveen SreeramPosted Jun 2, 2016, 1:33 AM
Thanks @Ketak
Ketak BhalsingPosted Jun 2, 2016, 1:32 AM
Helpful information....
Praveen SreeramPosted Jun 1, 2016, 1:45 AM
Thank you Debasis Saha
Debasis SahaPosted Jun 1, 2016, 1:37 AM
Nice share..
Praveen SreeramPosted May 31, 2016, 8:44 PM
Thanks @Vignesh
Vignesh ManiPosted May 31, 2016, 4:17 PM
Nice