

Once you are done with creating your cloud services project, it's time to do the deployment.
Primarily there are the following two types of deployment that can be done to Azure cloud services:
- Full Deploy: This performs a deployment of all Azure roles from scratch. In other words it uploads solution packages (.cspkg and .cscfg files) to an Azure blob and creates the entire web as well as worker roles as well as their instances, It usually takes a bit of a time.
- Web Deploy: This is also known as a developer deployment method that enables you to push only certain changes to Azure. This type of deployment usually takes a few seconds.
Note: the Web Deploy method is not a recommended way for deployment for production, since all the changes that are pushed to Azure using this method won't be there if any management operation like the restart of a web / worker role happens.
To do a Web Deploy, a one-time full deployment (with enabled remote desktop settings) must be done at least once. All the subsequent deployments can use web deploy.
Let's see it step-by-step.
(Steps 1 to 6 show the full deployment process, whereas steps 7 and 8 are used to do a web deployment.)
Full Deploy
Step 1
Select your cloud services project and select publish.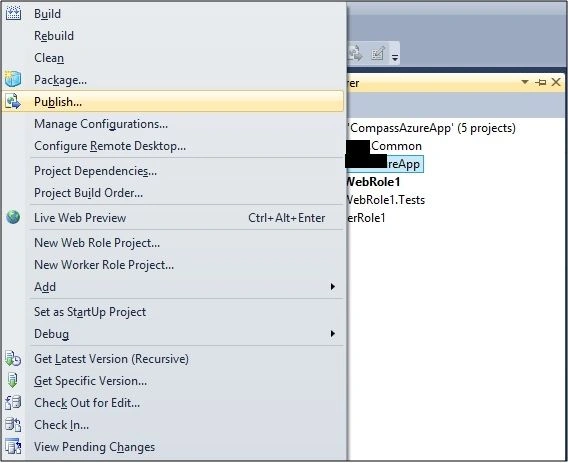
Step 2
Select your Azure subscription and click on "Next".
Note: You must make your subscription available in the list before choosing it from the list. The best way to do that is by importing your subscription settings file that you can download from the Azure portal.
Here is the link that you can use to download the publish settings file. It will ask you for your login credentials, once you enter those it will go ahead and download the file. Please ensure that you keep this file in a secure location since it contains sensitive information to connect to your subscription.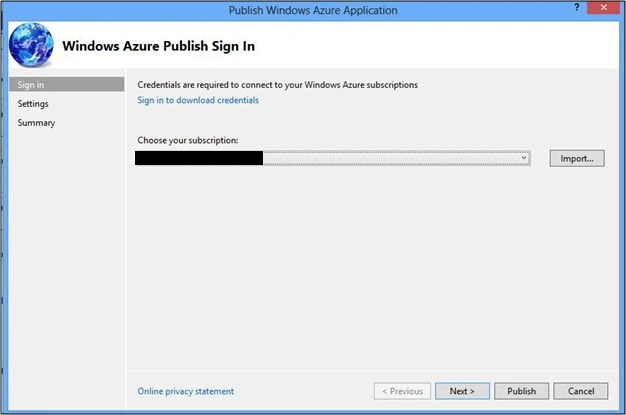
Step 3
Make sure that all the fields are initialized to the correct values based on your project.
- Cloud service: select the cloud service name from the available list on which you want to deploy the solution.
- Environment: select the slot of the deployment for a cloud service. (Production or Staging slot).
- Build Configuration: select the build mode, in other words debug / release mode. It will compile your solution with the selected mode of configuration.
- Service configuration: select the Azure service configuration, based on the selection it will generate the .cscfg file along with the deployment package (.cspkg). service configuration files usually contains your role-level settings like storage connection strings, endpoint urls, ports, certificates and so on.
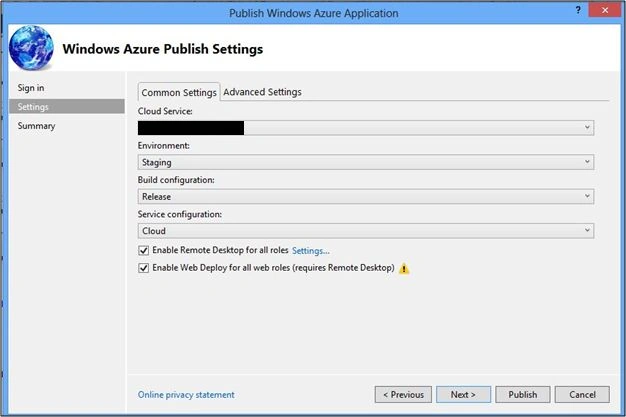
- Storage selection: If you click on the advanced tab, you will be shown a dropdown to select the specific Azure storage, it will be used to upload the deployment package along with configuration file before deploying to Azure cloud service.
- RDP and Web deploy checkboxes:
Make sure that both checkboxes are checked on this screen.
Note: This is required if you want your subsequent deployments to be a web deployment.
As soon as you check the first check box, you will be presented with a screen that asks for user name and password. You can enter any user name and password and note it down for future reference. It will be used to connect to the web and the worker roles in your project using the remote desktop.
Step 4
This is the summary page of all the settings you have done. Verify them and you can click on Publish. This starts the full publishing process.
You can track the progress of deployment using Windows Azure activity windows in Visual Studio.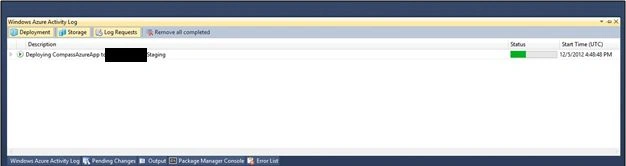
Web Deploy
Once you are done with full deployment, you will be able to do a web deployment.
For example: You have modified just a JavaScript file in your web project and now I need to deploy this change to the web role hosted on Azure.
Step 1
Select the web project, right-click on it and choose the option Publish. 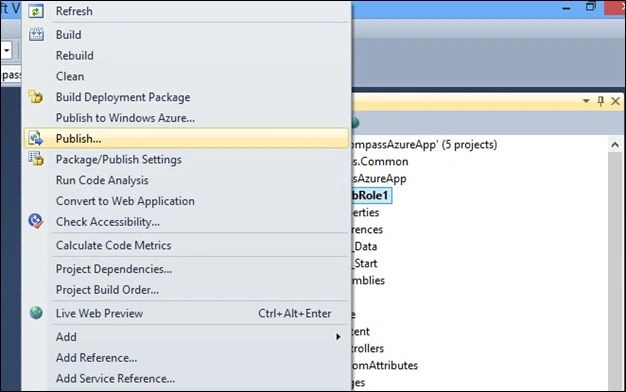
After clicking on Publish, a Publish Web dialog is shown. 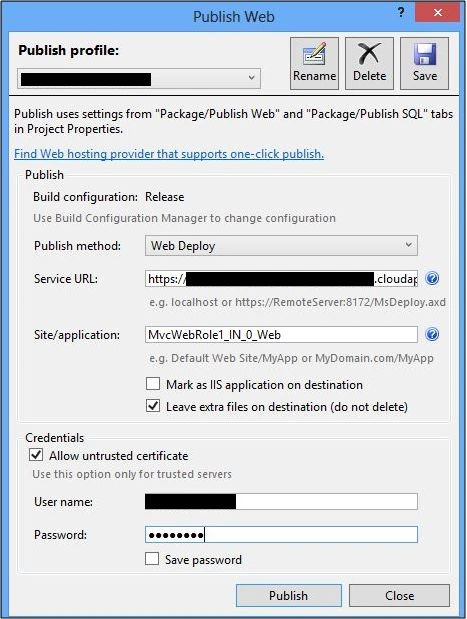
Here it automatically shows the publishing profile that you used in full deployment.
Make sure that you have selected the web deploy method as the publish method.
The Service URL should be the URL of your Azure hosted web site.
In the credentials section, enter the credentials that you created in Step 3 of full deployment. This will be used to connect to your web role.
All these settings are stored in the XML file that resides in your project files. Usually with name – yourprojectname.Publish.xml, use Visual Studio Solution Explorer to view this file.
Click on Publish and you are done. You can observe the progress of the deployment in the output window of Visual Studio. The deployment will be done in a few seconds (depending on the changes done).
Vithal WadjePosted Jan 8, 2015, 2:01 AM
Nice