

Kubernetes is an open source system started by Google to help orchestrate (deploy, scale and manage) containerized applications. Azure Kubernetes Service makes working with Kubernetes easier.
Before we learn how to orchestrate containers, let’s discuss a bit about containers.
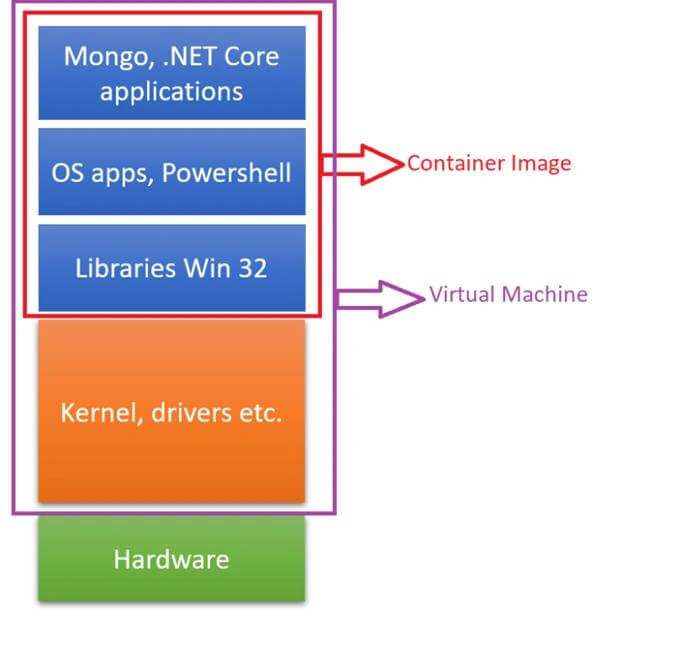
You can run your applications as containers. Think about containers as isolated processes that have their own directory, user groups, ports, etc. which run in the host machine. They are like virtual machines, but not the same. Virtual machines have their own operating systems, whereas containers use the operating system of the host machine. Also, the containers run from images. Think of images as software installers. But images bundle up the software code with its dependencies, because of which containers run the same way on different environments since they are environment independent to a much larger extent.
The diagram mentioned below helps explain the above-said things. The container image will contain the application code and its dependencies, but it won’t include the kernel, to interact with the hardware. It will use the host system kernel to interact with the hardware. But virtual machines will have their own kernel, to interact with the hardware. Because of this, the containers are much faster, lightweight, and easier to manage than virtual machines. Hence, in the new way of designing applications as microservices, the services are run as containers.
Before proceeding I would strongly advise reading more about dockers & containers here. This talks more about how dockers can be used to manage containers, what is docker hub & how to upload images to docker hub etc.
You might also want to check out this article here, which describes how to run containers as Azure Container Instances or ACIs.
Azure Kubernetes Service (AKS) helps manage your applications running as containers. Azure Kubernetes Service provides many services like load balancing, autoscaling, etc.
The AKS cluster contains a cluster master and multiple nodes. Cluster master deals with the management side of things whereas nodes run the actual workload.
The below diagram is taken from the official Microsoft documents for AKS. We will discuss the important components in AKS.
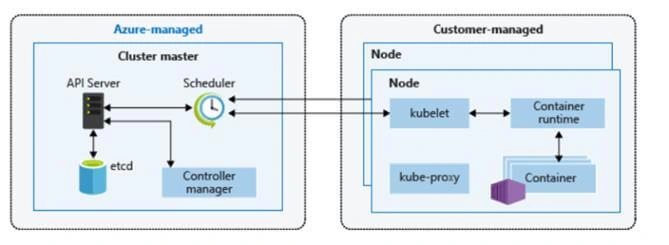
The cluster master consists of the following components,
- kube-apiserver: This API server helps in running management tools like kubectl.
- etcd: Used to store the state of Kubernetes cluster & configuration.
- kube-scheduler: Determines which nodes will handle will run the workload.
- kube-controller-manager: Manages pod replication etc.
The nodes consist of containers amongst other components. Containers are not run directly but are wrapped in units called pods. Pods can run one or more containers, but generally, they run a single instance of a container. Pods are the basic building block of kubernetes.
During deployment, we create a deployment yaml file that lists the pod replica sets that need to be created and other information. We will create a yaml file during our demo.
There are two namespaces that we must be aware of in kubernetes: the default namespace will house our deployments if no namespace is provided & the kube-system namespace will contain system resources.
We have covered the important terminology that is required to execute the following demo. For further details visit here which contains official information from Microsoft. This article from Medium also has some excellent information.
Let’s have a quick demo. But before proceeding reading my article on Docker & Containers & ACI. These will help understand the demo better.
Step 1- Creating an ASP.NET Core application
We will need Docker to manage our containers. So, install ‘Docker for Windows’ from here.
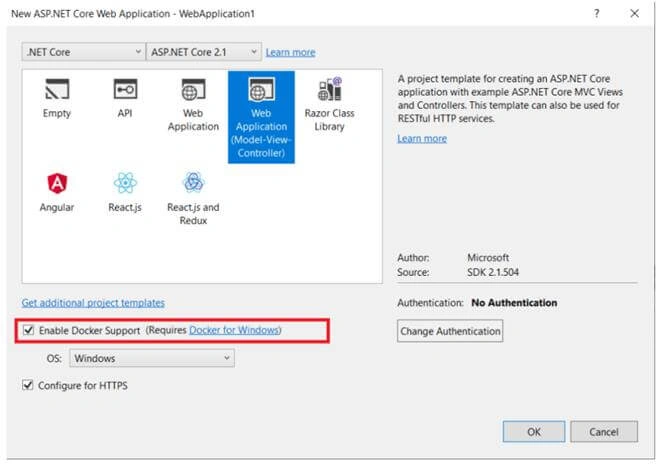
Then, I will create an ASP.NET Core application using Visual Studio. Check the ‘Enable Docker Support’ checkbox while creating the project.
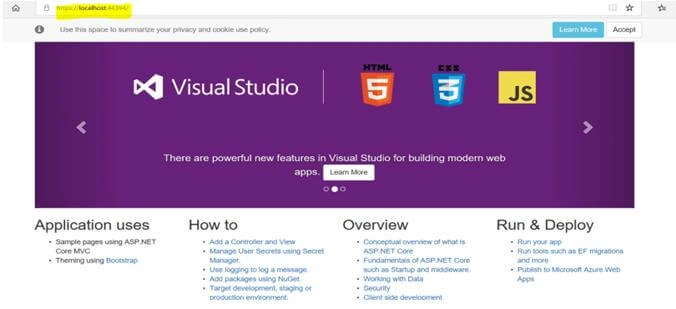
Run the application and it will run in its default mode as below.
Step 2- Containerizing the application
Let’s create an image from our application. We will write some instructions for the same in the Dockerfile that gets created as below.
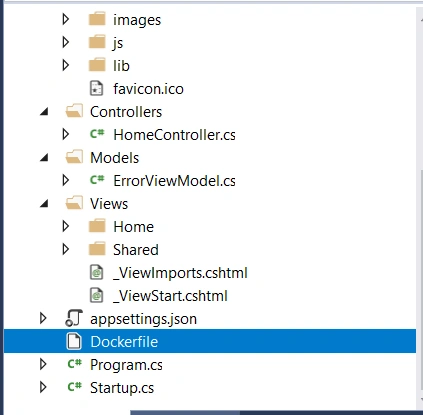
- FROM microsoft/dotnet:sdk AS build-env
- WORKDIR /app
- # Copy csproj and restore as distinct layers
- COPY *.csproj ./
- RUN dotnet restore
- # Copy everything else and build
- COPY . ./
- RUN dotnet publish -c Release -o out
- # Build runtime image
- FROM microsoft/dotnet:aspnetcore-runtime
- WORKDIR /app
- COPY --from=build-env /app/out .
- ENTRYPOINT ["dotnet", "aspnetapp.dll"]
Once the Dockerfile is ready, open PowerShell or the Command Prompt to type in the commands to create an image. Once the command prompt is open, navigate to the root of your application. Type-in the following code.

Then, to run the image as the container, we type the following command,

Now to check our containerized application, we goto 8080 port of localhost. We can find our application running there.
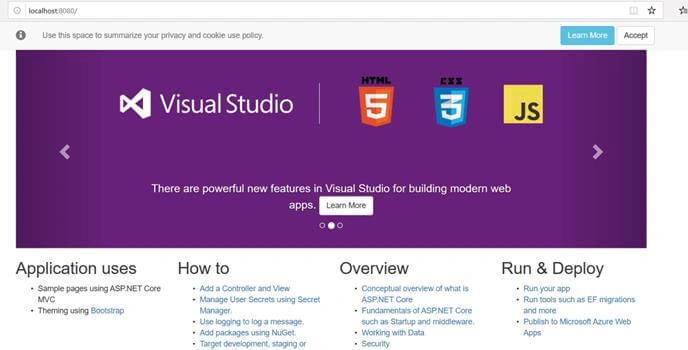
Now that we have successfully run our application as a container, we will now push our image to Azure Container registry.
Step 3- Deploying your image to Azure Container Registry
Now that you have created the application image and are able to run your application as a container, let’s deploy our image on Azure Container Registry. Once we have deployed our image on Azure, we can use it to run our Kubernetes.
So go to Azure Portal, and create an Azure Container Registry as follows,
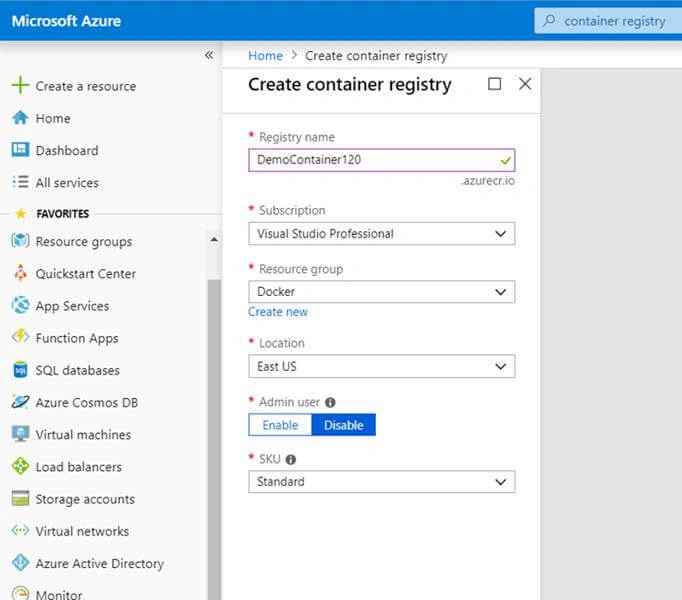
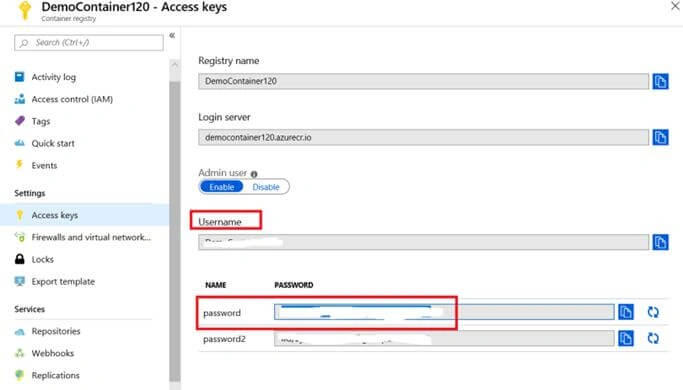
Remember you can find your username & password in the ‘access keys’ section. You will need them to push your image to the Azure Container Registry.
We will also create a repository called ‘demo’ as below. We will give it a tag 2.0.
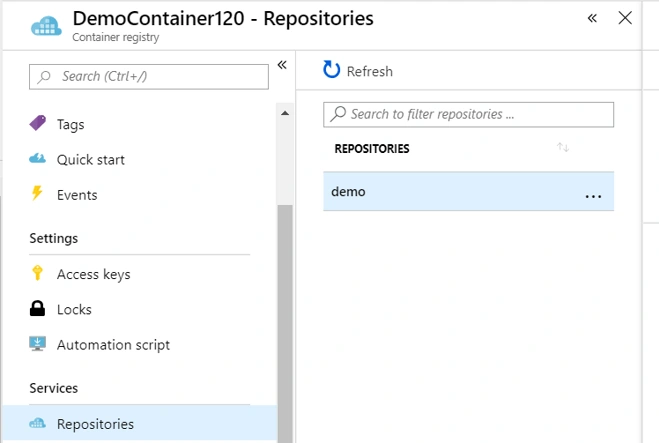
Open PowerShell and type in the following code to log in to your container registry with the access keys as discussed above.


Now that we have uploaded our image to Azure Container Registry, let’s learn how to use Kubernetes.
Step 4 - Implementing Kubernetes
Create a Kubernetes service in Azure as below,
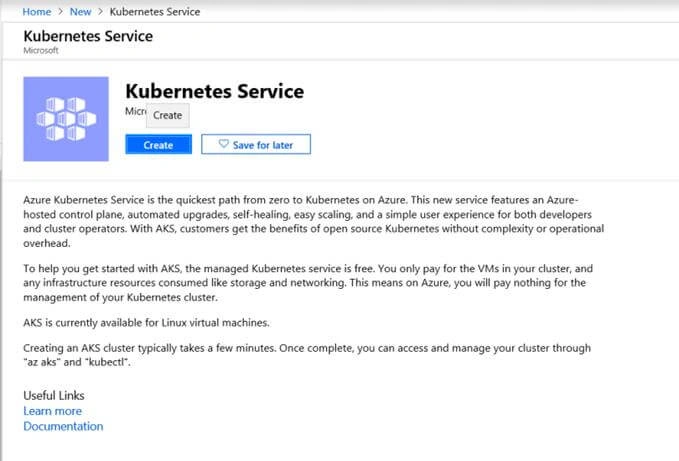
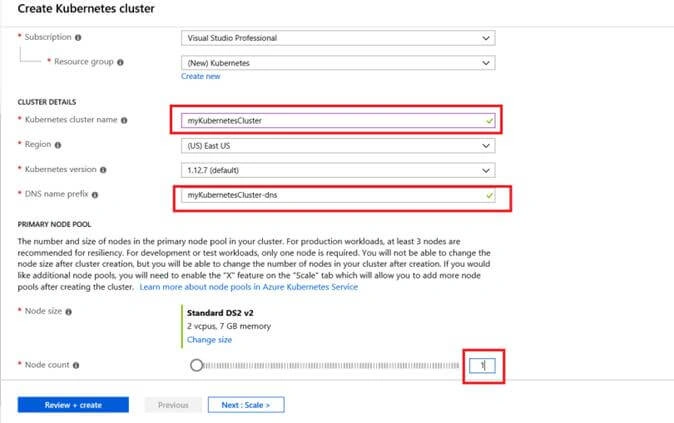
Install the Azure CLI from here.
Open powershell and type in the following command to install kubernetes cli.
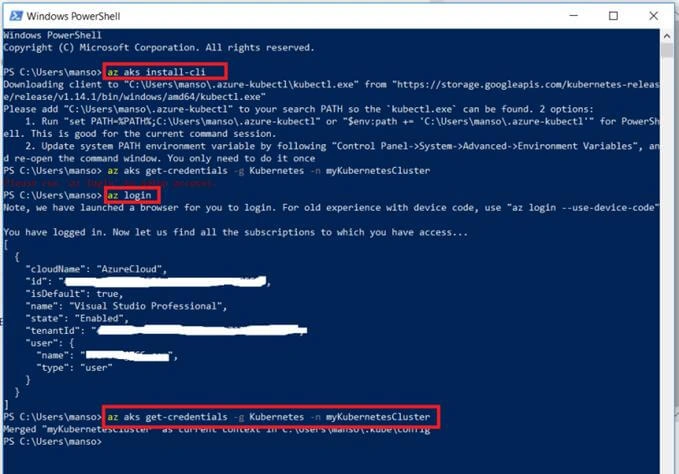
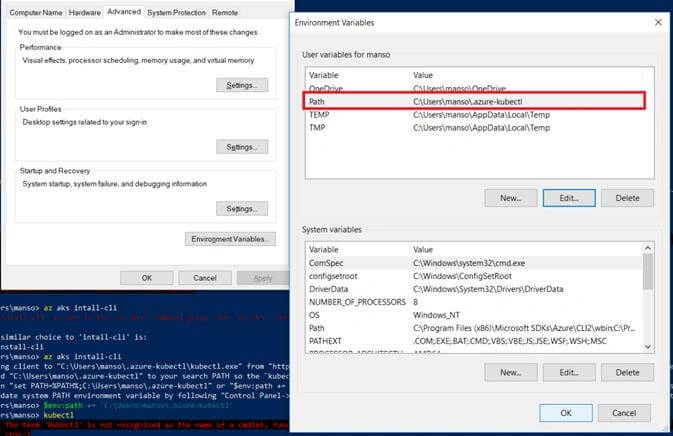
Before proceeding you will need to create a secret name as below,
- kubectl create secret docker-registry SECRET_NAME --docker-server=REGISTRY_NAME.azurecr.io --docker-username=USERNAME --docker-password=PASSWORD --docker-email=ANY_VALID_EMAIL

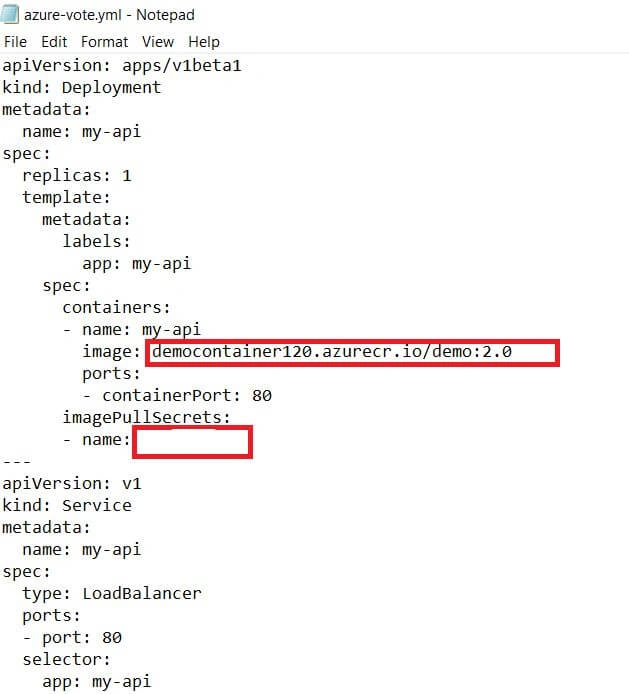
Create a yaml file as below. Enter your Azure container registry name & secret name as shown below in red rectangles.
- apiVersion: apps/v1beta1
- kind: Deployment
- metadata:
- name: my-api
- spec:
- replicas: 1
- template:
- metadata:
- labels:
- app: my-api
- spec:
- containers:
- - name: my-api
- image: democontainer120.azurecr.io/demo:2.0
- ports:
- - containerPort: 80
- imagePullSecrets:
- - name: [SECRET NAME]
- ---
- apiVersion: v1
- kind: Service
- metadata:
- name: my-api
- spec:
- type: LoadBalancer
- ports:
- - port: 80
- selector:
- app: my-api



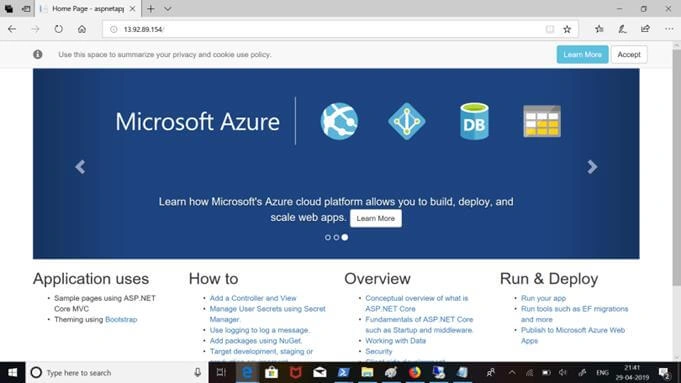
You can also autoscale your deployment using the below command.
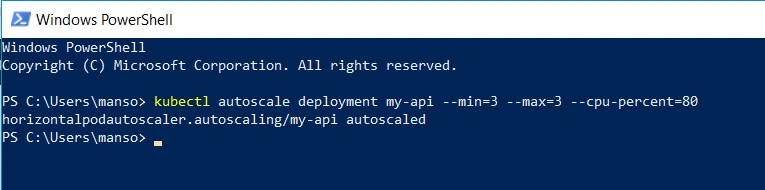

Now if you delete any one pod, you will find another instance opens up. That is the number of running pods, which is maintained at 3.
If you want to delete your pods and stop running your cluster, you need to delete your deployment as below,
- https://azure.microsoft.com/mediahandler/files/resourcefiles/kubernetes-learning-path/Kubernetes%20Learning%20Path%20v4.pdf
- https://docs.microsoft.com/en-us/azure/aks/kubernetes-walkthrough-portal
- https://kubernetes.io/
Happy learning!
This article was originally published on my website taagung.
Mahesh PullaguraPosted Dec 4, 2019, 9:07 AM
Nice article. Thank you for sharing information.
Sathesh RamanPosted Jun 6, 2019, 7:36 AM
Really Amazing Article for beginners .... Thank you