

Introduction
In this article we learn about how to set up a local environment for Azure Standard Logic App Development, Creating a new project for Azure Standard Logic App, Build and run using the local host server.
Pre-requisites
- Azure Subscription.
- Visual Studio Code
Download & Install Visual Studio Code.
Where to visit to install Visual Studio code?
Visit the official Visual Studio Code website and download the installer for your operating (Windows, macOS, or Linux). Once downloaded, run the installer and follow the on-screen instructions to complete the installation process.
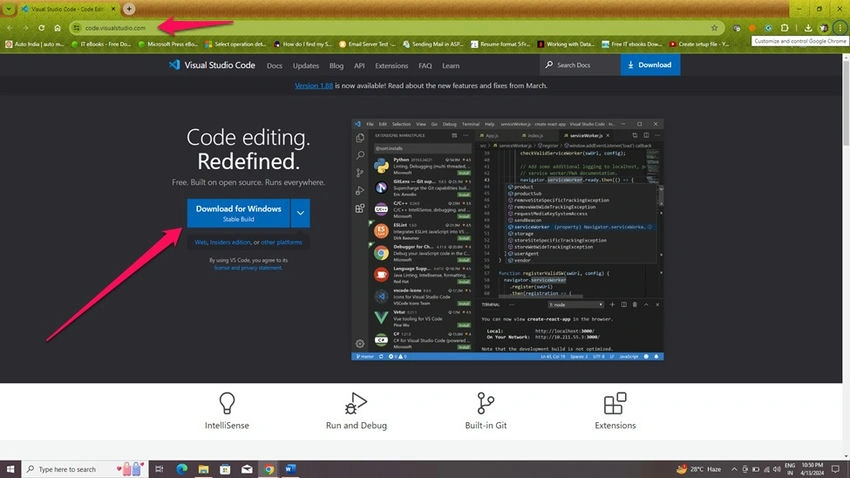
Step 1.Go tohttps://code.visualstudio.com/ website and select the Download for Windows download button for installer setup on my Windows machine.
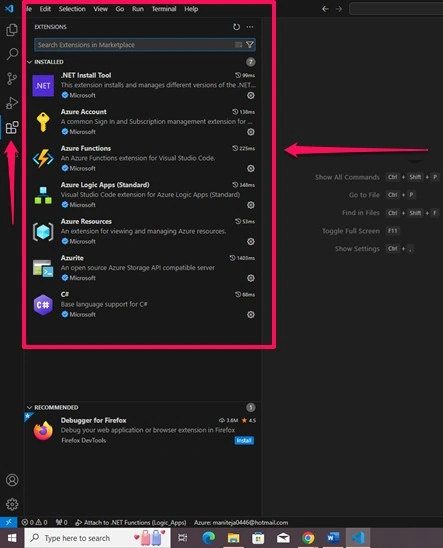
Step 2.Once the installer setup is completed, we need to click on the Extensions section which is left side of the window, and the below screenshot for quick reference.
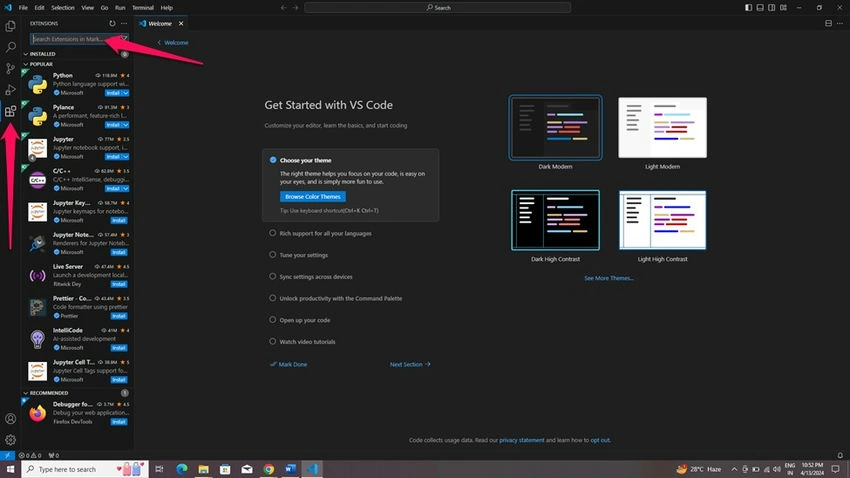
Now type Azure Standard Logic Apps in the extensions search bar to view the Azure standard logic app extension will be visible as shown below.
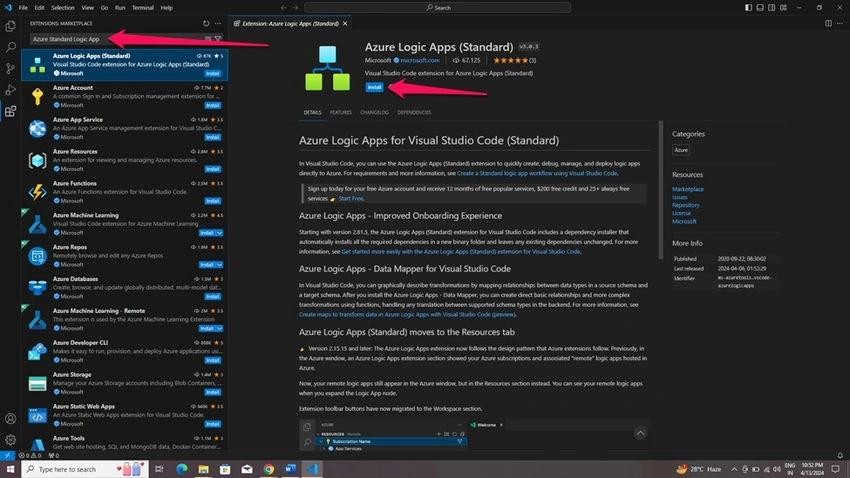
Step 3.Select the ‘Azure Logic Apps (Standard)’ extension and click on install button which is shown below, then automatically supported extensions also installed without any prompt.
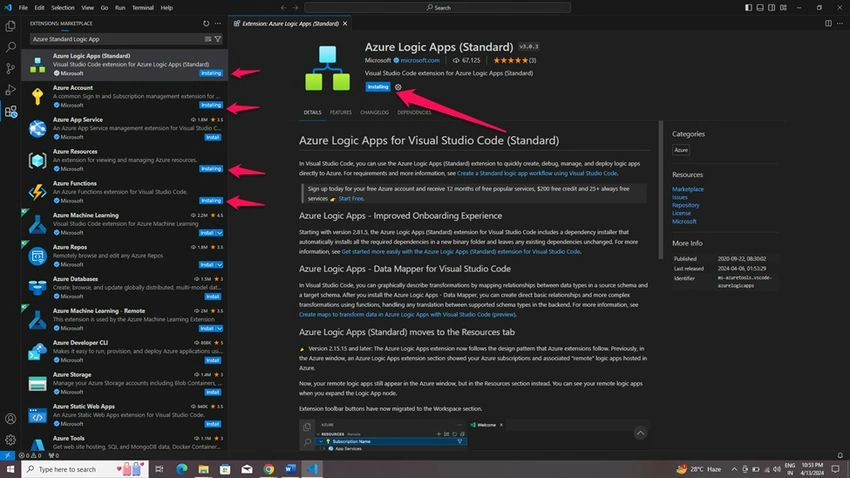
Step 4.If you select a single extension i.e., ‘Azure Logic Apps (Standard)’, then the rest of the required extensions will be installed without any user consent, so make sure when you’re downloading the right extension for your logic app development in the visual studio code.
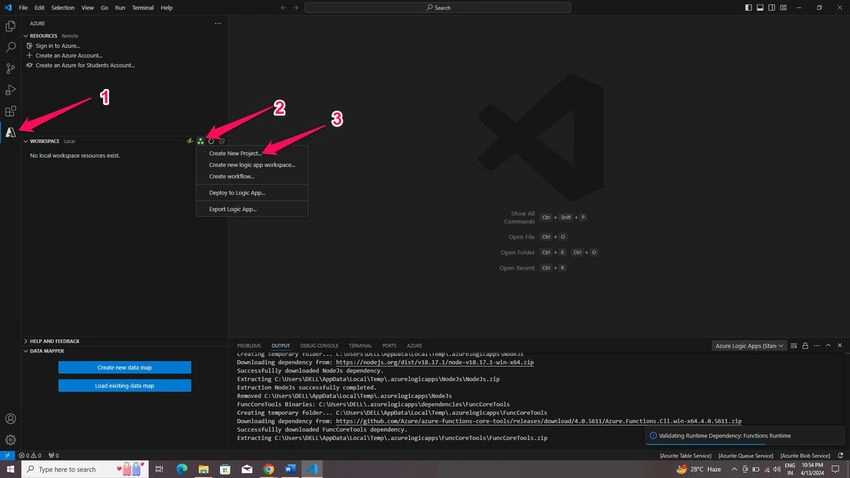
Now Azure Menu snippet will be visible as shown below, In the workspace section, thereis an Azure logic app symbol to create a new project or workspace or workflows or deploy logic app as shown in the below screenshot. Select Create a new project option to create a sample project for your development.
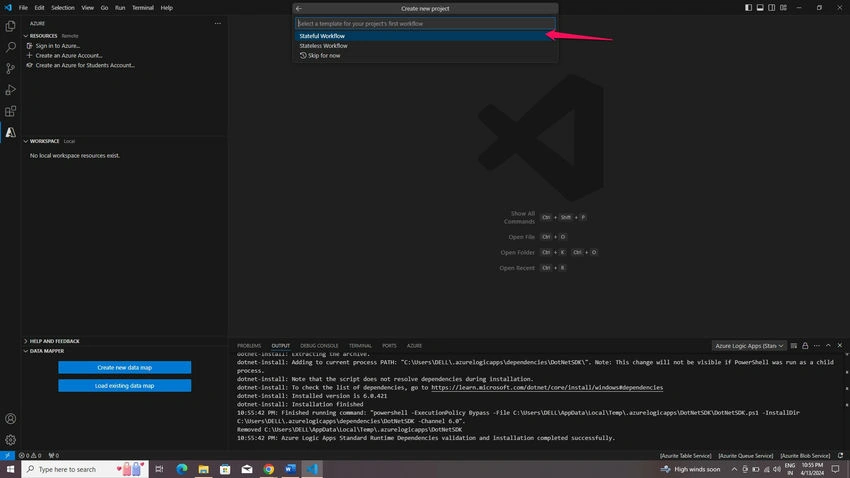
Select Stateful workflow for sample workflow creation and continue,
What is workflow?
Utilize this tool to outline the various stages of your business operations through an intuitive graphical interface. Visualize, design, build, automate and deploy business processes as a series of steps.
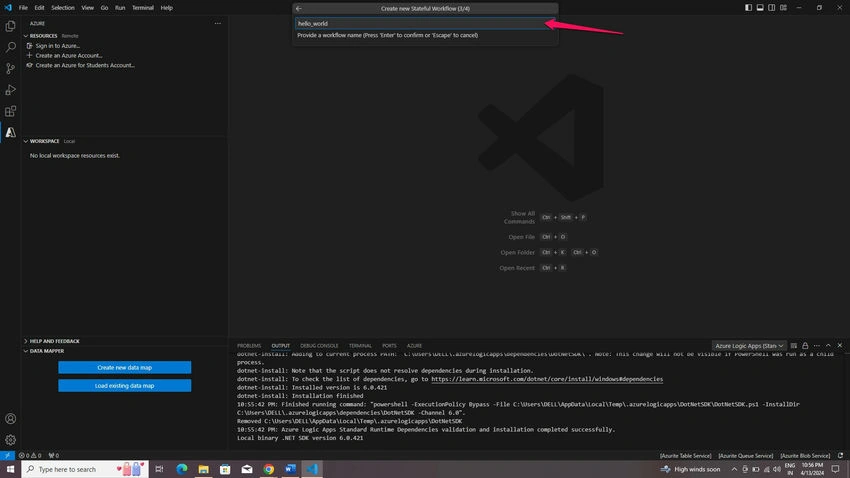
Now type workflow name as per your requirement and I entered as a hello_world for workflow name as shown below.
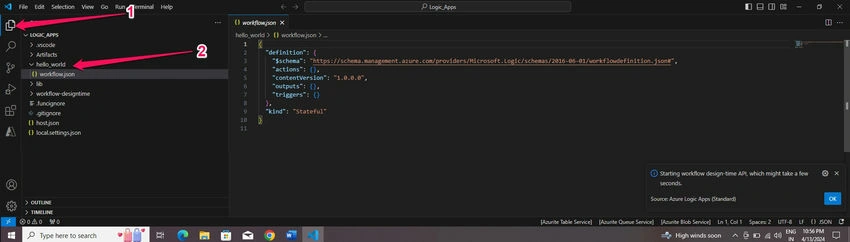
Now if you see below screenshot, Sample folder structure will be created along with workflow. Make sure below folders are created without any issues on the access level over your build machine(laptop).
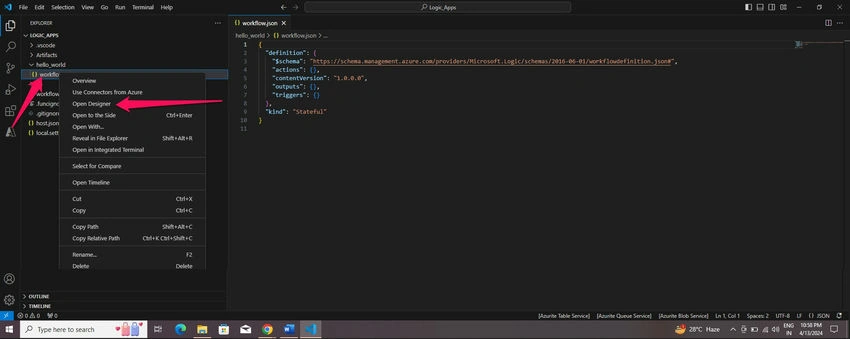
Now right-click on workflow.json and select the ‘Open Designer’ option to view the workflow designer and to support the workflow designer in your local machine there is a workflow-runtime folder that will help us to view all our workflows in the designer mode.
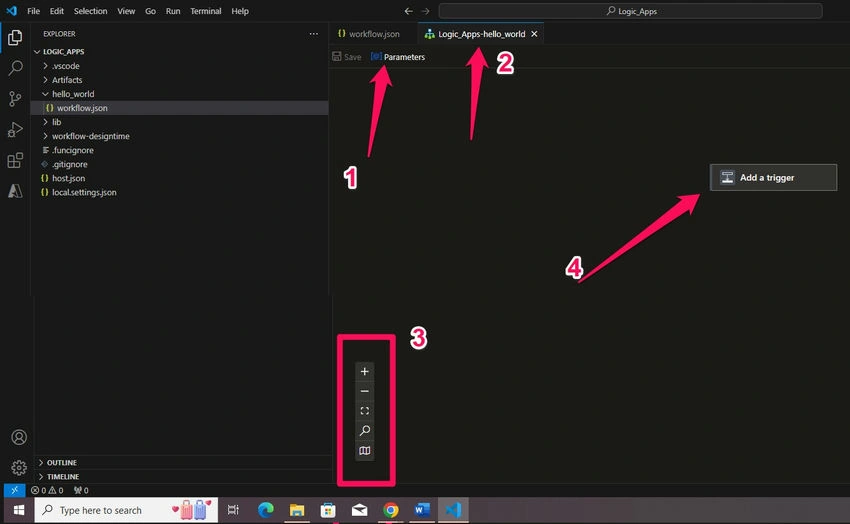
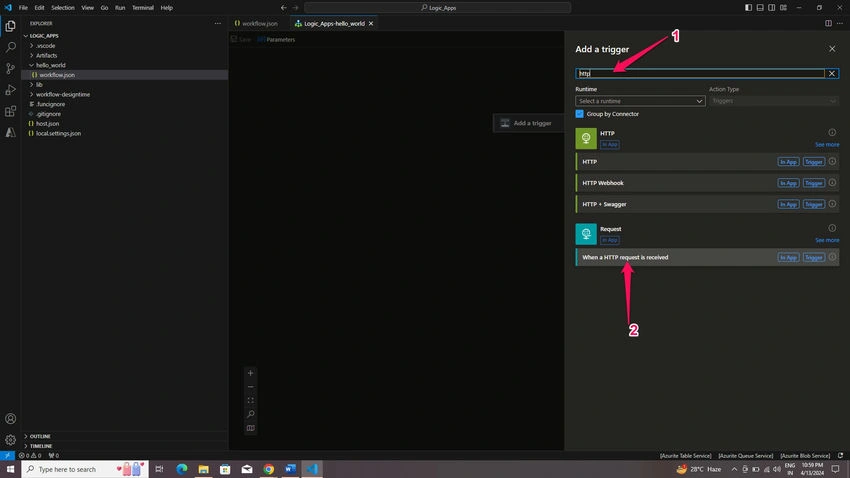
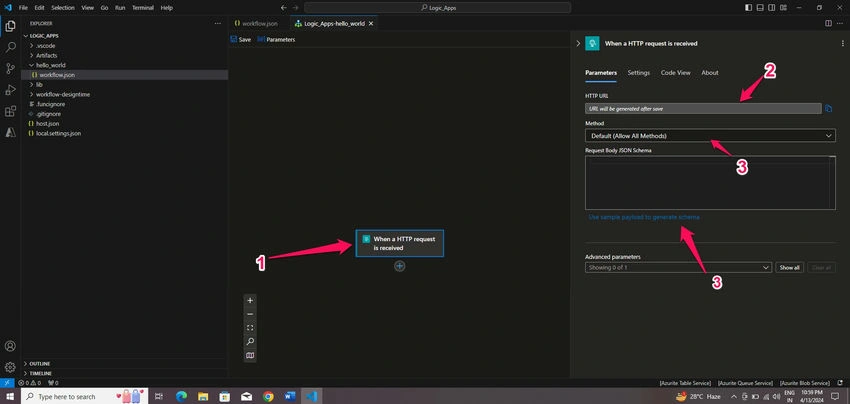
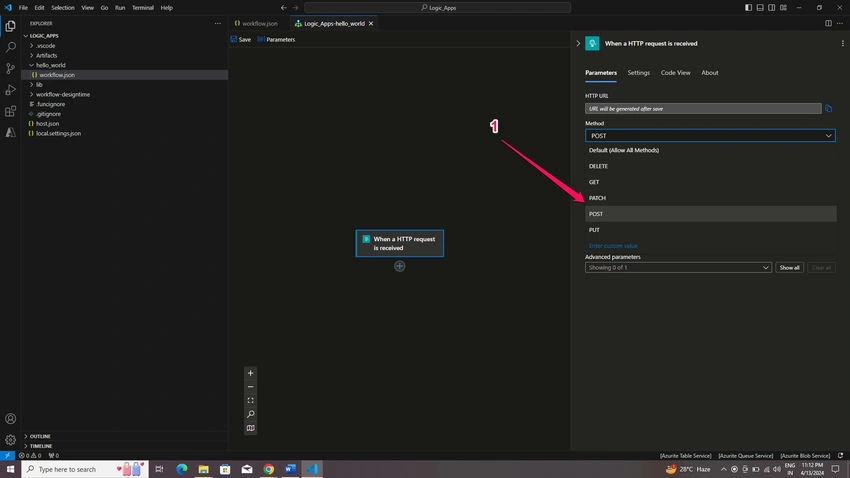
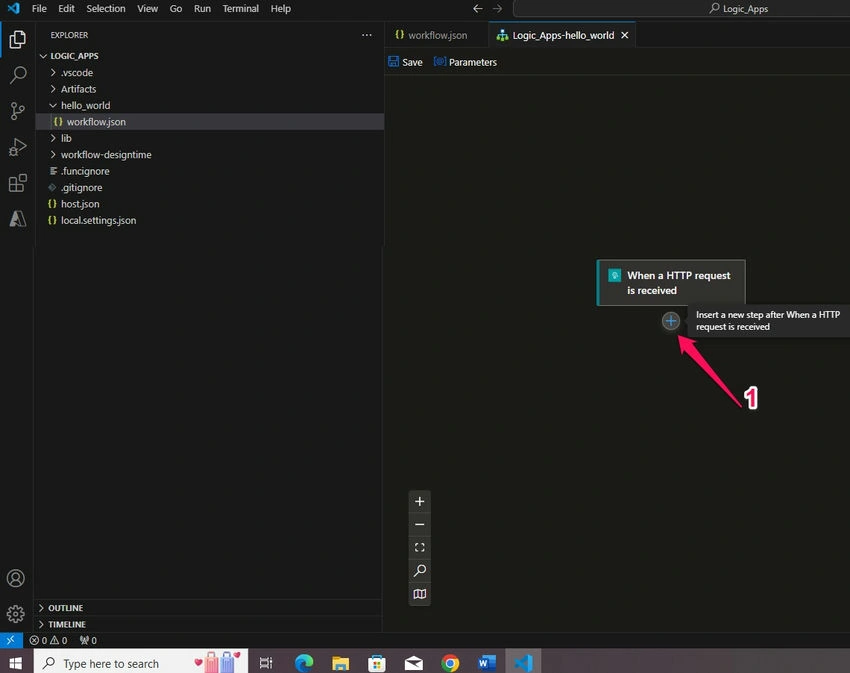
Now the empty designer view is opened as shown below, Click on the ‘Add a trigger’ option to add your workflow triggers.
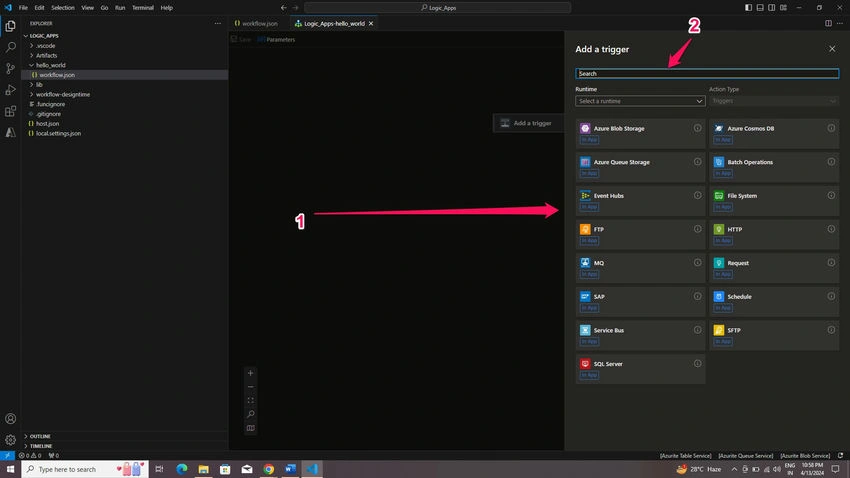
How many type of triggers are available in Azure Logic Apps (Standard) ?
- Poll triggers: These triggers are helps us to poll the service in specified frequency and all polling configuration needs to setup when we are choosing the poll service like SFTP file triggers, Blob triggers, SAP Message queue triggers, SQL table poll trigger etc.
- Push trigger: This will listen the data when a new event to happen or some another service will trigger this endpoint etc.
- Recurrence trigger: These triggers are act as schedulers, it will trigger or start process of your workflow on prescribed schedule.
Join the conversation! Your thoughts help the community grow.