

Introduction
Azure SQL database uses platform as a service, which is an intelligent, scalable, cloud database service that provides the broadest SQL Server engine compatibility. You can accelerate your on-premises SQL Server migrations without changing the application code with Managed Instance. Always have the latest SQL Server capabilities in the cloud with an evergreen SQL database that requires no patching or upgrading from you.
This article is divided into two parts, the first part is more about concepts and the second is hands on in Azure portal t0 create SQL database and using in .net applications with front end HTML.
Azure SQL Database
Azure SQL database is used as platform as a service but it can be used as infra as service if you plan to use SQL database using an Azure virtual machine. But you will still be responsible for managing the server, like backing the DB etc if you use it as Iaas.
In Pass, you don’t need to worry about maintenance and availably and security, that is managed by Azure, a managed service where Microsoft patches all security inside of it and keeps it up to date.
It has two purchasing models,
- vCore – pay money by total by number of cpu cores used.
- DTU – data base transaction unit, which measures based on the number of transactions done in the DB.
Azure SQL data has the following deployment options.
- Managed instance – server in which SQL DB can be deployed, does not mange server.
- Single DB – single SQL DB where you can go to store data, it comes with a logical server where managed instance comes with virtual network like VPN, gateway etc. managed by Azure.
- Elastic pol – it's suitable for storing data by the concept of auto scaling.
Choosing the right SQL option in Azure
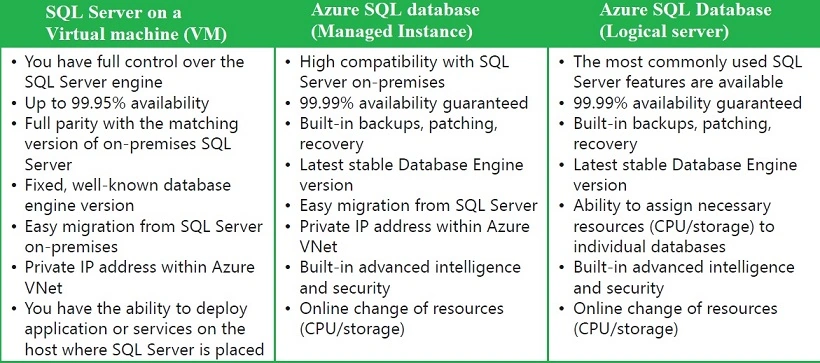
Access Azure SQL database using .net
This demo is about creating a SQL server Database and working with it using an application. The setup includes SQL server creation, configuring firewall, connecting to SQL database and inserting data to it.
Step 1
In the Azure portal, go to + Create a resource -> Database -> SQL Database.
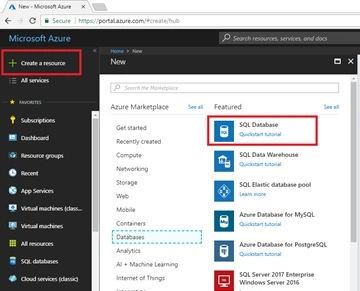
Step 2
Give a unique name and choose a subscription and a resource group. Let it be a blank database. Create a server with a name and username and password as denoted in the below given image and deploy the database.
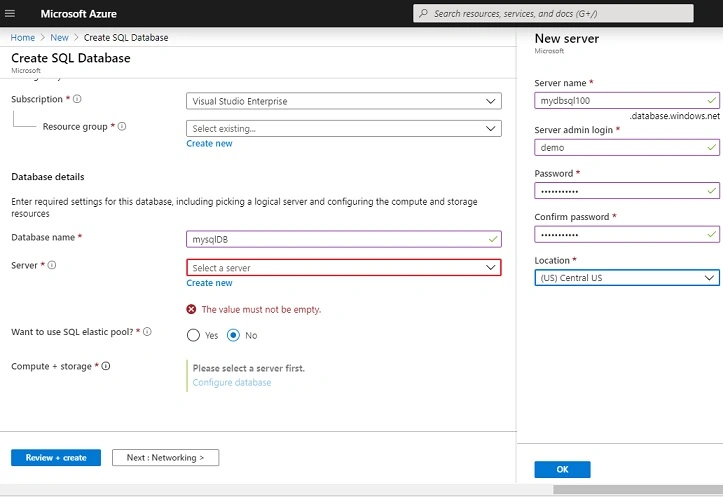
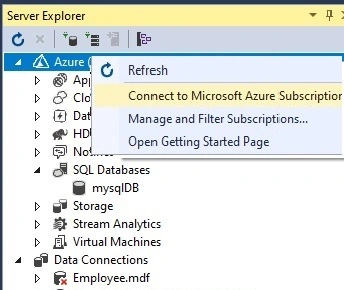
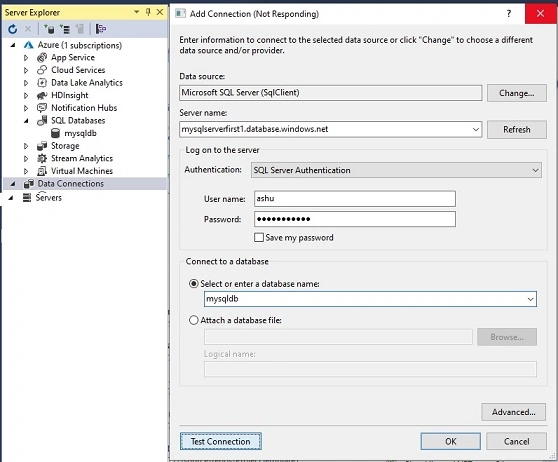
Change your DTU and vCore options by clicking on the "Configure database" option, once the DB is created, note the servername on overiview tab; i.e. mydbsql200.database.windows.net in my case. That will be used later to connect this Azure DB from Visual Studio.
Step 3
Configuring Firewall, in the overview bladed of the database, click on the set server firewall option to configure access to the server.
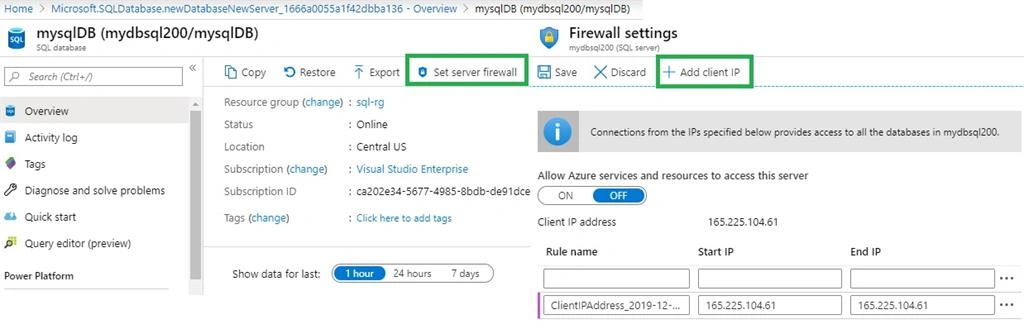
After that click on the + Add client IP option to add your machine's IP to have access to the server. If in case you want to allow access for an entire organization, you can manually add the IP ranges as allowed in the address in the option denoted below. After adding the IP, click on save button. Do not forget to switch on "allow azure services and resources"
Koshila SenadhiraPosted Nov 30, 2022, 6:53 AM
Interesting Article!
Onkar SharmaPosted Jul 7, 2020, 1:30 PM
Nice one...
Chittaranjan SwainPosted Dec 11, 2019, 11:24 PM
Nice article
AnandPosted Dec 10, 2019, 11:12 AM
Useful article.
Sourav Kumar DasPosted Dec 9, 2019, 10:48 PM
Nice useful article.