

Azure Traffic Manager
- Azure Traffic Manager is a DNS-based traffic load balancer and distributes traffic to public-facing applications across the global Azure regions.
- Traffic Manager uses DNS to direct client requests to the most appropriate service endpoint based on a traffic-routing method and the health of the endpoints.
- An endpoint is any Internet-facing service hosted inside or outside of Azure. It provides a range of traffic-routing methods and endpoint monitoring options to suit different application needs and automatic failover models.
- Traffic Manager is not a region-based resource.
- The following traffic routing methods are available in the Traffic Manager,
- Priority - If you select “Priority” then, primary service endpoint will be used for all traffic, and provide backups in case the primary or the backup endpoints are unavailable.
- Weighted - If you want to distribute traffic across a set of endpoints then Select “Weighted”. The traffic will be distributed either evenly or according to weights defined in the endpoints.
- Performance - If you select “Performance” then the "closest" endpoint (in terms of the lowest network latency) will be used. If you have endpoints in different geographic locations then you can opt for this routing method.
- Geographic - If a region or a set of regions is assigned to an endpoint then users are directed to specific endpoints based on which geographic location their DNS query originates from.
- Multivalue - If you only have IPv4/IPv6 addresses as endpoints then select “MultiValue” for Traffic Manager profiles. When a request is received for this profile, all healthy endpoints are returned.
- Subnet - Select the Subnet routing method to map sets of end-user IP address ranges to a specific endpoint. When a request is received, the endpoint is based on mapped the request’s source IP address.
How Traffic Manager works
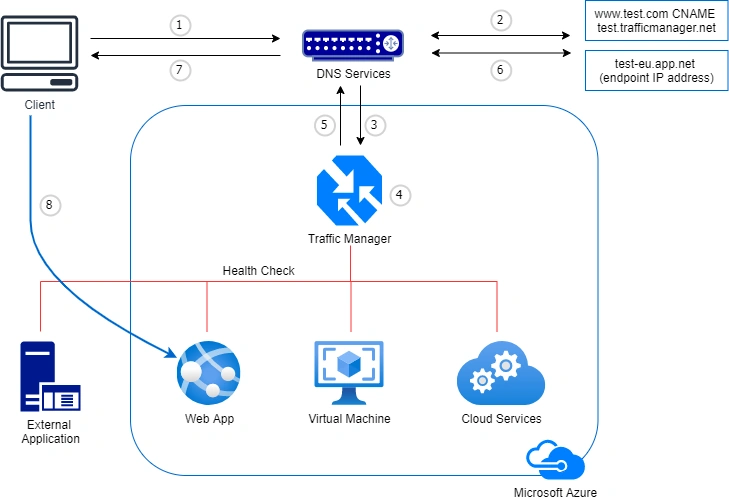
- The client sends a DNS query to its configured DNS service to resolve the name www.test.com.
- To resolve the DNS name, the DNS service finds the name servers for the test.com domain. The test.com DNS servers return the CNAME record that points to test.trafficmanager.net.
- DNS service finds the name servers for the trafficmanager.net domain, which are provided by the Azure Traffic Manager service. It then sends a request for the test.trafficmanager.net DNS record to those DNS servers.
- The Traffic Manager name servers receive the request. The traffic manager returns an endpoint based on,
- The configured state of each endpoint (disabled endpoints are not returned)
- The current health of each endpoint, as determined by the Traffic Manager health checks.
- The chosen traffic-routing method
- The chosen endpoint is returned as another DNS CNAME record. For example, test-eu.app.net is returned.
- The DNS service finds the name servers for the app.net domain. It contacts those name servers to request the test-eu.app.net DNS record. A DNS 'A' record containing the IP address of the EU-based service endpoint is returned.
- The DNS service consolidates the results and returns a single DNS response to the client.
- The client receives the DNS results and connects to the given IP address. The client connects to the application service endpoint directly, not through Traffic Manager. Since it is an HTTPS endpoint, the client performs the necessary SSL/TLS handshake, and then makes a request for the page.
Demo
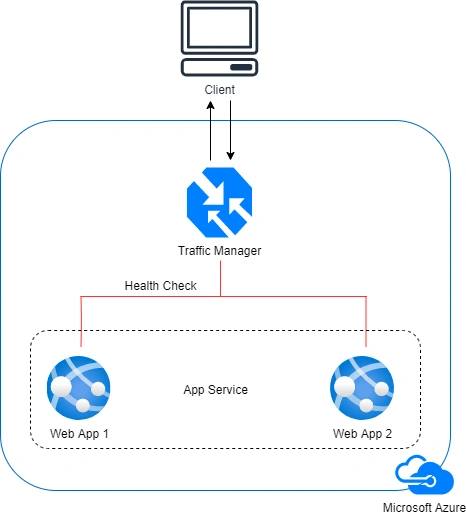
- We are going to create two Web apps (one web app in the South India region and another web app in the West Europe region) for demo purposes inside the App service in azure. These Web apps have just static web pages.
- Create Traffic Manager Profile with routing method is "Performance".
- Attach the above two web apps endpoint to traffic manager profile.
- Hit the Traffic Manager Profile URL and check how it behaves.
Here we are configuring the below resources for demo purposes.
- App Services (Web Apps)
- Traffic Manager
Create Web Apps
Step 1
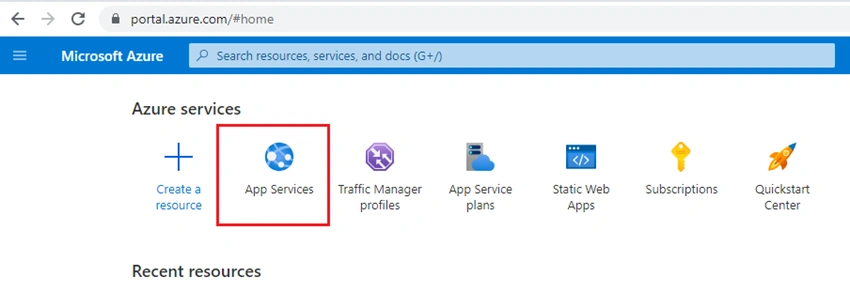
Select “App Services” on Home Page or Select "Create Resource" and select “App Services”.
Step 2
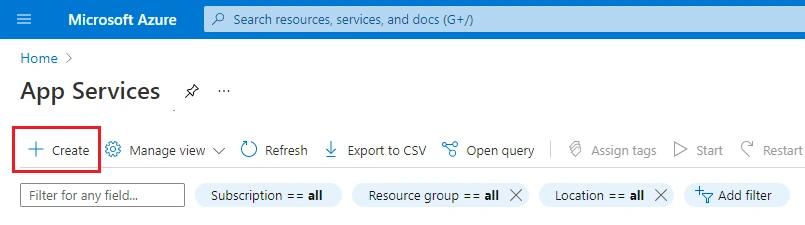
Once navigated to the "App Services" page, click the "Add" button.
Step 3
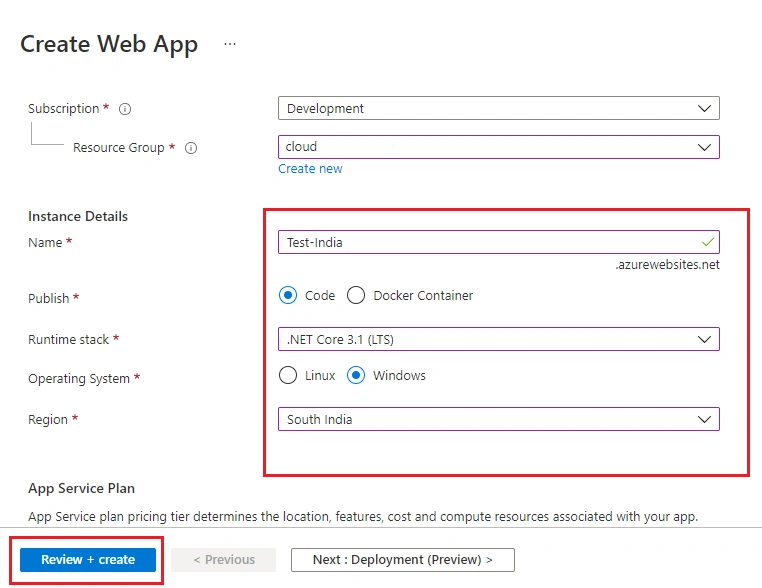
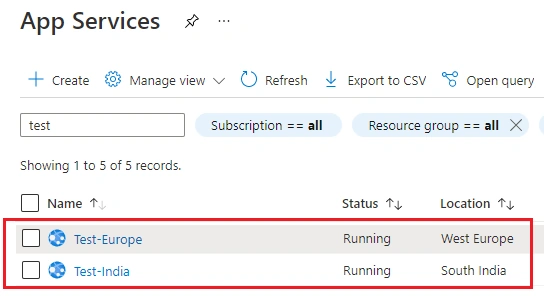
The “Create Web App” page will open and enter the values. For Resource Group select the existing resource group or if you want to create a new one-click the "Create new" link below the dropdown. I have selected the existing Resource group and the Web App name is "Test-India", the region is "South India" and App Service Plan is “Standard Service Plan(S1)” and click the "Review + Create" button.
Note
Traffic Manager works with Web Apps with minimum App Service Plan is “Standard Service Plan(S1)”.
Please check the app service plans in the link.
Step 4
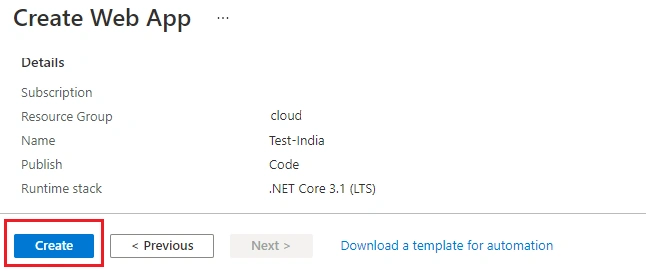
Review the data which you enter and click the "Create" button.
Step 5
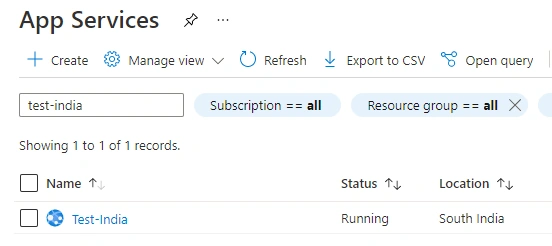
The “Test-India” web app has been created. You can see it under the “App Services” Page.
Step 6
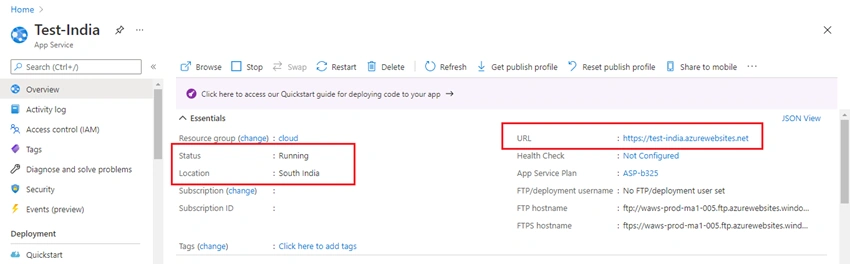
Click the “Test-India“ and the corresponding web app page will open. The URL is the actual URL where the web app has been hosted.
Step 7
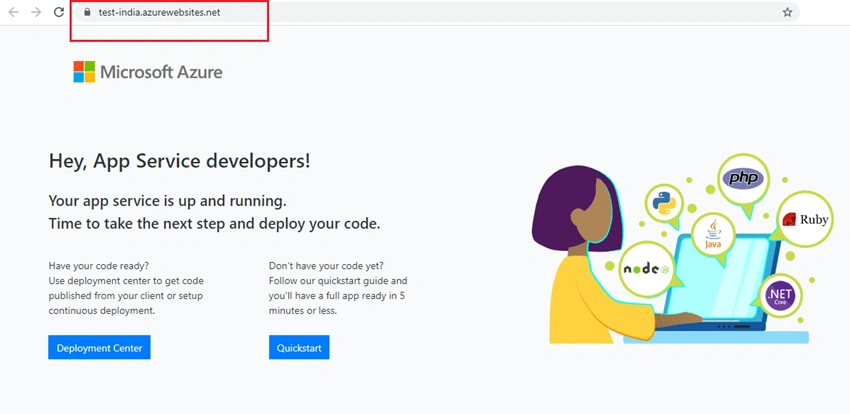
If you click the above URL then the web application will open. It has a simple default HTML page as below.
Step 8
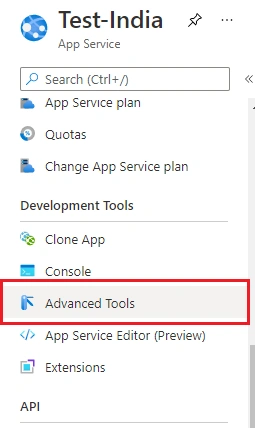
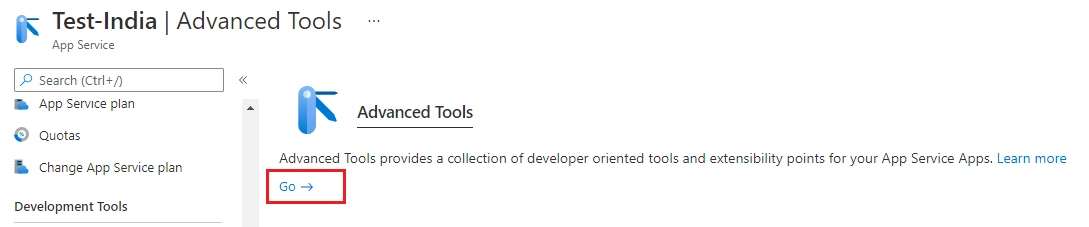
To make differentiate two web apps, we are going to edit the HTML page. Click the "Advanced Tools" menu in the left panel and click the "Go" link on the "Advanced Tools" page.
Step 9
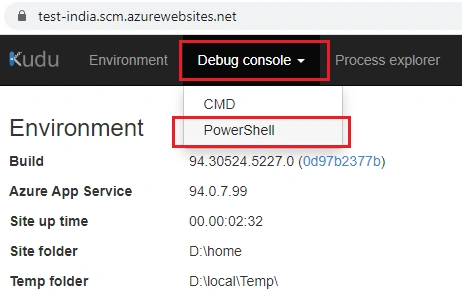
The below page will be open. Instead of the above step, you can open this page by appending the ".scm" in the Web App URL (before .azurewebsites.net).
For example, here Web app URL is https://test-india.azurewebsites.net so the Advanced Tools URL will be https://test-india.scm.azurewebsites.net ,
On this page, navigate to Debug console -> PowerShell.
Step 10
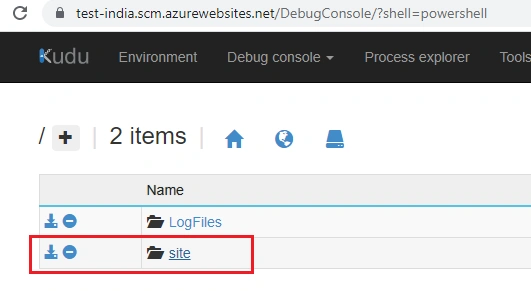
The below page will open. Click the “site” folder.
Step 11
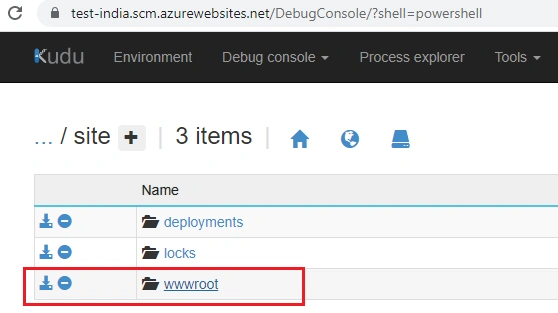
The below page will open. Click “wwwroot” folder.
Step 12
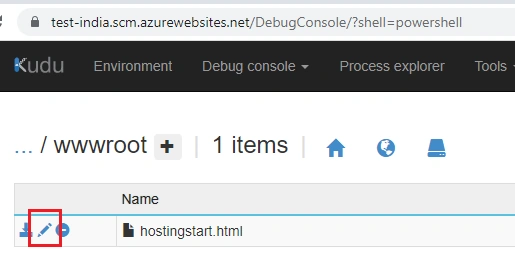
You can see the “hostingstart.html” file. We are going to edit this HTML file. Click the “Edit” button (“Pencil” icon) on left.
Step 13
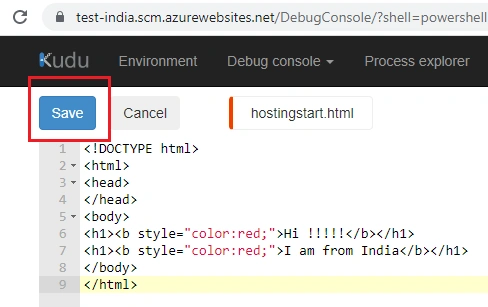
The “hostingstart.html” file will open. It has simple HTML code. Just replace with the below code in the file and click the “Save” button.
<!DOCTYPE html>
    <html>
        <head>
        </head>
     <body>
         <h1><b style="color:red;">Hi !!!!!</b></h1>
         <h1><b style="color:red;">I am from India</b></h1>
     </body>
</html>
Step 14
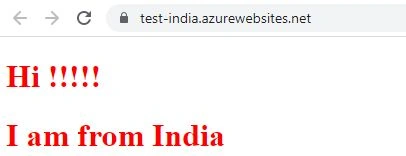
Now open the “Test-India” web app URL (https://test-india.azurewebsites.net). You can see the below-modified content.
Step 15
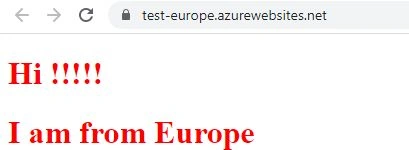
Same as above, create another Web App called “Test-Europe” where the region is “West Europe”. Modify the “Test-Europe” HTML file with the below code and check the URL. You can see the below page.
<!DOCTYPE html>
    <html>
        <head>
        </head>
    <body>
        <h1><b style="color:red;">Hi !!!!!</b></h1>
        <h1><b style="color:red;">I am from Europe</b></h1>
    </body>
</html>
Create Traffic Manager Profile
Step 1
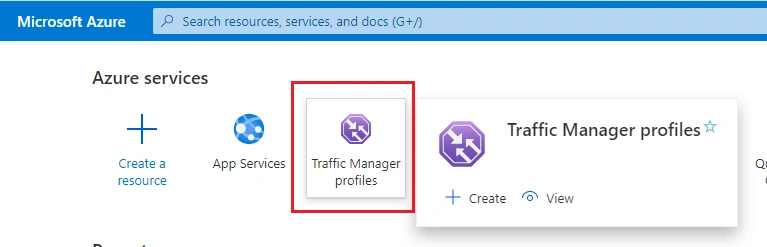
Click the “Traffic Manager profiles” on Home Page or Select "Create Resource" and select “Traffic Manage profiles”.
Step 2
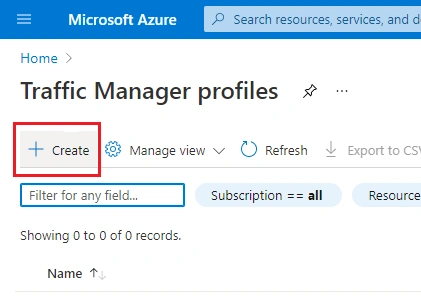
Click the “Create” button on the “Traffic Manager profiles” page.
Step 3
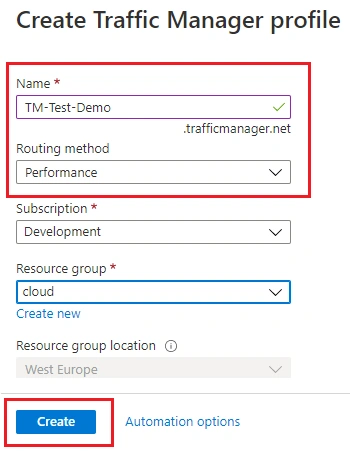
Enter the values. Here I have given the Routing method is “Performance” and click the “Create” button.
Step 4
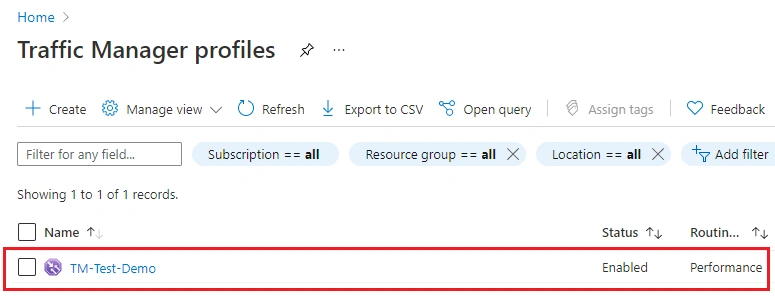
The “TM-Test-Demo” Traffic Manager profile has been created. You can see this on the “Traffic Manager profiles” Page.
Step 5
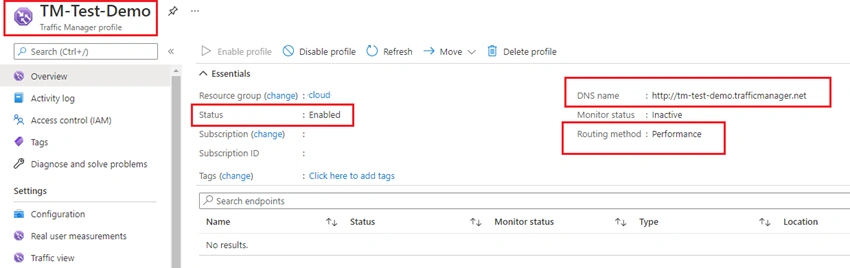
Click the “TM-Test-Demo” and the corresponding traffic manager page will open. In the below, the Routing method is "Performance" and the DNS name is the URL(http://tm-test-demo.trafficmanager.net/) of the Traffic manager.
Step 6
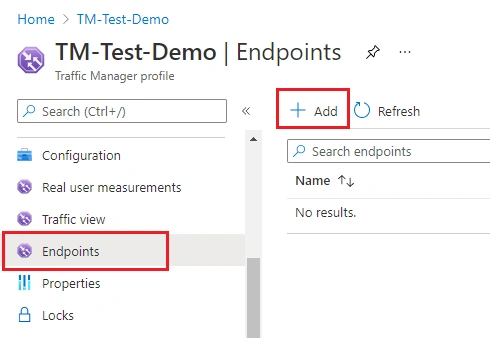
Click the "Endpoints" in the left panel and click "Add" but to add an endpoint to the traffic manager.
Step 7
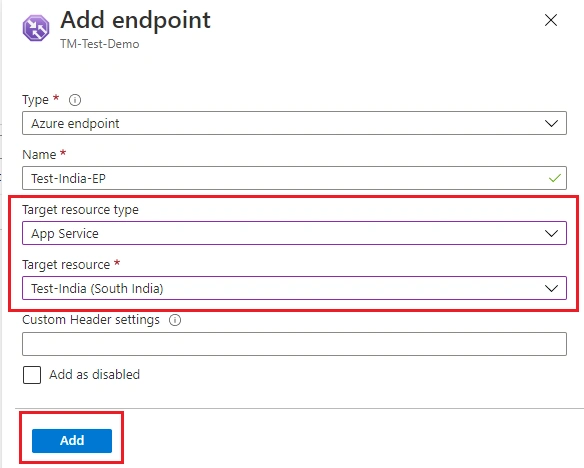
Select the values. Here Type is “Azure endpoint”, the target resource type is “App service” and select target resource "Test-India" (First Web App) and click "Add".
Step 8
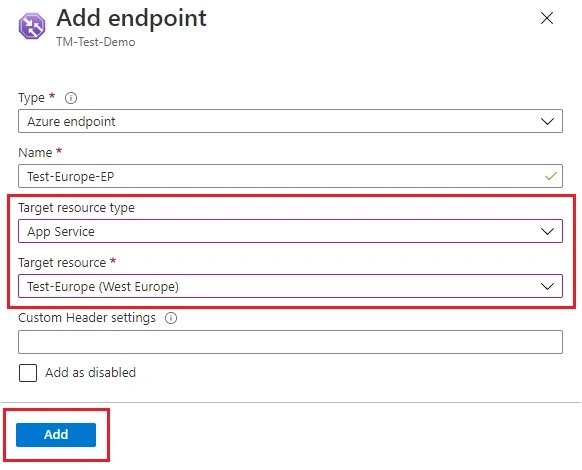
Same as above, Add another Web App ("Test-Europe").
Step 9
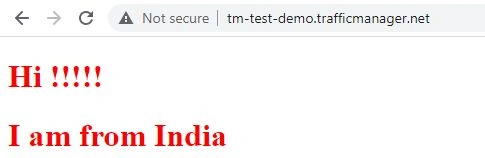
Hit the Traffic Manager URL (DNS Name - http://tm-test-demo.trafficmanager.net/). Here, I am from India. The Traffic Manager routing method is "Performance"(It picks the endpoint with low latency). So "Test-India" Web App endpoint has been picked by Traffic Manager and the corresponding web page has been rendered.
Step 10
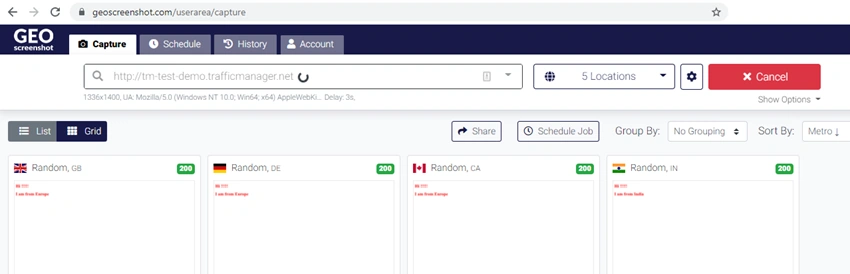
For Testing with different regions, I have used "https://www.geoscreenshot.com/". GeoScreenshot lets capture webpage from different geographic locations. Here, entered the Traffic Manager URL and selected the random locations, and clicked the "Capture" button. You can see the web page, from different locations. Here the locations are India (IN), Canada (CA), United Kingdom (GB), Germany (DE). The different locations have different web apps because the traffic manager returns the endpoint based on the source location(which has less latency).
Step 11
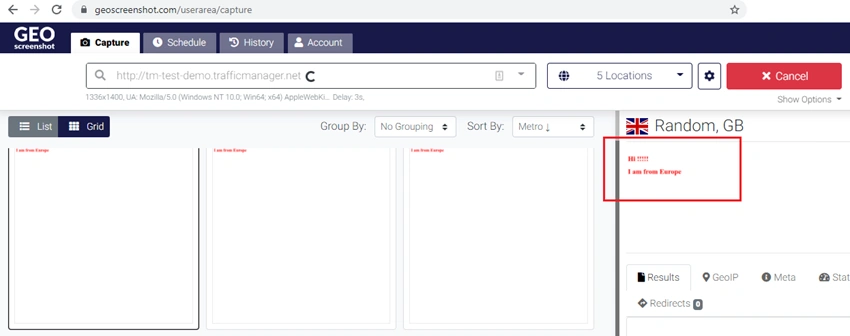
For Canada (CA), United Kingdom (GB), Germany (DE), the Traffic manager returns the “Test-Europe” Web app endpoint.
Step 12
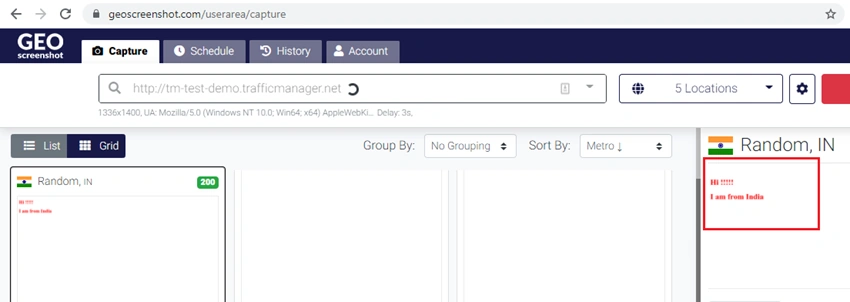
For India (IN), the Traffic manager returns the “Test-India" Web app endpoint.
This is how the traffic manager has returned the endpoints based on the routing method. You can try with different routing methods the same as the above steps and check how traffic manager works.
In real-time, users won't hit the traffic manager URL directly. Traffic manager URL will be added in the DNS service(Please see How Traffic Manager works diagram in above).
I hope you liked the article and know the basic knowledge about Azure Traffic Manager. If you have any doubts or comments about this, please let me know in the comments.
Keep Learning!!!! Happy Coding!!!!
Join the conversation! Your thoughts help the community grow.