

Introduction
One of the main advantages of mobile development is the use of technologies that allow us to create native applications to use most of the technical capabilities of the operating system. For this, Android Studio offers a great tool for the construction of Android UI, such as Constraint Layout. On the other way, Microsoft has one of the most popular and modern programming languages currently, C #, and with the fantastic tool of Xamarin Android, so we can build native applications that use Android UI in Android Studio, coding in C # with Visual Studio.
The example shows to build a simple UI in Android Studio and coding in C # using Visual Studio. The application that downloads an image from the Internet, and displays it on the Android screen.
Requirements
- Android Studio 3 with Android SDK 6 or higher.
- Visual Studio 2017 with Xamarin.
Code
https://github.com/enriqueaguilarvargas/xamarinandroidconstraints
Step 1 - Create the App in Android Studio
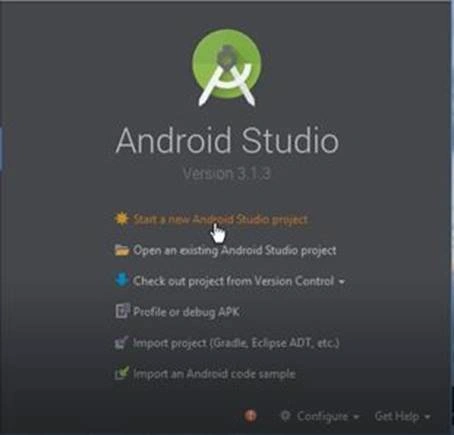
Open Android Studio and Start a new Android Studio Project,
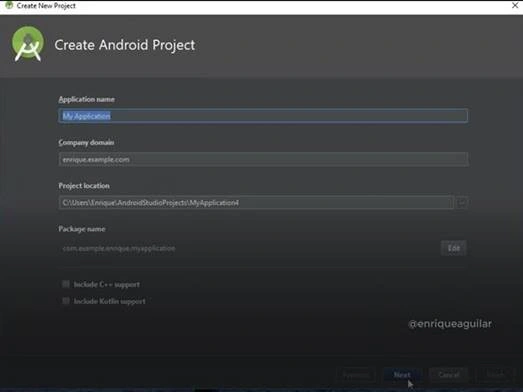
Put the name and the path project,
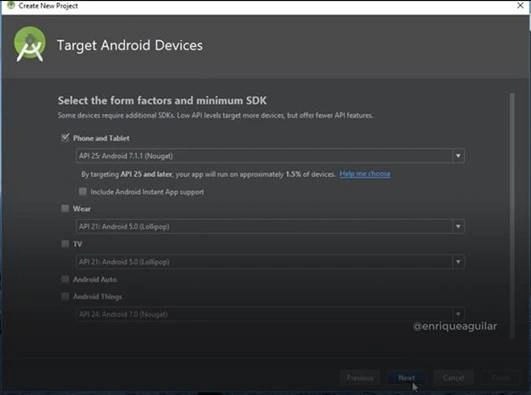
Select SDK installed
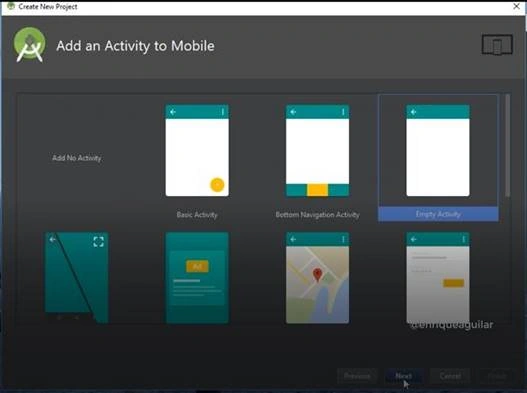
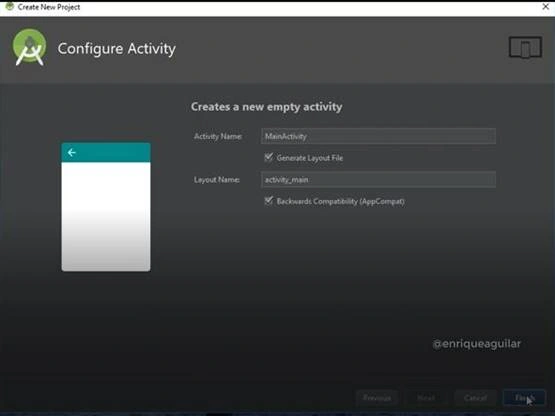
Select Empty Activity and next
Click in finish button
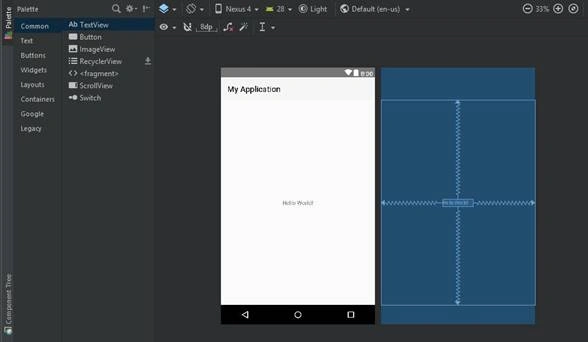
You will see a text "Hello World" appears centered and with a screen on the right side with the UI Constraints.
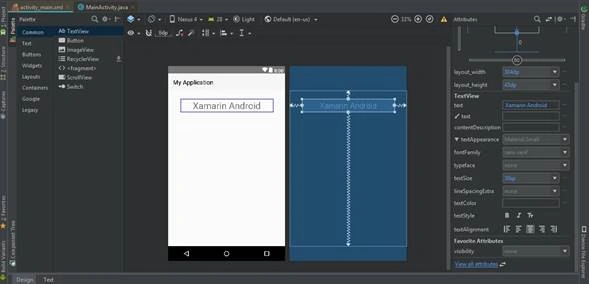
Move the text to the top and in the attributes panel (right) and change the text “Hello World” to "Xamarin Android". Additional can increase the size of the font.
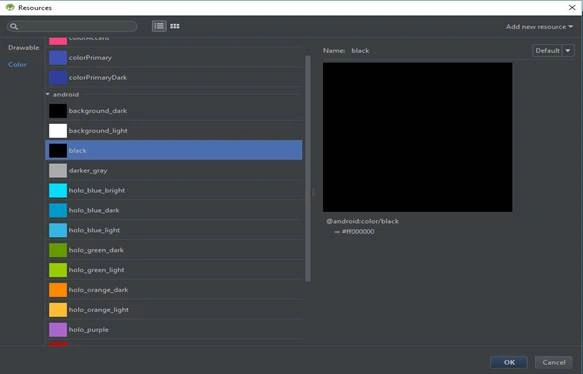
In the palette panel (left) select the component "ImageView" and put it on the screen, appearing a window, and select "color” and “black", and click in “Ok”.
In the attributes panel, add the ID as "imageView".
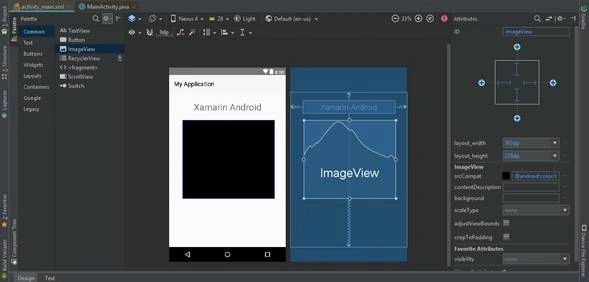
Now add a button, below the image and put the ID "btndownload".
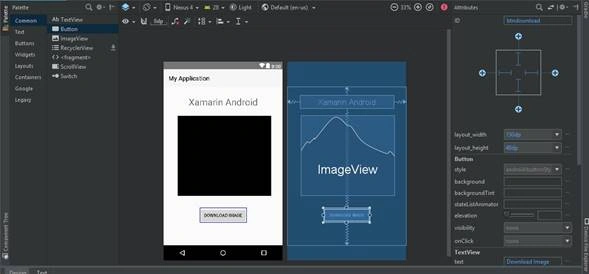
Select the title, you will see points around with the constraints by default.
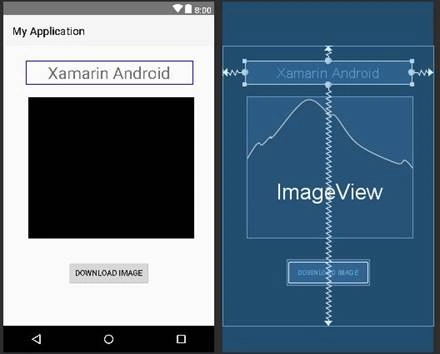
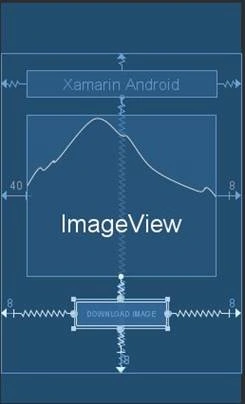
In the image, select the point that is in the upper central and drag it to the text of the upper (title) until the connection symbol appears. Now select the center points of the sides and drag them to the limits of the interface, both on the right and left sides. Finally, take the center point of the bottom and drag it to the bottom of the screen. Remaining as follows,
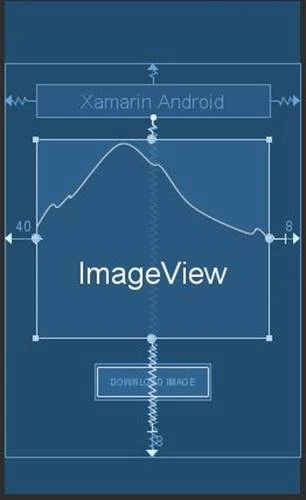
Do the same process with the button.
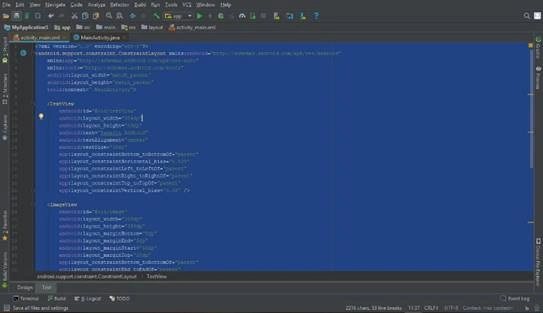
Once finished, save and go to the "text" area of the screen, to go to the XML coding of the interface. There we copy all the code to the clipboard. This code will copy in Visual Studio later.
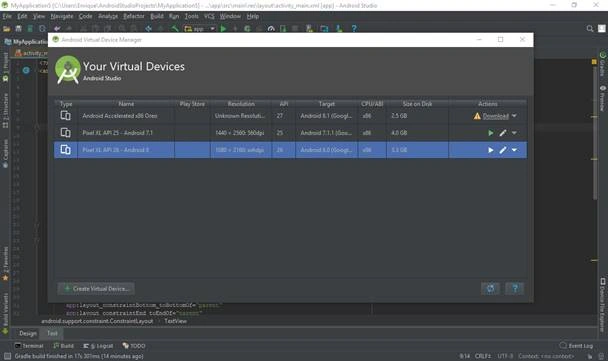
Now, select from the "Tools - AVD Manager" menu, and select the emulator that you will use. (You can also use your physical device, just check the resolution, is the same one you are using in the design).
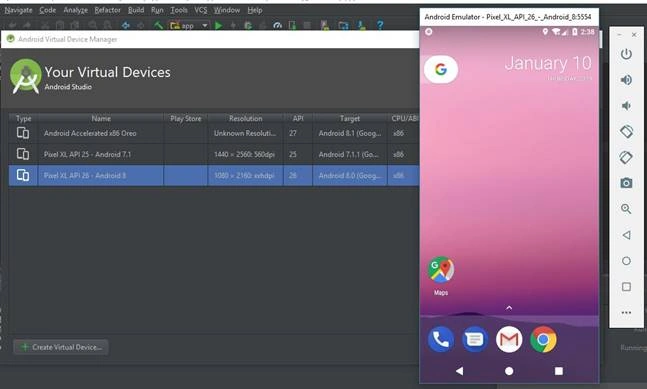
Click on play, your Android simulator will appear.
Step 2 - Create the App in Visual Studio
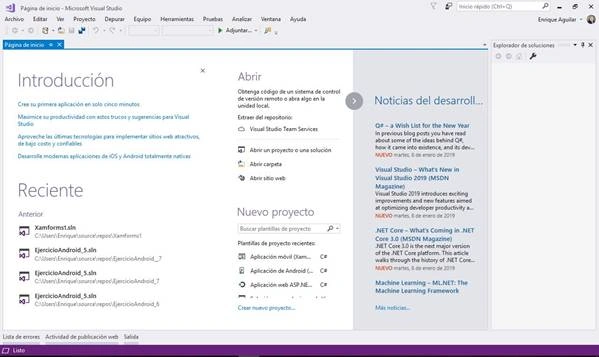
Open Visual Studio and Start a new Xamarin Android Project
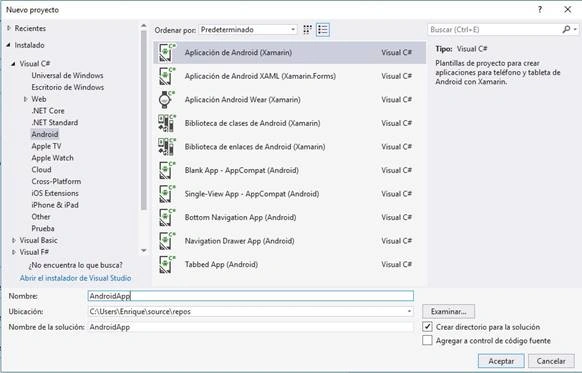
Put the project name and path
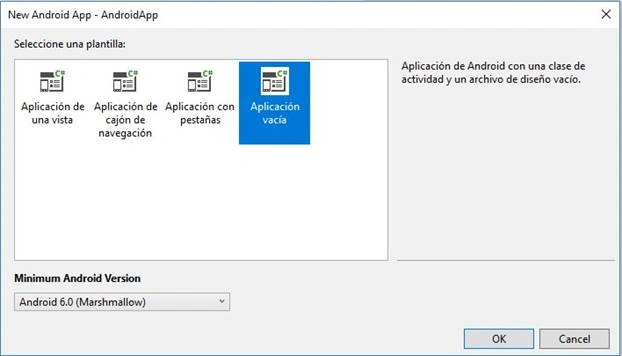
Select Empty App and click in “OK”
The following screen will appear,
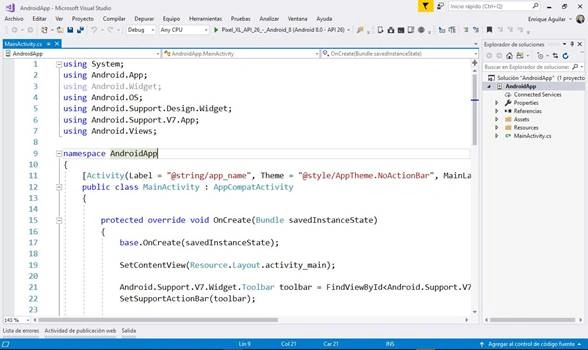
In the name of the project, in the solution explorer, click with the right mouse button and select "Manage Nuget Packages". There you write “Xamarin Android Constraint Layout” and browse, and click on the install button.
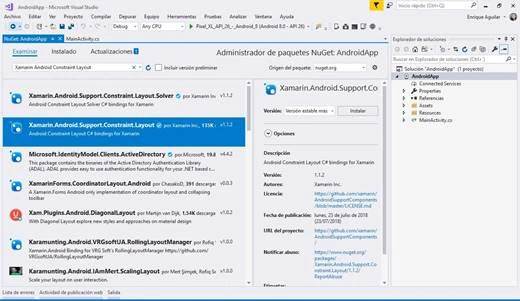
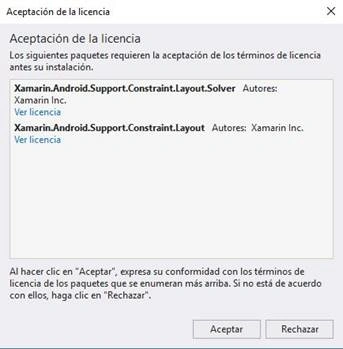
Accept the license,
Wait a moment for the packages to be downloaded, usually in about 5 seconds or less.

In the solution explorer, click in the folder "Resources" and "Layout", there is our file "activity_main.axml",
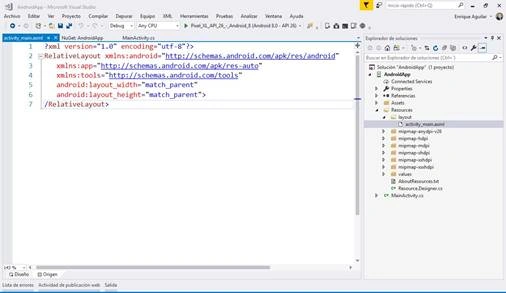
Put the Android Studio XML code in this area (copy and paste), save and compile the solution.
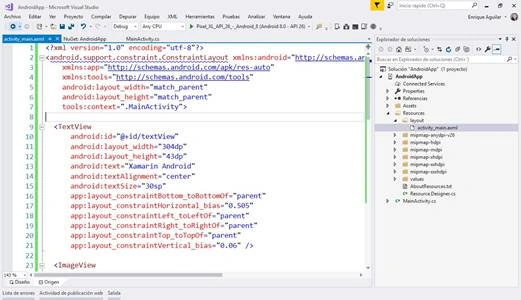
Now, click on the Run, verifying that our emulator appears at the top, being recognized by Visual Studio. Be patient the first time,
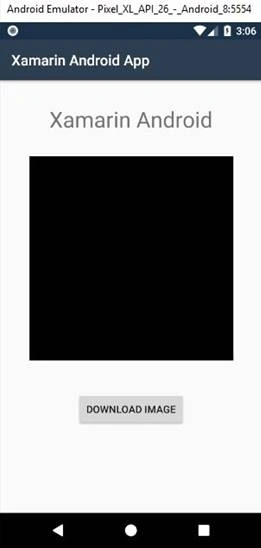
With the UI Android works correctly, so now we start the coding.
- using Android. App;
- using Android.OS;
- using Android.Support.V7.App;
- using Android. Widget;
- using System;
- using System.IO;
- using System.Net;
- using System.Threading.Tasks;
Now, declare two variables below the public class called “BtdDownload” and “Image”:
- amespace AndroidApp
- {
- [Activity(Label = "Xamarin Android App", Theme = "@style/AppTheme", MainLauncher = true)]
- public class MainActivity : AppCompatActivity
- {
- Button BtnDownload;
- ImageView Image;
- protected override void OnCreate(Bundle savedInstanceState)
- {
- base.OnCreate(savedInstanceState);
- // Set our view from the "main" layout resource
- SetContentView(Resource.Layout.activity_main);
Create the "DownloadImage" method that will allow asynchronously to download an image in an array of bytes "imageData", then will generate the path "documentspath" and the name of the file "localfilename" where it will be saved in our device, then will join the name and the path in "localpath", that allows us to create the file with the command "File.WriteAllBytes", it will combine the name and the route with the byte array, which will allow the storage in Android of the image that was downloaded.
- public async Task<string> DownloadImage()
- {
- var client = new WebClient();
- byte[] imageData = await client.DownloadDataTaskAsync
- ("https://pbs.twimg.com/media/DZt_rBAVAAAtNWe.jpg");
- var documentspath = System.Environment.GetFolderPath
- (System.Environment.SpecialFolder.Personal);
- var localfilename = "mydog.jpg";
- var localpath = Path.Combine(documentspath, localfilename);
- File.WriteAllBytes(localpath, imageData);
- return localpath;
- }
- }
Now generate a method to put the image in the ImageView of the interface. First, receive the route of the image saved in Android, later generate an image route and place it in "Image":
- async void PutImage(object sender, EventArgs e)
- {
- var path = await DownloadImage();
- Android.Net.Uri ImagePath = Android.Net.Uri.Parse
- (path);
- Image.SetImageURI(ImagePath);
- }
Finally, code the call to the “PutImage” method from the button:
- BtnDownload.Click += PutImage;
And Done, the code should be as follows,
- sing Android.App;
- using Android.OS;
- using Android.Support.V7.App;
- using Android.Widget;
- using System;
- using System.IO;
- using System.Net;
- using System.Threading.Tasks;
- namespace AndroidApp
- {
- [Activity(Label = "Xamarin Android App", Theme = "@style/AppTheme", MainLauncher = true)]
- public class MainActivity : AppCompatActivity
- {
- Button BtnDownload;
- ImageView Image;
- protected override void OnCreate(Bundle savedInstanceState)
- {
- base.OnCreate(savedInstanceState);
- // Set our view from the "main" layout resource
- SetContentView(Resource.Layout.activity_main);
- BtnDownload = FindViewById<Button>(Resource.Id.btndownload);
- Image = FindViewById<ImageView>(Resource.Id.image);
- BtnDownload.Click += PutImage;
- }
- async void PutImage(object sender, EventArgs e)
- {
- var path = await DownloadImage();
- Android.Net.Uri ImagePath = Android.Net.Uri.Parse
- (path);
- Image.SetImageURI(ImagePath);
- }
- public async Task<string> DownloadImage()
- {
- var client = new WebClient();
- byte[] imageData = await client.DownloadDataTaskAsync
- ("https://pbs.twimg.com/media/DZt_rBAVAAAtNWe.jpg");
- var documentspath = System.Environment.GetFolderPath
- (System.Environment.SpecialFolder.Personal);
- var localfilename = "mydog.jpg";
- var localpath = Path.Combine(documentspath, localfilename);
- File.WriteAllBytes(localpath, imageData);
- return localpath;
- }
- }
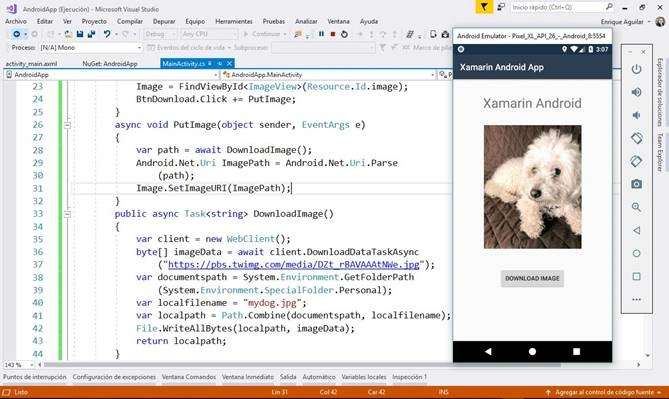
Finally, test our Android App,
Summary
This tutorial showed how to build a graphical interface in Android Studio and encode the download of an image in Android from Visual Studio.
Join the conversation! Your thoughts help the community grow.