

This article shows you how to bind data in Repeater controls without using any database in ASP.NET. Also, we will learn here how to bind controls with data without using a database. Additionally, how to handle repeater common events will be discussed. For this I have shownthe clicked-on image and changed image on click.
Initial Chamber
Step 1: Open Visual Studio and create an empty website, then provide a suitable name such as RepeaterChangeImage.
Step 2: In Solution Explorer you will get your empty website, then add some web forms.
RepeaterChangeImage (your empty website). Right-click and select Add New Item Web Form. Name it RepeaterChangeImage.aspx.
Design Chamber
Step 3:
Open the RepeaterChangeImage.aspx file and write some code for the design of the application. Choose control from toolbox and put on your design page as in the following code snippet:
- <div>
- <asp:RepeaterID="Repeater1"runat="server">
- <ItemTemplate>
- <asp:LabelID="Label1"runat="server"><%#Eval("Product_Name")%></asp:Label>
- <asp:LabelID="Label2"runat="server"><%#Eval("Quantity")%></asp:Label>
- <asp:LabelID="Label3"runat="server"><%#Eval("Price")%></asp:Label>
- <asp:ImageButtonID="ImageButton1"runat="server"Height="50px"Width="100px"ImageUrl='<%#Eval("path") %>'
- CommandArgument='<%#Eval("path")%>'OnClick="ImageButton1_Click"/><br/>
- </ItemTemplate>
- </asp:Repeater>
- </div>
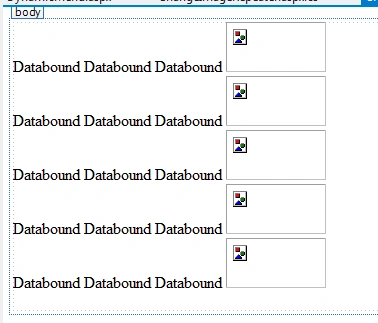
Here, I've designed the GridView Control and uploader used some property as in the following code snippet:
- <%@PageLanguage="C#"AutoEventWireup="true"EnableEventValidation="true"CodeFile="ChangeImageRepeater.aspx.cs"Inherits="ChangeImageRepeater"%>
- <!DOCTYPEhtml>
- <htmlxmlns="http://www.w3.org/1999/xhtml">
- <headrunat="server">
- <title></title>
- </head>
- <body>
- <formid="form1"runat="server">
- <div>
- <asp:RepeaterID="Repeater1"runat="server">
- <ItemTemplate>
- <asp:LabelID="Label1"runat="server"><%#Eval("Product_Name")%></asp:Label>
- <asp:LabelID="Label2"runat="server"><%#Eval("Quantity")%></asp:Label>
- <asp:LabelID="Label3"runat="server"><%#Eval("Price")%></asp:Label>
- <asp:ImageButtonID="ImageButton1"runat="server"Height="50px"Width="100px"ImageUrl='<%#Eval("path") %>'
- CommandArgument='<%#Eval("path")%>'OnClick="ImageButton1_Click"/><br/>
- </ItemTemplate>
- </asp:Repeater>
- </div>
- </form>
- </body>
- </html>
Step 4:
In the code chamber we will write some code so that our application works. Adding the following namespaces under namespace section of your code behind page.
- using System;
- usingSystem.Collections.Generic;
- usingSystem.Linq;
- usingSystem.Web;
- usingSystem.Web.UI;
- usingSystem.Web.UI.WebControls;
- usingSystem.Data;
- usingSystem.Data.SqlClient;
- usingSystem.Configuration;
- using System;
- using System.Collections.Generic;
- using System.Linq;
- using System.Web;
- using System.Web.UI;
- using System.Web.UI.WebControls;
- using System.Data;
- using System.Data.SqlClient;
- using System.Configuration;
- public partial classChangeImageRepeater: System.Web.UI.Page
- {
- protected void Page_Load(object sender, EventArgs e)
- {
- if (!IsPostBack)
- {
- BindRepeater();
- }
- }
- protected void BindRepeater()
- {
- DataSet ds = newDataSet();
- DataTabledt;
- DataRowdr;
- DataColumnpName;
- DataColumnpQty;
- DataColumnpPrice;
- DataColumnpPath;
- //int i = 0;
- dt = newDataTable();
- pName = newDataColumn("Product_Name", Type.GetType("System.String"));
- pQty = newDataColumn("Quantity", Type.GetType("System.Int32"));
- pPrice = newDataColumn("Price", Type.GetType("System.Int32"));
- pPath = newDataColumn("path", Type.GetType("System.String"));
- dt.Columns.Add(pName);
- dt.Columns.Add(pQty);
- dt.Columns.Add(pPrice);
- dt.Columns.Add(pPath);
- dr = dt.NewRow();
- dr["Product_Name"] = "Product 1";
- dr["Quantity"] = 2;
- dr["Price"] = 200;
- dr["path"] = "image/Produc1.jpeg";
- dt.Rows.Add(dr);
- dr = dt.NewRow();
- dr["Product_Name"] = "Product 2";
- dr["Quantity"] = 5;
- dr["Price"] = 480;
- dr["path"] = "image/Produc2.jpeg";
- dt.Rows.Add(dr);
- dr = dt.NewRow();
- dr["Product_Name"] = "Product 3";
- dr["Quantity"] = 8;
- dr["Price"] = 100;
- dr["path"] = "image/Produc3.jpeg";
- dt.Rows.Add(dr);
- dr = dt.NewRow();
- dr["Product_Name"] = "Product 4";
- dr["Quantity"] = 2;
- dr["Price"] = 500;
- dr["path"] = "image/Produc4.jpeg";
- dt.Rows.Add(dr);
- ds.Tables.Add(dt);
- Repeater1.DataSource = ds.Tables[0];
- Repeater1.DataBind();
- }
- protected void ImageButton1_Click(object sender, ImageClickEventArgs e)
- {
- ImageButtonImgBtn = (ImageButton) sender;
- string path = ((ImageButton) sender).CommandArgument;
- if (ImgBtn.ImageUrl == path)
- {
- ImgBtn.ImageUrl = "image/Penguins.jpg";
- ImgBtn.BackColor = System.Drawing.Color.Aqua;
- } else
- {
- ImgBtn.ImageUrl = path;
- ImgBtn.BackColor = System.Drawing.Color.Red;
- }
- }
- }
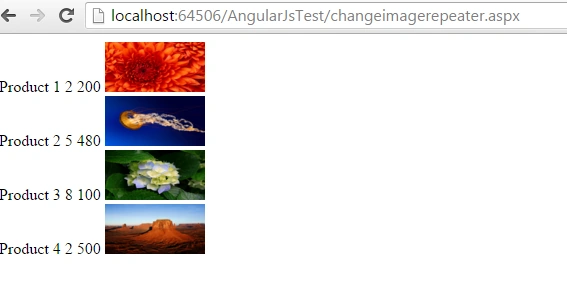
First Loading:
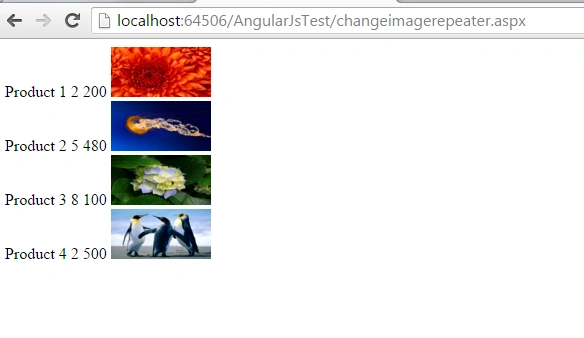
After click on Image:
Vignesh ManiPosted Apr 4, 2016, 4:06 AM
nice