
Introduction
Microsoft Bot framework is really a game-changer for many applications. It's very useful in performing valuable operations on top of data. Recently bots and machine learning are in huge demand. I recently participated in the Global Azure Bootcamp. Since I was a presenter, I got to learn all these amazing things about building a bot, and now I am sharing it with you all.
Prerequisites
- Microsoft Visual Studio ✌️
- Azure Bot Framework Emulator 🎮
- An Azure Subscription 🎆
- Patience to read this article 🍁
Objectives or Project Goals
The goal for me is to give the bot an image or an image URL and it should give back the analysis of the particular image.
Getting Started:
Let's go to Visual Studio and create a Bot Framework V4 project.
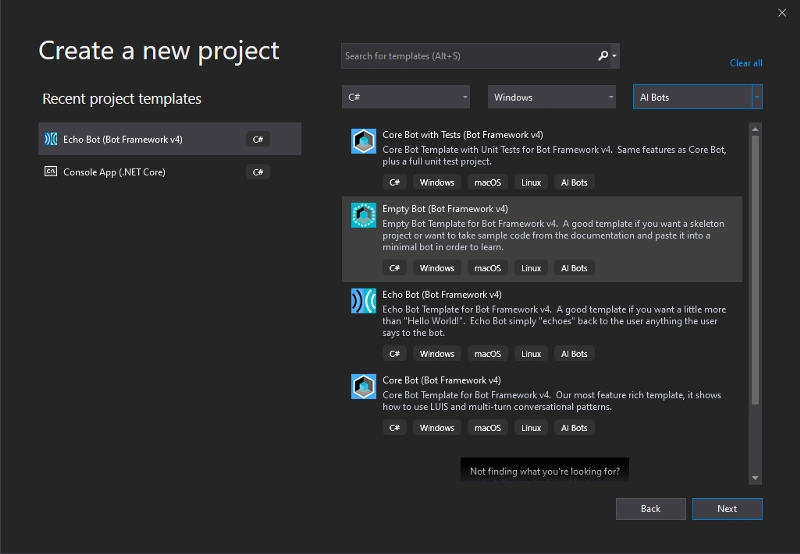
But wait, you won't have the Bot Framework template straight away. You need to install the Bot Framework v4 SDK Templates for Visual Studio from the marketplace.
Now that you have the template installed, select it and create an Echo Bot. You will have a solution like this:
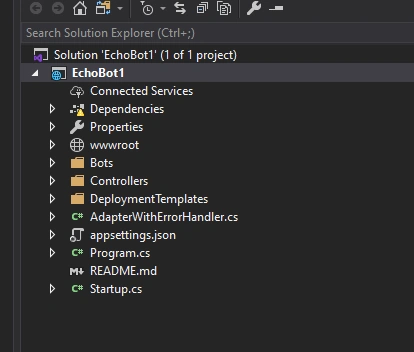
Exploring the Solution
This looks like the same structure as a .NET CORE Web API application. It has a controller for interacting with the bot with[Route(“api/messages”)]. It has a startup for injecting your dependencies, and also a ErrorHandler class.
EchoBot.cs
If you have a look at the EchoBot.cs under the Bots folder, this is where the actual bot processing and logic is done. The main thing to note here is the OnMessageActivityAsync and also OnMembersAddedAsync
OnMembersAddedAsync
The name of the function itself indicates whenever a new member is added to the bot for interacting or the first time the bot is connected, tells it to interact with the user. Let’s modify this first.
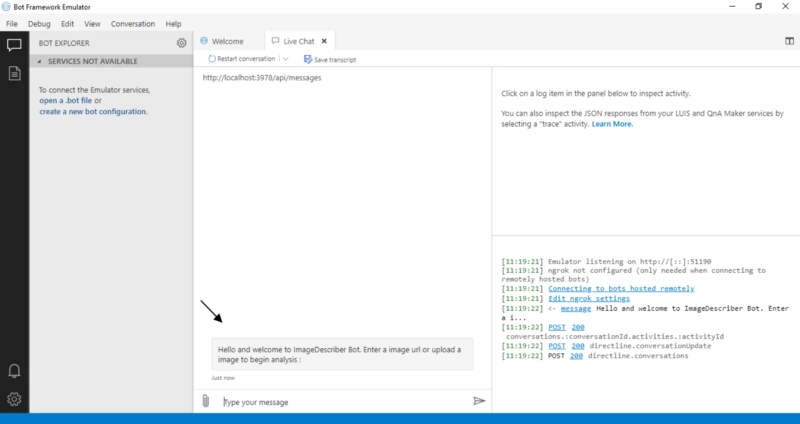
var welcomeText = “Hello and welcome to ImageDescriber Bot. Enter a image URL or upload an image to begin analysis”
- foreach (var member in membersAdded){
- if (member.Id != turnContext.Activity.Recipient.Id)
- await turnContext.SendActivityAsync(MessageFactory.Text(welcomeText), cancellationToken);
- }
I have removed CreateActivityWithTextAndSpeak and changed it like the one above. All it does is welcome the user.
OnMessageActivityAsync
This is where we need to process the image or a URL. Let’s see the possibilities. In case if you are not aware, you can make use of Azure Cognitive Services for AI operations like this.
There are always two ways to interact with Azure Services.
- REST API
- Client SDK
I’m a lazy guy, so I won't go explore the REST API browser and find the suitable API, find its headers, mandatory params blah blah.. This is the same reason I created my own library for interacting with StackExchange API. It’s called StackExchange.NET and you can also find it in Nuget
Azure Cognitive Services SDK
So I’m going to install the Azure Cognitive services SDK on my project for processing the image. However, before, you need to create an Azure Cognitive service to be able to do it.
- Open Azure portal and click on Add new resource
- Select the AI & Machine Learning category and click on Computer Vision
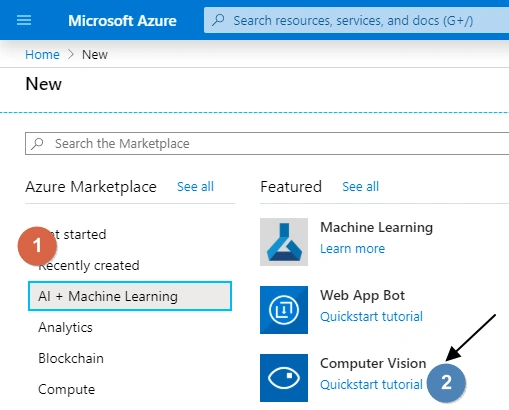
- Give it a preferable name as you want, and while selecting the pricing plan, choose the F0 cause its free and it will serve our purpose. We’re not going to production so FREE should be fine.
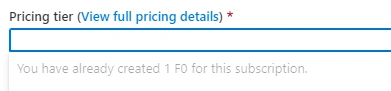
Note
If you already have a computer vision resource, you cannot re-create a free one. You can make use of it.
Sundaram SubramanianPosted Feb 27, 2020, 6:22 AM
Thanks for sharing Hari. :). Looking forwards to learn more from you. Keep contributing.
Nandha NandhuPosted Feb 26, 2020, 6:07 AM
Thank you for this Article...
Rushi MehtaPosted Feb 26, 2020, 2:11 AM
Thanks for sharing