
Introduction
Requirements
- Arduino Uno
- Ultrasonic sensors
- Servo motor
- DC motors
- Chaises board
- Jumper wires
- L293D motor driver
- Battery
Steps to follow.
Step 1
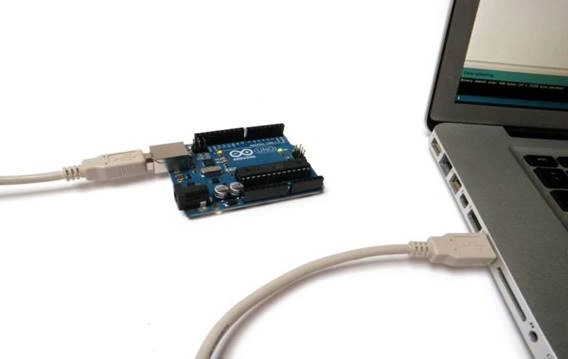
First of all, connect the Arduino board with a laptop or computer.
Step 2
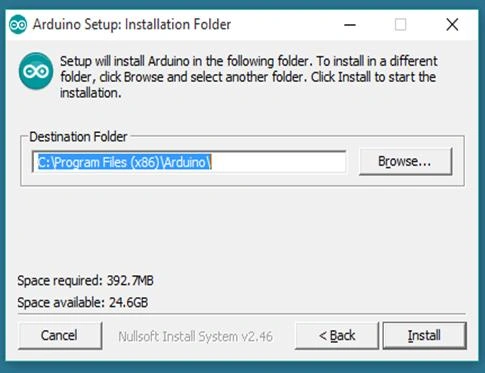
Install the Arduino software on the computer.
Step 3
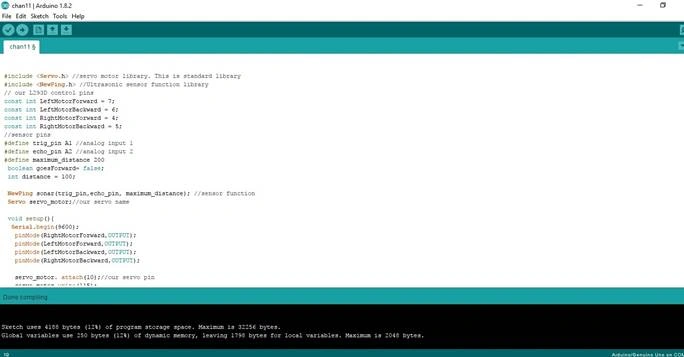
Open the Arduino software. The following screen will appear.

Step 4
You can see the Main Page of the software.
Step 5
Then, open the new page on the software.
Then select the File→ New.
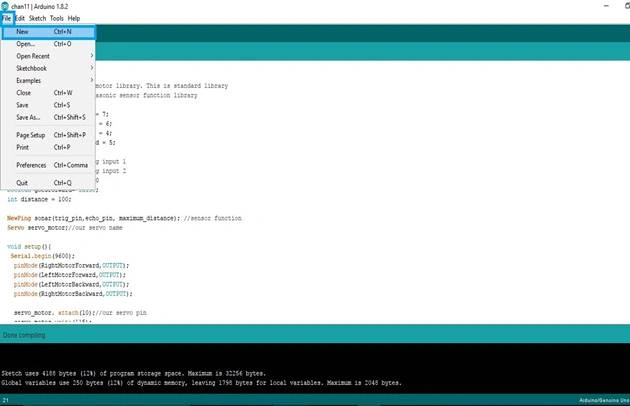
A new page opens on the Arduino software.
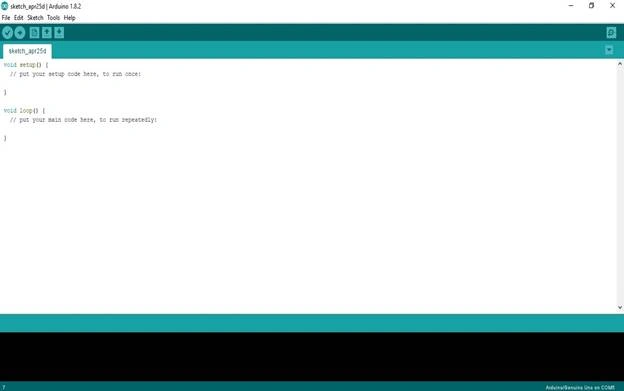
Step 6
I have given a source code that you can use or you can use your own source code.
Then, select File → open → select written program →open the program.
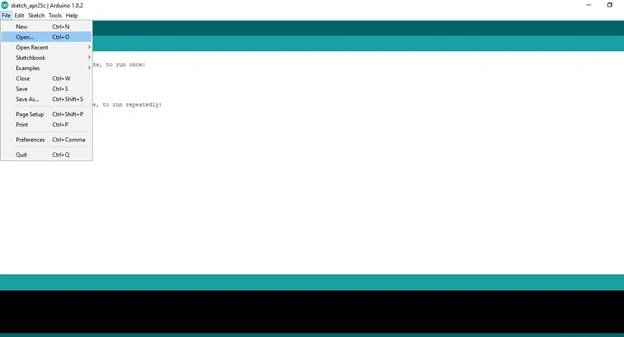
Open the program folder.
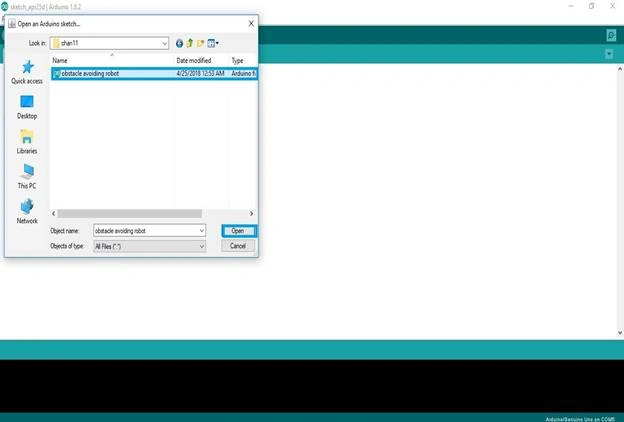
Select the program and open it.
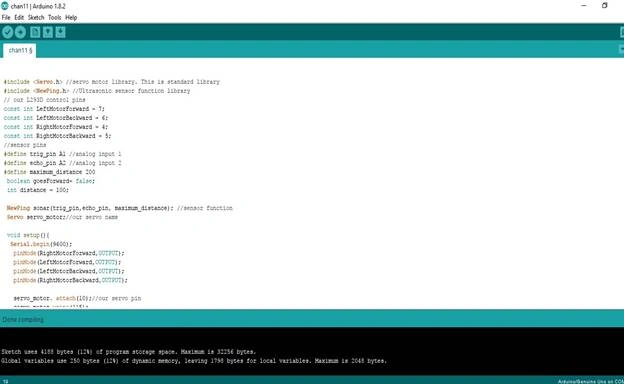
Source code
- #include <Servo.h>
- #include <NewPing.h>
- const int LeftMotorForward = 7;
- const int LeftMotorBackward = 6;
- const int RightMotorForward = 4;
- const int RightMotorBackward = 5;
- #define trig_pin A1 //analog input 1
- #define echo_pin A2 //analog input 2
- #define maximum_distance 200
- boolean goesForward= false;
- int distance = 100;
- NewPing sonar(trig_pin,echo_pin, maximum_distance); //sensor function
- Servo servo_motor;//our servo name
- void setup(){
- Serial.begin(9600);
- pinMode(RightMotorForward,OUTPUT);
- pinMode(LeftMotorForward,OUTPUT);
- pinMode(LeftMotorBackward,OUTPUT);
- pinMode(RightMotorBackward,OUTPUT);
- servo_motor. attach(10);//our servo pin
- servo_motor.write(115);
- delay(2000);
- distance =readPing();
- delay(100);
- distance = readPing();
- delay(100);
- distance =readPing();
- delay(100);
- distance = readPing();
- delay(100);
- }
- void loop(){
- int distanceRight = 0;
- int distanceLeft = 0;
- delay(50);
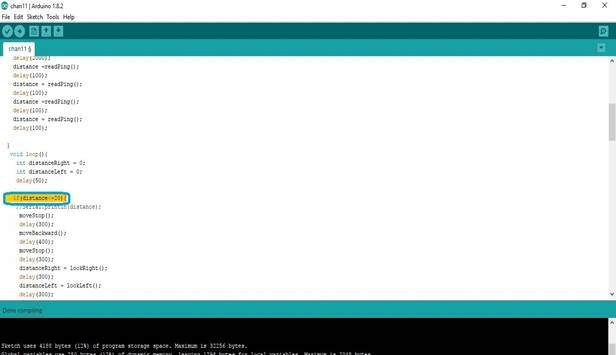
- if(distance<=40){
- //Serial.println(distance);
- moveStop();
- delay(400);
- moveBackward();
- delay(400);
- moveStop();
- delay(400);
- distanceRight = lookRight();
- delay(400);
- distanceLeft = lookLeft();
- delay(400);
- if(distance >= distanceLeft){
- turnRight();
- moveStop();
- }
- else{
- turnLeft();
- moveStop();
- }
- }
- else{
- moveForward();
- }
- distance = readPing();
- }
- int lookRight(){
- servo_motor.write(50);
- delay(500);
- int distance=readPing();
- delay(100);
- servo_motor.write(115);
- return distance;
- }
- int lookLeft(){
- servo_motor.write(170);
- delay(500);
- int distance = readPing();
- delay(100);
- servo_motor.write(115);
- return distance;
- delay(100);
- }
- int readPing(){
- delay(70);
- int cm = sonar.ping_cm();
- if (cm==0){
- cm=250;
- }
- return cm;
- }
- void moveStop(){
- digitalWrite(RightMotorForward,LOW);
- digitalWrite(LeftMotorForward,LOW);
- digitalWrite(RightMotorBackward,LOW);
- digitalWrite(LeftMotorBackward,LOW);
- }
- void moveForward(){
- if(!goesForward){
- goesForward=true;
- digitalWrite(LeftMotorForward,HIGH);
- digitalWrite(RightMotorForward,HIGH);
- digitalWrite(LeftMotorBackward,LOW);
- digitalWrite(RightMotorBackward,LOW);
- }
- }
- void moveBackward(){
- goesForward=false;
- digitalWrite(LeftMotorBackward,HIGH);
- digitalWrite(RightMotorBackward,HIGH);
- digitalWrite(LeftMotorForward,LOW);
- digitalWrite(RightMotorForward,LOW);
- }
- void turnRight(){
- digitalWrite(LeftMotorForward,HIGH);
- digitalWrite(RightMotorBackward,HIGH);
- digitalWrite(LeftMotorBackward,LOW);
- digitalWrite(RightMotorForward,LOW);
- delay(500);
- digitalWrite(LeftMotorForward,HIGH);
- digitalWrite(RightMotorForward,HIGH);
- digitalWrite(LeftMotorBackward,LOW);
- digitalWrite(RightMotorBackward,LOW);
- }
- void turnLeft(){
- digitalWrite(LeftMotorBackward,HIGH);
- digitalWrite(RightMotorForward,HIGH);
- digitalWrite(LeftMotorForward,LOW);
- digitalWrite(RightMotorBackward,LOW);
- delay(500);
- digitalWrite(LeftMotorForward,HIGH);
- digitalWrite(RightMotorForward,HIGH);
- digitalWrite(LeftMotorBackward,LOW);
- digitalWrite(RightMotorBackward,LOW);
- }
Step 9
The obstacle avoiding robot program coding will be there already. The value of distance for the ultrasonic sensors to detect the collision is set in the program as 30 cm.
Step 10
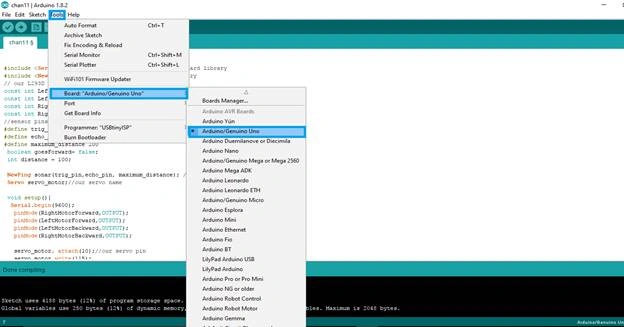
Click TOOL- Select BOARD - then press ARDUINO/GENUINO UNO R3.
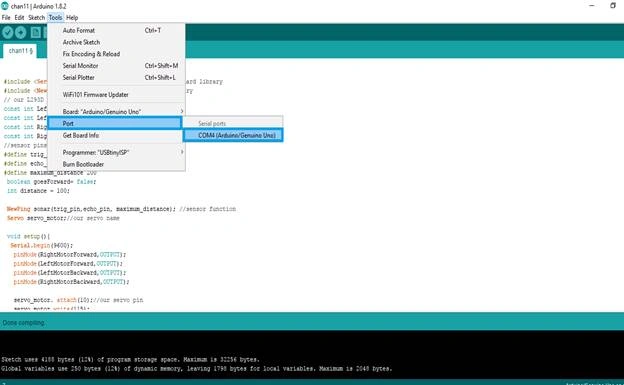
Again Select TOOL >> Select a PORT >> COM3 ARDUINO UNO
Step 11
Verify the program or compile the program.
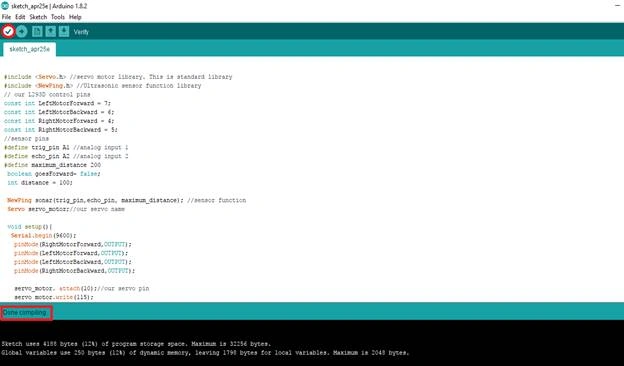
The compilation is done.
Step 12
Connect the hardware as per the connection diagram given for the Obstacle avoiding robot.
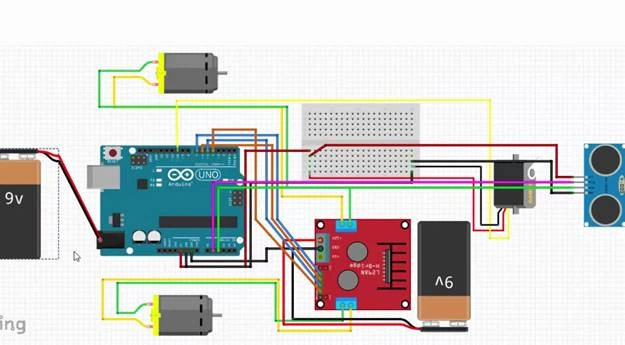
Complete the connection as per the diagram.
Step 13
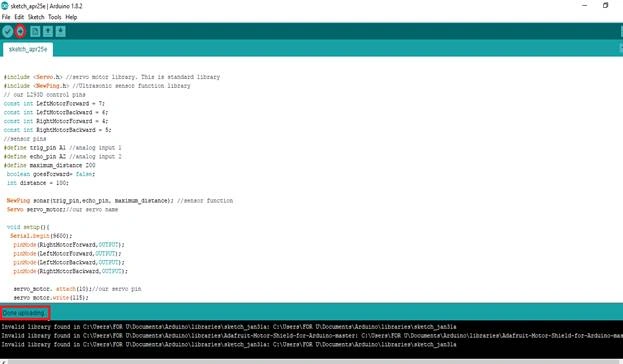
Then connect the Arduino to the laptop and upload the code in Arduino.
Step 14
Then the obstacle avoiding robot will start working.
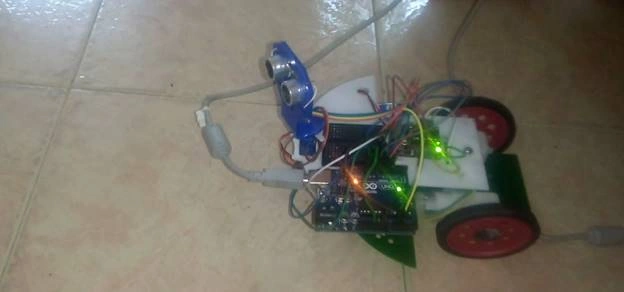
The ultrasonic sensor detects the collision using Arduino.
Summary
More exciting articles are coming up next.
Hadshana KamalanathanPosted Jul 21, 2018, 10:00 AM
Nice one...