

Before reading this article, I highly recommend reading the previous parts of the series on ASP.NET:
- Getting Started With ASP.NET MVC
- First ASP.NET MVC 5.0 Application
- How to Publish ASP.NET MVC on IIS MVC 5.0: Part 3
- How to Publish ASP.NET MVC 5.0 Application on Windows Azure: Part 4
- ASP.NET MVC 5.0 Views (Dynamic/Strongly Typed Views) - Part 5
- What Are Areas in ASP.NET MVC - Part 6
- Using Partial Views In ASP.NET MVC 5.0: Part 7
- MVC 5.0 Application using Entity Framework DB First Approach: Part 8
- MVC 5.0 Application using Entity Framework Code First Approach: Part 9
- HTML Helpers In ASP.NET MVC 5.0: Part 10
- Using TempData, ViewData and ViewBag in ASP.NET MVC 5.0: Part 11
- Filters in ASP.NET MVC 5.0: Part 12
- Validations In ASP.NET MVC 5.0: Part 13
- Layouts (Master Pages) in ASP.NET MVC 5.0: Part 14
- Facebook Authentication In ASP.NET MVC 5.0: Part 15
- How to Configure Google Sign-In for ASP.NET MVC 5: Part 16
- Using WCF Services In ASP.NET MVC 5: Part 17
What is Bundling?
A bundle may consist of multiple CSS and JavaScript files. A bundle is a logical group of files that is loaded with a single HTTP request. You can create style and script bundle for CSS and JavaScript’s respectively by calling BundleCollection class Add() method with in BundleConfig.cs file.
What is the mean of Bundling?
- In Asp.net MVC, Bundling means combining multiple files into a single file.
- Mainly Bundling is done for CSS, JS files.
What are the benefits of Bundling?
- With the help of Bundling, there will be having less HTTP request to the server.
- This would definitely reduce the page load time.
Why we use Bundling?
- Bundles can be used for run-time swapping of css or jss file.
An Example of Bundled CSS-
- html, body
- {
- font - size: 2e m;
- font - family: ‘Arial’;
- margin: 10 px;
- }
- html, body
- {
- background - color: red;
- color: green;
- }
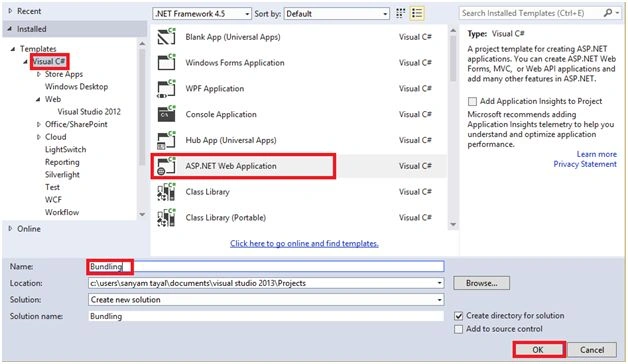
In the below figure Select Visual C# in the left side of the page and choose ASP.NET Web Application from the menu, and here I give the name of project “Bundling”. You can give the project name as you wish. Click on to “OK” button to create your project.
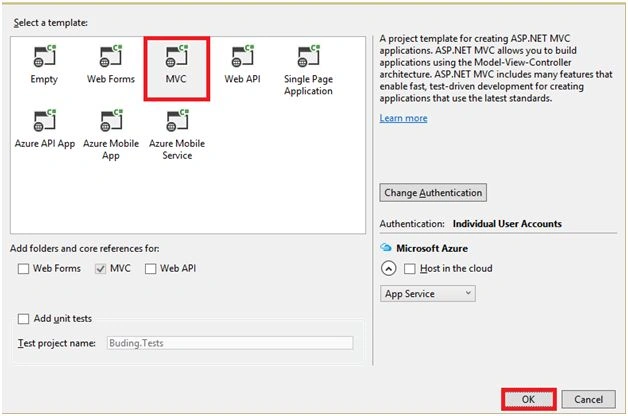
You can see the default MVC will be selected, select MVC and then click “OK” button.
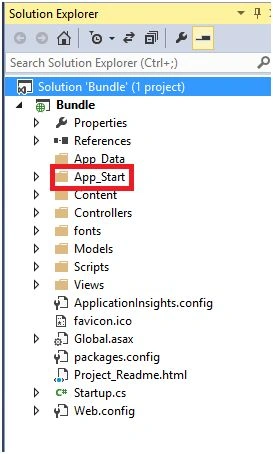
Here, my project is created and is ready for use. First I want to make some changes in BundleConfig.cs, so click on to App_Start folder.
Now we are using Kendo UI
What is Kendo UI?
Kendo UI is a JavaScript tool set which is an HTML5 user interface framework for building interactive and high-performance modern web applications, websites. After installing the Kendo UI, you’ll get lots of JavaScript files, images and style sheets. The framework comes with a library of 70+ UI widgets and features. Kendo UI provides AngularJS and Bootstrap integration.Kendo UI is very easy to use.
So download the free trial of Kendo UI . Now Click on to the Download free trial.

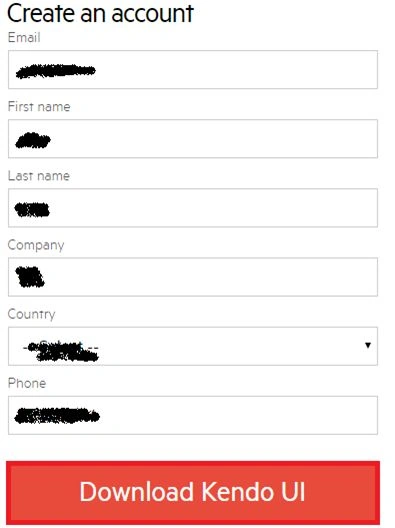
You need to create a account for this. After filling all the required details click on to Download.
Now file will be downloaded in to your local PC. Select the downloaded file and open it.

Open this file and click on to styles folder.

In Styles folder you’ll find CSS files, copy these 2 files:
- Kendo.common.min.css
- Kendo.default .min.css
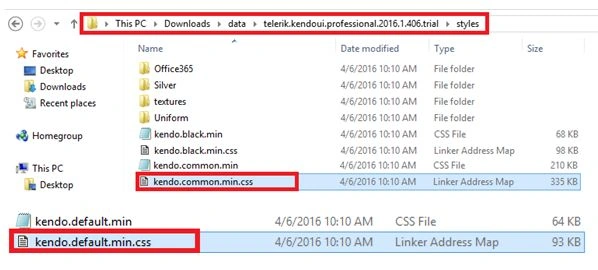
Including CSS file there would be a JavaScript folder withjs extension. Open this folder, and select below two js files.
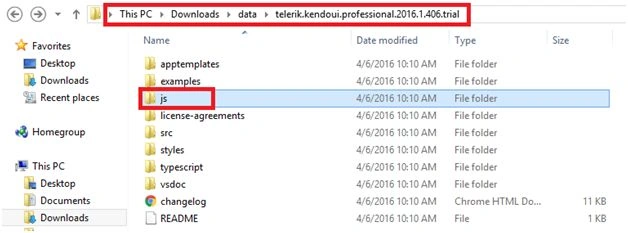
In js folder copy these 2 files:
- .jquery.min
- Kendo.all.min.js

First I need to create a New Folder in to our solution, so right click on to content folder and click on “ADD” and then click on to new folder.
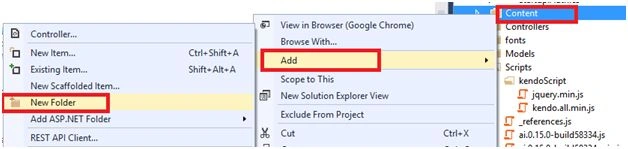
Now Rename your New Folder AS “Kendo”. In Kendo folder paste these two CSS files.
- Kendo.common.min.css
- Kendo.default .min.css
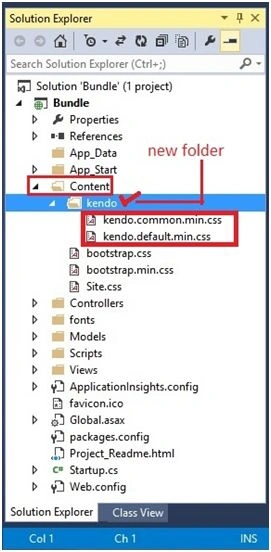
Now again I need to create a New Folder in our solution, so right click on to Scripts folder and click on “ADD” and then click on to new folder.

Now Rename your New Folder AS “KendoScript”. In KendoScript folder paste these two CSS files. As shown in below screenshot,
- .jquery.min.js
- Kendo.all.min.js

Creating Style Bundle
Now Click on to BundleConfig.cs file And add the Bundles.Add Files as shown in following screenshot.

Now I’m going to add these two files in to our layout page.
Under “View” Folder, click on “Shared” and then click on “Layout.cs.html”, to add these 2 files. Add these files into the head section of the page.

Now Again click on to “Views” Folder, then select “Home” folder and then open “Index.cs.html”.
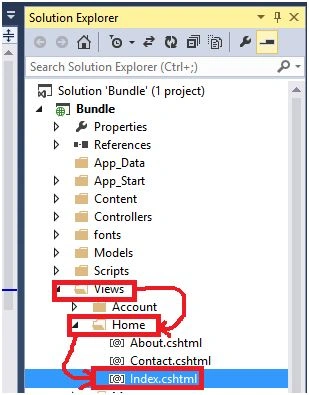
Cut the following section in the “Index.cs.html” view page and write some scripts over here.

Write the following code in “Index.cs.html"view page.
In this code you have to write script function. With the help of Script function you have to show a KendoCalendar.
I’ve pass a link in the head section for the calendar.
Initialize the Calendar by using a jQuery selector:
- <div id="calendar"></div>
- <script>
- $(document).ready(function()
- {
- $("#calendar").kendoCalendar();
- });
- </script>

Now Build the Application.
Click on to the Google chrome, or press F5 to run your application.
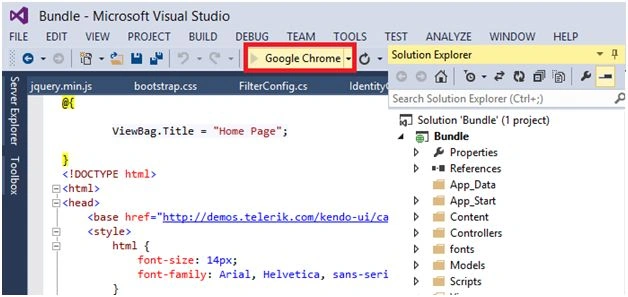
Output:
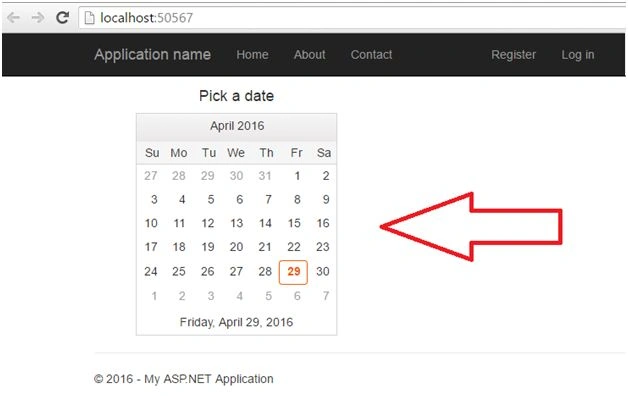
Now finally I get my output that is the current date.
Here, in this article, we learned about how we can use the scripts of the bundles in my project.
I hope you enjoyed this article. Stay tuned with me for more articles on all other Microsoft technologies.
BablooPosted Aug 23, 2019, 6:38 AM
Very nice article sir ji
Aya SadyPosted Apr 25, 2018, 2:43 AM
Hello , thanks for your series , I want to ask you is this article is the last article in this series ? if Not can you provide me the link of the next articles in this series please?Nitin Pandit
Islam GhanemPosted Nov 8, 2016, 5:46 PM
$ is not defined(…) what can i do
Islam GhanemPosted Nov 8, 2016, 5:45 PM
When i do like this Example i found this error
Pradeep SahooPosted May 18, 2016, 12:48 PM
Good share ....you are a genius writter....
Prerana TiwariPosted May 18, 2016, 12:31 AM
Nice article sir...
Neeraj KumarPosted May 17, 2016, 2:58 PM
Nice article
Bhuvanesh MohankumarPosted May 17, 2016, 2:20 PM
Good one
Kuppurasu NagarajPosted May 17, 2016, 10:53 AM
Nice sharing..