

Introduction
We can split this article into 4 parts:
- Creating WebApi
- Registering custom App
- Updating Author column using Csom
- Consuming WebApi
Creating WebApi
- Open visual studio
- Search for Asp.net web application
- Enter project name,location ,soln name,and framework (.net framework 4.7.2)
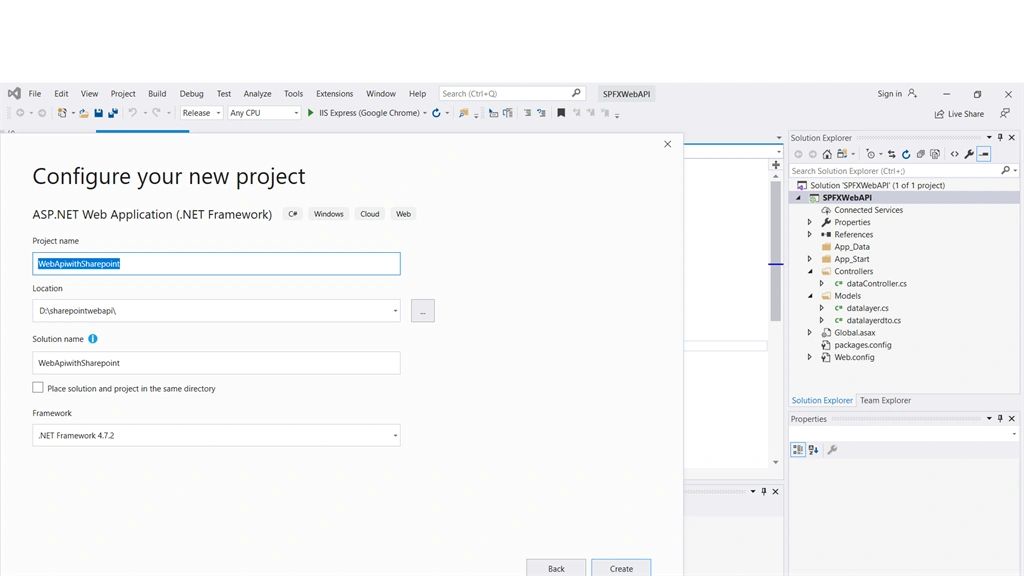
- Click create button
- Next, select empty project and check webapi tick mark in right corner
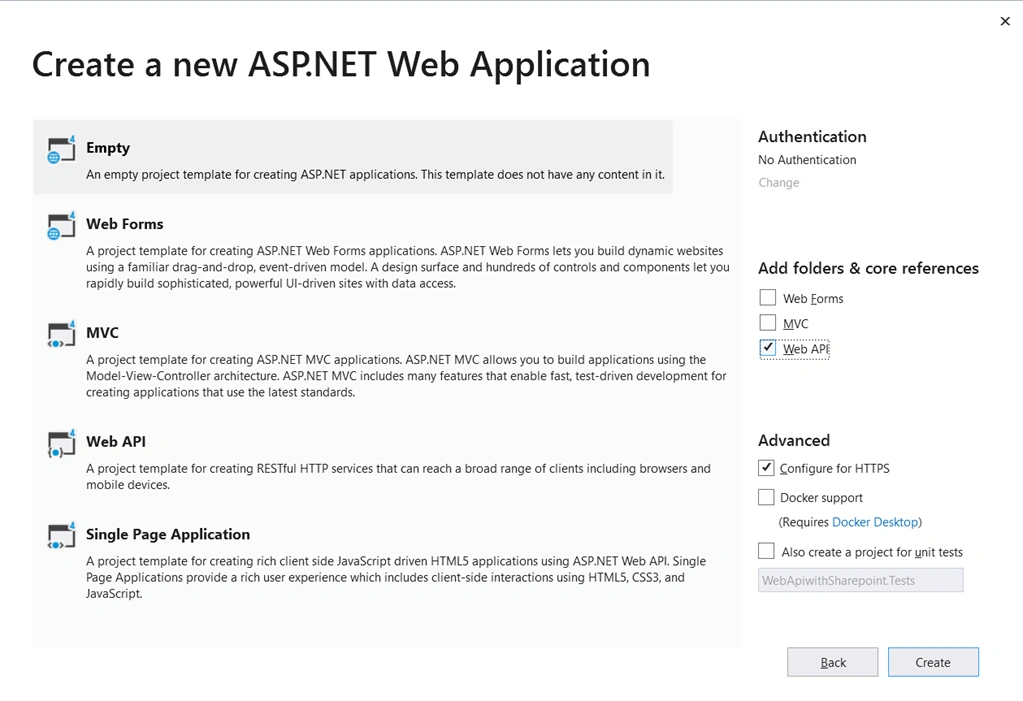
- Click create
Add the following Nuget Pacakages,
- Microsoft.AspNet.WebApi.Cors
- SharePointPnPCoreOnline
- Newtonsoft.Json
Right click controllers in the solution explorer -->Add-->Controller-->select WebAPI 2 Controller-empty and click add button give the name mynewcontroller.
Right click Models in the solution explorer -->Add-->New Item-->select Class and click add button give the name mycsom.cs.
Right click Models in the solution explorer -->Add-->New Item-->select Class and click add button give the name mymodel.cs
in MyNewController.cs,
- using Newtonsoft.Json;
- using System;
- using System.Collections.Generic;
- using System.Linq;
- using System.Net;
- using System.Net.Http;
- using System.Threading.Tasks;
- using System.Web.Http;
- namespace WebApiwithSharepoint
- {
- public class MyNewController : ApiController
- {
- public async Task SaveData(HttpRequestMessage value)
- // public async Task SaveData([FromBody] List<arrayobj> paramsList)
- {
- try
- {
- string body = value.Content.ReadAsStringAsync().Result;
- var datalayer = new mycsom();
- mymodel dto = JsonConvert.DeserializeObject<mymodel>(body);
- var setdata = datalayer.mysavedata(dto.Email);
- }
- catch (Exception ex)
- {
- Console.WriteLine(ex.Message);
- }
- }
- }
- }
- using System;
- using System.Collections.Generic;
- using System.Linq;
- using System.Web;
- namespace WebApiwithSharepoint
- {
- public class mymodel
- {
- public string Email { get; set; }
- }
- /* public class arrayobj
- {
- public string Id1 { get; set; }
- public string Id2 { get; set; }
- public string Id3 { get; set; }
- }*/
- }
In mycsom.cs,
- using System;
- using System.Collections.Generic;
- using System.Configuration;
- using System.Linq;
- using System.Threading.Tasks;
- using System.Web;
- using Microsoft.SharePoint.Client;
- using SP = Microsoft.SharePoint.Client;
- namespace WebApiwithSharepoint
- {
- public class mycsom
- {
- public async Task mysavedata(string value)
- {
- try
- {
- string SPClientID = "clientid";
- string SPClientSecret = "clientsecret";
- string SitePath = "your site collection";
- /* var clientid = ConfigurationManager.AppSettings["cid"];
- var clientsec = ConfigurationManager.AppSettings["csc"];
- var siteurl = ConfigurationManager.AppSettings["Spath"];*/
- using (var clientContext = new OfficeDevPnP.Core.AuthenticationManager().GetAppOnlyAuthenticatedContext(SitePath, SPClientID, SPClientSecret))
- {
- List oList = clientContext.Web.Lists.GetByTitle("Madhan");
- ListItem item = oList.GetItemById(1); //here item ID updating a single item
- clientContext.Load(item);
- // item["Author"] = GetUsers(clientContext, "[email protected]");
- item["Author"] = GetUsers(clientContext, value);
- item.Update();
- clientContext.ExecuteQuery();
- }
- }
- catch (Exception ex)
- {
- Console.WriteLine("Error Message: " + ex.Message);
- }
- }
- private static SP.FieldUserValue GetUsers(ClientContext clientContext, string UserName) //Method for getting user id for given user mail
- {
- SP.FieldUserValue userValue = new SP.FieldUserValue();
- SP.User updateUser = clientContext.Web.EnsureUser(UserName);
- clientContext.Load(updateUser);
- clientContext.ExecuteQuery();
- userValue.LookupId = updateUser.Id;
- return userValue;
- }
- }
- }
The below is the method for app context authentication:
- var clientContext = new OfficeDevPnP.Core.AuthenticationManager().GetAppOnlyAuthenticatedContext(SitePath, SPClientID, SPClientSecret)
In WebApiConfig.cs which is located in App_start folder:
- using System;
- using System.Collections.Generic;
- using System.Linq;
- using System.Web.Http;
- using System.Web.Http.Cors;
- namespace WebApiwithSharepoint
- {
- public static class WebApiConfig
- {
- public static void Register(HttpConfiguration config)
- {
- // Web API configuration and services
- config.EnableCors(new EnableCorsAttribute("SiteCollectionurl", "*", "*"));
- // Web API routes
- config.MapHttpAttributeRoutes();
- config.Routes.MapHttpRoute(
- name: "DefaultApi",
- routeTemplate: "api/{controller}/{id}",
- defaults: new { id = RouteParameter.Optional }
- );
- }
- }
- }
- config.EnableCors(new EnableCorsAttribute("SiteCollectionurl", "*", "*"));
Here we are following the Sharepoint app concept to get context for running csom code. To register a new app you need to route to this url /_layouts/15/appregnew.aspx from your site collection.
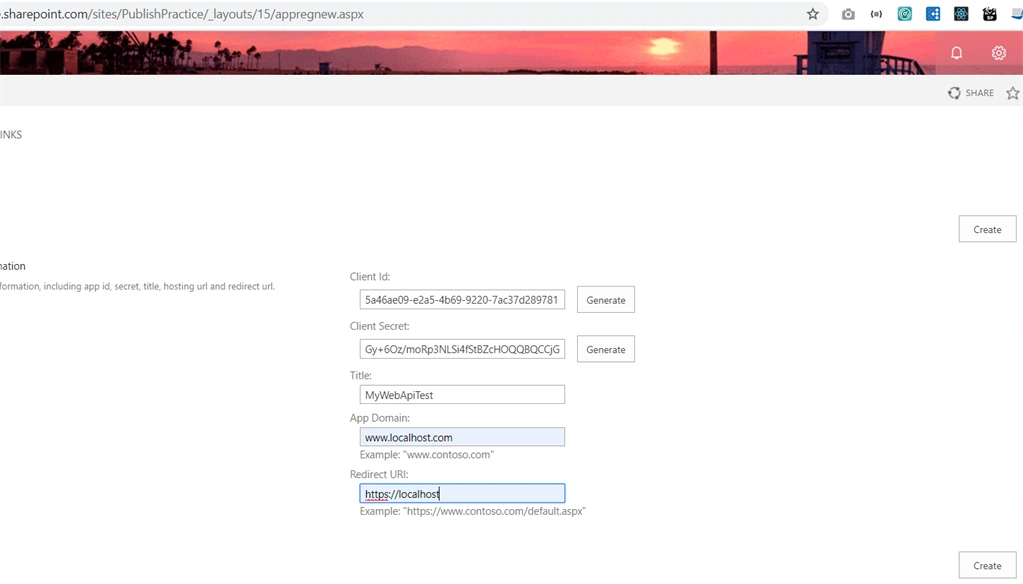
Navigate to that url and click the generate button. After copying the clientid and client secret in local notepad for future reference and clicking create once the app is created, we need to provide scope for that. Navigate to _layouts/15/appinv.aspx from your site collection,
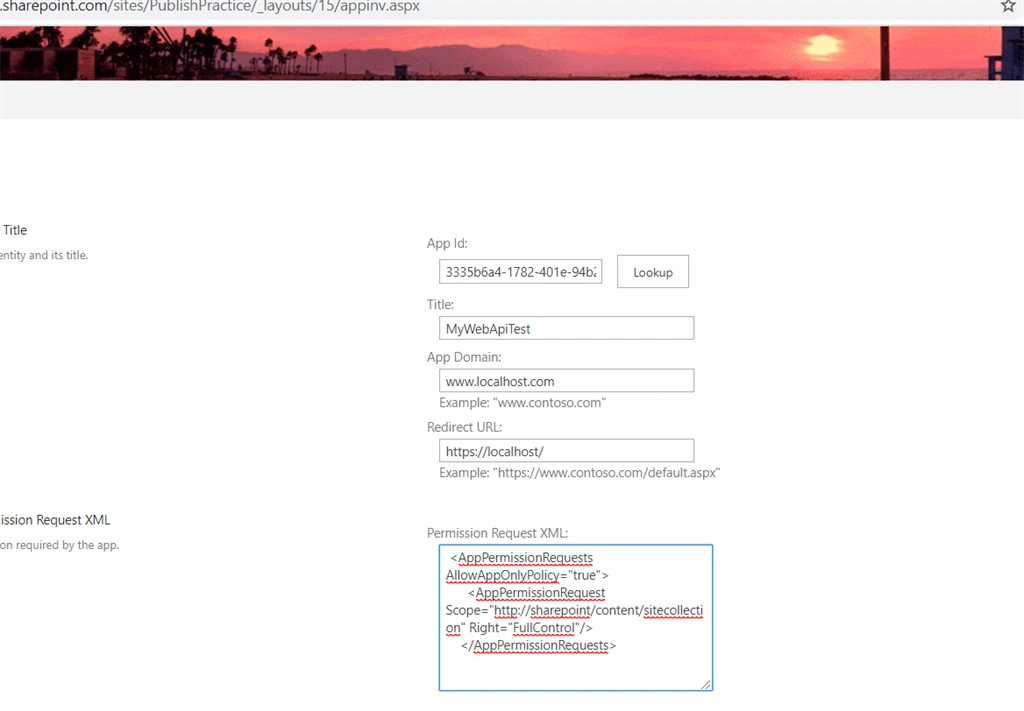
In this give the already-registered client id and click lookup, and it fetches all the details of the app. In the bottom of the page there is a textarea box for the scope of permision. Give the required permission in the form of xml format -- the permisions are here.
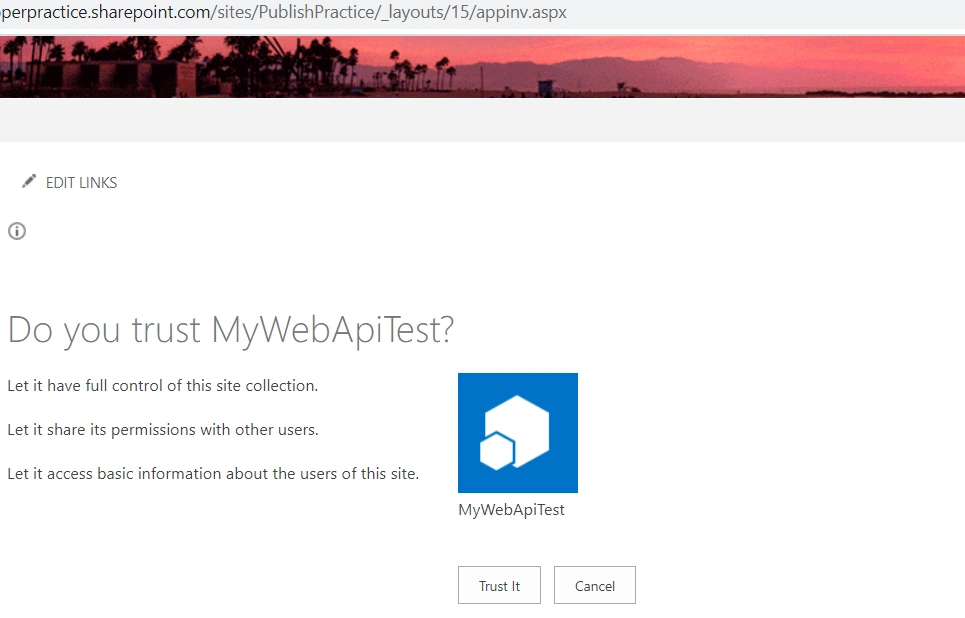
When you click on Create you'll be presented with a permission consent dialog. Press "Trust It" to grant the permissions,
For details about app registration visit here.
This is purely run with app context so if you do any operations in Sharepoint list or library, the created and modified field is mapped as Shareppoint app instead of user name. Provide the client id, client secret, site url in mycsom.cs file. Once completed bulid the solution.
consuming webapi
- var urla = "https://localhost/api/MyNew/SaveData";
- var data={ Email: "User Email" }
- fetch(urla, {
- method : "POST",
- headers: {
- 'Accept': 'application/json',
- 'Content-Type': 'application/json'
- },
- //body: JSON.stringify([{"Id1":3,"Id2":76,"Id3":19},{"Id1":56,"Id2":87,"Id3":94},{"Id1":976,"Id2":345,"Id3":7554}])
- body: JSON.stringify(data)
- }).then(
- response => response.text() // .json(), etc.
- // same as function(response) {return response.text();}
- ).then(
- html => console.log(html)
- );
Url
https://localhost/api/MyNew/SaveData
pre-request-script
- var body={
- Email:'Your Email'
- }
- pm.environment.set('req_body',JSON.stringify(body));
Headers
Accept application/json
Content-Type application/json
Body
{{req_body}}
Conclusion
From this article we get some new idea of authenticating Sharepoint with the standalone progam, and also webapi process consumption in Sharepoint. I hope this helps someone. Happy Coding :)
Madhan ThuraiPosted Jan 26, 2020, 8:35 AM
Yeah author field can updated using csom and using restapi we want to change author field to editable, regarding termstore,i didn't tried it out,but i think its possible
Ano MepaniPosted Jan 25, 2020, 11:18 PM
Did you get term store using clientid and client secret approach?
Ano MepaniPosted Jan 25, 2020, 11:17 PM
I am confused about author field updation.Does Author field value updated