

Introduction
In this article, I will discuss how to create a cascading dropdown using Angular 7 and Web API. This article has two parts. The first part creates a SQL Server datababase with two tables. The second part creates the Angular app.
Prerequisite
- Angular 7
- Web API
- HTML/Bootstrap
- SQL Server
Cascading DropDownList means a series of dependent DropDownLists where one DropDownList is dependent on another DropDownList. Child DropDownLists are populated based on the item selected in dropdownlist by a user. For example, loading all states in a country.
There are three parts of this article.
- Create a SQL Server database with two tables, parent and child.
- Create a Web API using ASP.NET Web API Project template
- Create an Angular 7 app
Part 1. Create a Database
For this article, I have created a database and two tables. If you already have data representing a parent-children form, you may skip this step.
Step 1. Open SQL Server Management Studio, connect to a server, and get ready to execute SQL.
Step 2. Create a database using the following query.
- create Database CaseCaddingDDL
Step 3. Create a table, CountryMaster, using the following query.
- CREATE TABLE [dbo].[CountryMaster](
- [CountryId] [int] NOT NULL,
- [CountryName] [varchar](50) NULL
- )
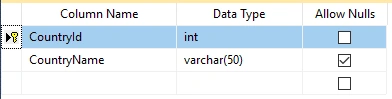
Step 4. Create a state table, StateMaster, using the following query.
- CREATE TABLE [dbo].[StateMaster](
- [StateID] [int] NOT NULL,
- [StateName] [varchar](50) NULL,
- [CountryId] [int] NULL
- )
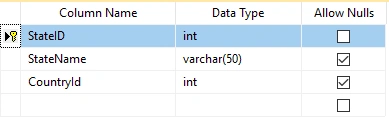
Step 5. Insert seed ata using the following script.
- INSERT [dbo].[CountryMaster] ([CountryId], [CountryName]) VALUES (1, N'INDIA')
- GO
- INSERT [dbo].[CountryMaster] ([CountryId], [CountryName]) VALUES (2, N'AUSTRALIA')
- GO
- INSERT [dbo].[CountryMaster] ([CountryId], [CountryName]) VALUES (3, N'SRILANKA')
- GO
- INSERT [dbo].[StateMaster] ([StateID], [StateName], [CountryId]) VALUES (1, N'Rajasthan', 1)
- GO
- INSERT [dbo].[StateMaster] ([StateID], [StateName], [CountryId]) VALUES (2, N'Delhi', 1)
- GO
- INSERT [dbo].[StateMaster] ([StateID], [StateName], [CountryId]) VALUES (3, N'Gujrat', 1)
- GO
- INSERT [dbo].[StateMaster] ([StateID], [StateName], [CountryId]) VALUES (4, N'UttarPradesh', 1)
- GO
- INSERT [dbo].[StateMaster] ([StateID], [StateName], [CountryId]) VALUES (5, N'New South Wales', 2)
- GO
- INSERT [dbo].[StateMaster] ([StateID], [StateName], [CountryId]) VALUES (6, N'Queensland', 2)
- GO
- INSERT [dbo].[StateMaster] ([StateID], [StateName], [CountryId]) VALUES (7, N'South Australia', 2)
- GO
- INSERT [dbo].[StateMaster] ([StateID], [StateName], [CountryId]) VALUES (8, N'Tasmania', 2)
- GO
- INSERT [dbo].[StateMaster] ([StateID], [StateName], [CountryId]) VALUES (9, N'Western Province', 3)
- GO
- INSERT [dbo].[StateMaster] ([StateID], [StateName], [CountryId]) VALUES (10, N'Central Province', 3)
- GO
- INSERT [dbo].[StateMaster] ([StateID], [StateName], [CountryId]) VALUES (11, N'Southern Province', 3)
- GO
- INSERT [dbo].[StateMaster] ([StateID], [StateName], [CountryId]) VALUES (12, N'Uva Province', 3)
- GO
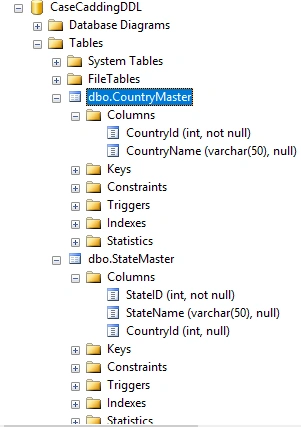
Now, the database is created and seeded.
Part 2. Create a Web API
For this article, I create a Web API using ASP.NET Web API.
Step 1
Let's open Visual Studio 2017 or later and create a new Web API project.
Step 2
Select File > New > Project.
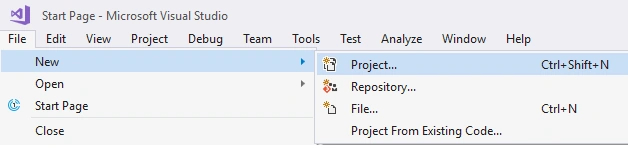
Step 3
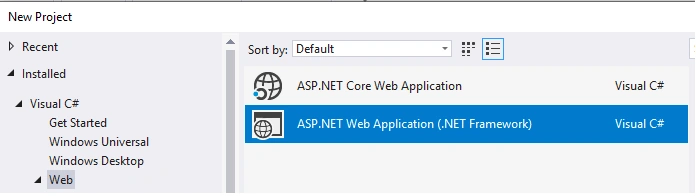
Select Web and ASP.NET Web Application.
Step 4
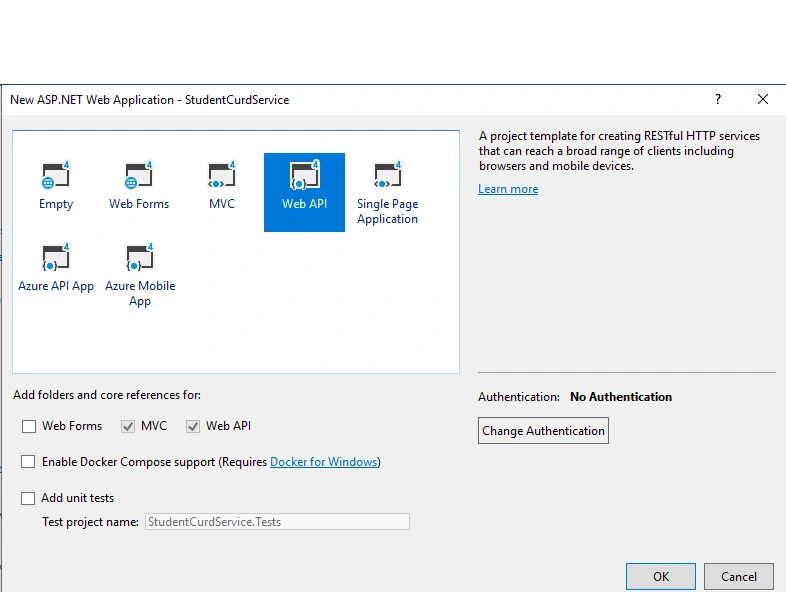
Then select Web API and then OK.
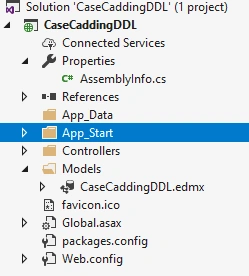
Your project is created and it will look like the following in Solution Explorer.
Step 5
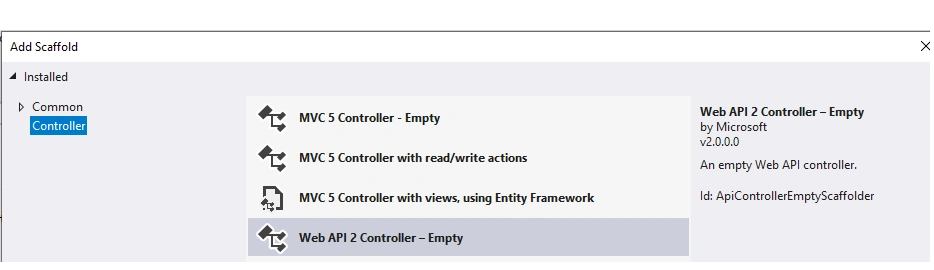
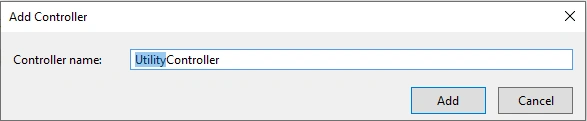
I create a new Controller named Utility using right click on Controllers folder and select Add, and select Controller.
Select Web API 2 Controller - Empty. Provide a controller name and click Add.
Step 6
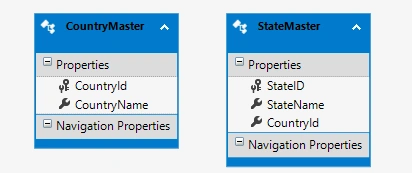
Now, import our database table's Entity Framework.
Step 7
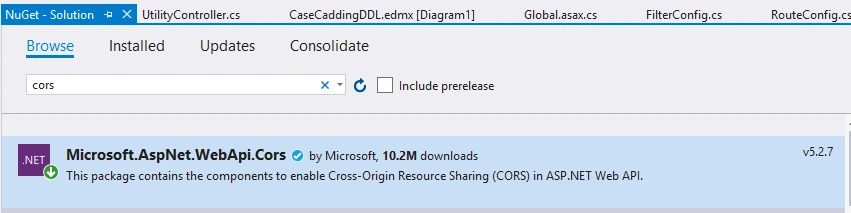
I have enabled Cors using the following steps.
Add the following reference using NuGet.
Add the following line in WebApiConfig to enable Cors.
- EnableCorsAttribute cors = new EnableCorsAttribute("*", "*", "*");
- config.EnableCors(cors);
WebApiConfig.cs
- public static class WebApiConfig
- {
- public static void Register(HttpConfiguration config)
- {
- // Web API configuration and services
- // Web API routes
- config.MapHttpAttributeRoutes();
- config.Routes.MapHttpRoute(
- name: "DefaultApi",
- routeTemplate: "api/{controller}/{id}",
- defaults: new { id = RouteParameter.Optional }
- );
- EnableCorsAttribute cors = new EnableCorsAttribute("*", "*", "*");
- config.EnableCors(cors);
- }
- }
Setp 8
Add the following method to fetch country data.
- [Route("CountryData")]
- [HttpGet]
- public List<CountryMaster> CountryData()
- {
- return ccddlEN.CountryMasters.ToList<CountryMaster>();
- }
Setp 9
Add another method to fetch state data.
- [Route("StateData")]
- [HttpGet]
- public List<StateMaster> StateData(int CountryId)
- {
- return ccddlEN.StateMasters.Where(s => s.CountryId == CountryId).ToList<StateMaster>();
- }
Complete code for the Utility controller.
- using System;
- using System.Collections.Generic;
- using System.Linq;
- using System.Net;
- using System.Net.Http;
- using System.Web.Http;
- using CaseCaddingDDL.Models;
- namespace CaseCaddingDDL.Controllers
- {
- [RoutePrefix("Api/Utility")]
- public class UtilityController : ApiController
- {
- CaseCaddingDDLEntities ccddlEN = new CaseCaddingDDLEntities();
- [Route("CountryData")]
- [HttpGet]
- public List<CountryMaster> CountryData()
- {
- return ccddlEN.CountryMasters.ToList<CountryMaster>();
- }
- [Route("StateData")]
- [HttpGet]
- public List<StateMaster> StateData(int CountryId)
- {
- return ccddlEN.StateMasters.Where(s => s.CountryId == CountryId).ToList<StateMaster>();
- }
- }
- }
Part 3. Create an Angular 7 App
For this part, I will create a Angular 7 app and call API to get the data.
Step 1
Create an Angular project using the following command in command prompt.
- ng new casecaddingDDL
Step 2
Open Project in Visual Studio Code using the following command in command prompt.
- cd casecaddingDDL
- open .
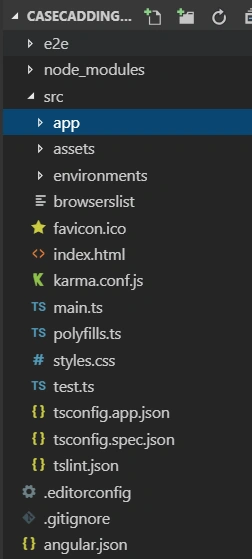
Now open project in Visual Studio Code. The project looks like the following:
Step 3
Create a student service in a student folder using the following command.
- ng g service student
Step 4
Create a method and call the country data API.
- CountryDDL(): Observable<CountryVM[]>
- {
- return this.http.get<CountryVM[]>(this.Url + '/CountryData');
- }
Step 5
Create a method and call a the state data API.
- StateDDL(CountryId: string): Observable<StateVM[]>
- {
- return this.http.get<StateVM[]>(this.Url + '/StateData?CountryId='+CountryId);
- }
Complete code for student.service.ts.
- import { Injectable } from '@angular/core';
- import {HttpClient} from '@angular/common/http';
- import { Observable } from 'rxjs';
- import { CountryVM } from '../Classes/country-vm';
- import { StateVM } from '../Classes/state-vm';
- @Injectable({
- providedIn: 'root'
- })
- export class StudentService {
- Url = 'http://localhost:50613/Api/Utility';
- constructor(private http:HttpClient) { }
- CountryDDL(): Observable<CountryVM[]>
- {
- return this.http.get<CountryVM[]>(this.Url + '/CountryData');
- }
- StateDDL(CountryId: string): Observable<StateVM[]>
- {
- return this.http.get<StateVM[]>(this.Url + '/StateData?CountryId='+CountryId);
- }
- }
Step 6
Create a student component in the student folder using the following commad.
- ng g c student
student.component.ts
- import { Component, OnInit } from '@angular/core';
- import { NgForm, FormBuilder, FormGroup, Validators, FormControl } from '@angular/forms';
- import { Observable } from 'rxjs';
- import { StateVM } from 'src/app/Classes/state-vm';
- import { CountryVM } from 'src/app/Classes/country-vm';
- import { StudentService } from 'src/app/Services/student.service';
- import { HttpClient, HttpHeaders } from "@angular/common/http";
- @Component({
- selector: 'app-student',
- templateUrl: './student.component.html',
- styleUrls: ['./student.component.css']
- })
- export class StudentComponent implements OnInit {
- private _allCountry: Observable<CountryVM[]>;
- private _allState: Observable<StateVM[]>;
- SelCountryId:string="0";
- FromStudent: any;
- constructor(private formbulider: FormBuilder,private StudentService:StudentService) { }
- FillCountryDDL()
- {
- debugger;
- this._allCountry=this.StudentService.CountryDDL();
- }
- FillStateDDL()
- {
- debugger;
- this._allState=this.StudentService.StateDDL(this.SelCountryId);
- }
- ngOnInit() {
- this.FromStudent = this.formbulider.group({
- StudentName: ['', [Validators.required]],
- Country: ['', [Validators.required]],
- State: ['', [Validators.required]]
- });
- this.FillCountryDDL();
- }
- }
Front End Design
I have used 2 DropDownLists, one for each entity, country and state.
- Country - List of countries.
- State - List of states.
I have added a ChangeEvent to Country and also set ngmodel set property to SelCountryId.
- <select class="form-control" formControlName="Country" [(ngModel)]="SelCountryId" (change)="FillStateDDL();">
Student.Component.html
- <div class="card">
- <div class="card-header" style="text-align:center"><b>WEL COME TO CASECADDING DROP DOWN EXAMPLE</b></div>
- <div class="card-body">
- <form [formGroup]="FromStudent" >
- <div class="row">
- <div class="form-group col-sm-3">
- <label for="company">Student Name</label>
- <input type="text" class="form- control" formControlName="StudentName" id="company" placeholder="Enter Student Name" >
- </div>
- <div class="form-group col-sm-3">
- <label for="company">Country</label>
- <select class="form-control" formControlName="Country" [(ngModel)]="SelCountryId" (change)="FillStateDDL();">
- <option value="">--Select--</option>
- <option *ngFor="let Country of _allCountry | async" value={{Country.CountryId}}>
- {{Country.CountryName}}
- </option>
- </select>
- </div>
- <div class="form-group col-sm-3">
- <label for="company">State Name</label>
- <select class="form-control" formControlName="State">
- <option value="">--Select--</option>
- <option *ngFor="let State of _allState | async" value={{State.StateId}}>
- {{State.StateName}}
- </option>
- </select>
- </div>
- </div>
- </form>
- </div>
Step 7
Let's run the project using the following command in terminal and check the results.
- npm start


Summary
In this article, I have discussed how to create cascading DropDown lists using Angular 7 and Web API. In my next article, I am going to discuss Editable Table using Angular 7.
Kishore Kumar SPosted Aug 20, 2020, 4:22 AM
Hi Gajendra, Thanks for the nice article. Can you please clarify what are these and how to add these ? import { CountryVM } from '../Classes/country-vm'; import { StateVM } from '../Classes/state-vm';
Pankaj KrPosted Aug 1, 2019, 9:33 PM
Hi Gajendra, Pankaj(Content developer) this side from https://jsonworld.com. I really liked the way you have explained everything. Thanks for sharing this.
Abhishek SainiPosted Apr 16, 2019, 6:05 AM
Good article.
Chu DuPosted Apr 7, 2019, 10:18 PM
Thank You So much!.