

Master Pages provide a consistent look and feel throughout the site. They provide consistent elements, like global navigation, search box, branding, and other controls, that are expected to appear across the site collection. When Master Page displays a persistent layout, content pages display page specific content. Master pages and content pages are combined at run-time and are displayed as a single page.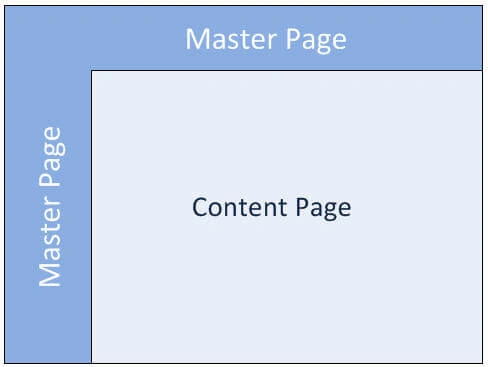
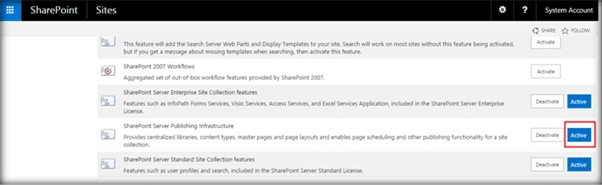
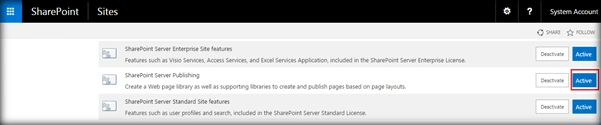
In order to apply custom master pages, we have to enable the publishing feature in the site collection as well as the site. Unless these features are activated, we cannot use custom master pages or change the existing master pages.
Publishing feature at site collection level
Publishing feature at Site Level
Once the features are activated, we get the option to change the master page out of the box. Even with SharePoint 2016, the master pages are those that were introduced with SharePoint 2013. Microsoft has not created a new master page, as is the tradition, but has built upon the exiting SharePoint 2013 master page. Out of the box, we can change the master page by going to the Site Settings -> Look and feel -> Master Page.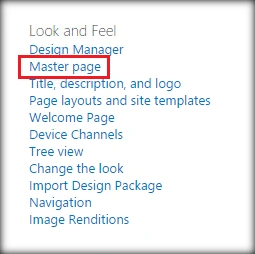
As you can see, the drop down for site master pages shows ‘seattle’ and ‘oslo’ as the available choices. Similarly, for system master pages, we have the same option.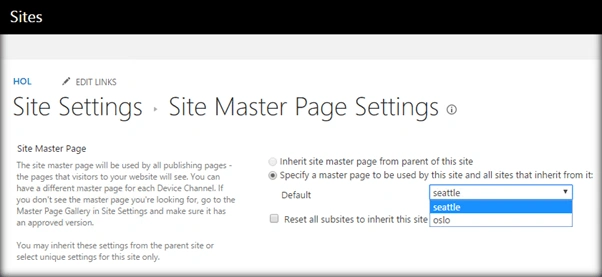
In this article, we will see how to change the default ‘seattle.master’ to ‘oslo.master’ programmatically, using REST API.
SharePoint provides two types of master pages
- Site Master Page
- System Master Page
Site Master Pages are used to provide a consistent look and feel throughout the SharePoint publishing pages. While the System Master Pages provide unique customization to the Forms, like ‘Newform.aspx’ and administrative pages, like site settings.
Change Master Page
In order to change the master page, we will be making use of the REST Endpoint URL:
"/_api/web";
We will be issuing a MERGE AJAX request, using the REST URL. In addition to that, we will be creating a key value pair of the information which will be used to update the master page. The master page updating property is shown below. It will be sent as JSON in the ‘data’ attribute of the AJAX REST call.
- var metadata =
- {
- __metadata: {
- 'type': 'SP.Web'
- },
- 'CustomMasterUrl': '/sites/HOL/_catalogs/masterpage/oslo.master',
- MasterUrl ': ' / sites / HOL / _catalogs / masterpage / oslo.master '
- };
- headers:
- (
- "accept": "application/json;odata=verbose",
- "X-RequestDigest": $("#__REQUESTDIGEST").val(),
- "content-Type": "application/json;odata=verbose"
- },
Output
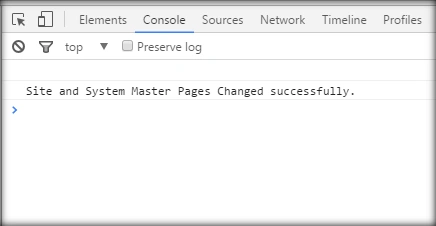
On running the script, we will get the message for successful update of site and system master pages.
Full Code
The full code for changing the site and system master page, using REST API, is as shown below,
- <script language="javascript" type="text/javascript" src="//ajax.googleapis.com/ajax/libs/jquery/1.8.1/jquery.min.js"></script>
- <script language="javascript" type="text/javascript">
- $(document).ready(function() {
- var newMasterPageUrl = "/_api/web";
- var metadata = {
- __metadata: {
- 'type': 'SP.Web'
- },
- 'CustomMasterUrl': /sites/HOL / _catalogs / masterpage / oslo.master ',
- 'MasterUrl': '/sites/HOL/_catalogs/masterpage/oslo.master'
- };
- changeMasterPage(newMasterPageUrl, metadata)
- });
- function changeMasterPage(newMasterPageUrl, metadata) {
- $.ajax({
- url: _spPageContextInfo.webAbsoluteUrl + newMasterPageUrl,
- type: "MERGE",
- headers: {
- "accept": "application/json;odata=verbose",
- "X-RequestDigest": $("#__REQUESTDIGEST").val(),
- "content-Type": "application/json;odata=verbose"
- },
- data: JSON.stringify(metadata),
- success: function(data) {
- console.log(data);
- console.log("Site and System Master Pages Changed successfully.");
- },
- error: function(error) {
- alert(JSON.stringify(error));
- }
- });
- }
- </script>
SharePoint Implementation
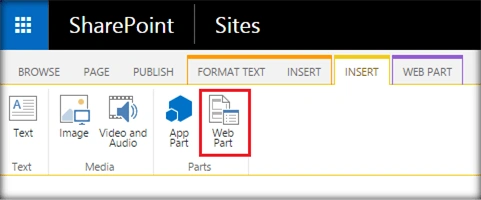
- Go to the edit settings of the SharePoint page and click on Web part from the Insert tab.
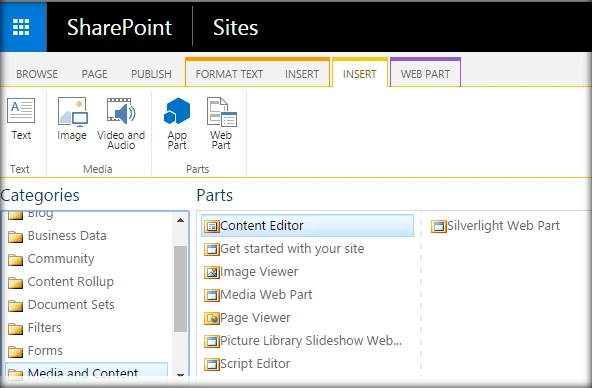
- Add Content Editor Web part.
- Click on Edit Web part from Content Edit Web part. Assign the URL of the script text file and click on Apply.
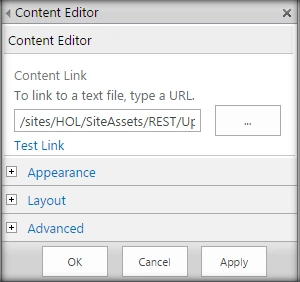
- Click on Apply and we can see the successful master page update message in the console.
Going to the Site Settings -> Look and Feel -> Master page location, we can see that the site master page and system master page has been changed from ‘seattle’ to ‘ oslo’ as part of running the script.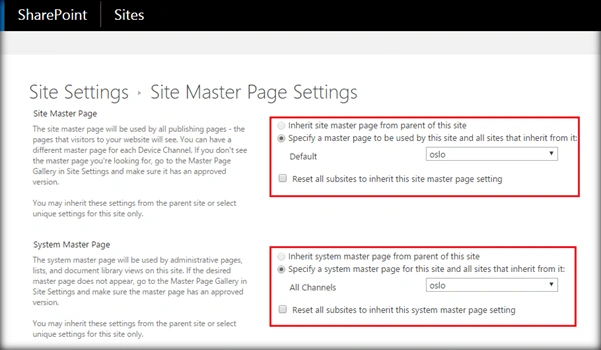
Summary: Thus, we have seen how to update the site and system master pages in SharePoint 2016, using REST API.
Nagarajan ElumalaiPosted Jul 5, 2018, 10:29 AM
I want to add masterpage data dynamically from the console application. Could you please give me some idea.
Tarun DPosted Aug 1, 2016, 2:15 AM
Nice.. Thanks for sharing..
Humayun Kabir MamunPosted Aug 1, 2016, 12:27 AM
Nice...
Vignesh ManiPosted Jul 30, 2016, 8:09 PM
Good one