

How to change the Application Name using LightSwitch Visual Studio 2012
This article describes how to change the Application Name in LightSwitch using Visual Studio 2012.
Step 1
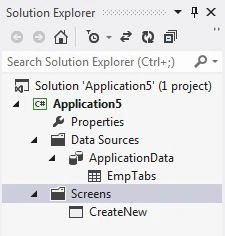
Open the Solution Explorer.
Step 2
In the Solution Explorer, right-click on the property node and choose the "Open" option.

Step 3
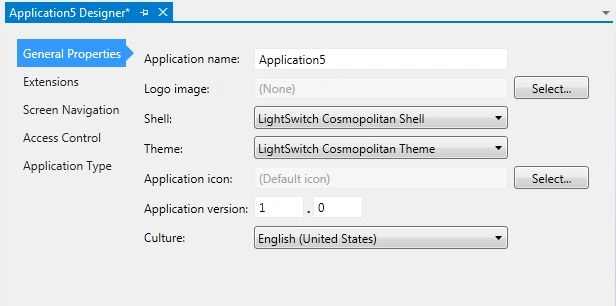
The Application Designer appears.
Step 4
In the Application Designer, select "General Properties".
Step 5
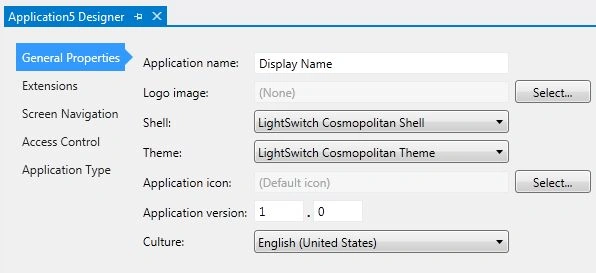
In the Application Name field, enter the new name for the application.
Step 6
When we run the application we see the application with a new name as shown:
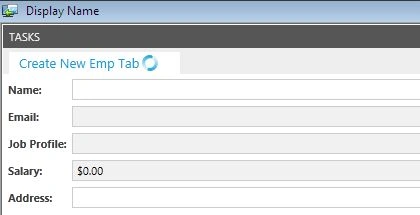
In this article we saw how the name changes from Application 5 to Display Name.
Join the conversation! Your thoughts help the community grow.