

Preface
Slack is undoubtedly the platform that every developer needs nowadays and it is trending in a new way. It is easy to use and manage, and not only this, we can create our own slack app and add a lot of custom functionality to that too.
Chatbot Tutorial Roadmap
Since this is a vast topic and beyond the scope of a single article, I have divided the sections into multiple articles. In the first article, we’ll see how to create a chatbot using Google’s Dialogflow and test the bot in Dialogflow console. We’ll also see how it could be integrated with Slack. The second article will demonstrate how to create a custom chatbot using Microsoft’s bot framework and enable the webhooks in Dialogflow and return the response from the custom bot to Dialogflow intents as a fulfillment response. The third article of the series will demonstrate how to integrate the complete crated bot in article two and three with Facebook Messenger and Slack and test the webhook response in the two environments. Following are the three articles of tutorial about learning how to create a custom chatbot.
- Your first Chatbot using Microsoft’s Bot Framework and Dialogflow API: Part 1 (Dialogflow and Slack Integration)
- Your first Chatbot using Microsoft’s Bot Framework and Dialogflow API: Part 2 (Bot using Microsoft’s Bot Framework)
- Your first Chatbot using Microsoft’s Bot Framework and Dialogflow API: Part 3 (Integrate and test the bot on Slack and Facebook Messenger)
Introduction
From Wikipedia, “A chatbot (also known as a smartbot, talkbot, chatterbot, Bot, IM bot, interactive agent, conversational interface or artificial conversational entity) is a computer program or an artificial intelligence which conducts a conversation via auditory or textual methods.[1] Such programs are often designed to convincingly simulate how a human would behave as a conversational partner, thereby passing the Turing test. ”
In this article, we’ll discuss how to create a real-time chatbot using Google’s Dialogflow API and integrate the same with Slack. The reader of the article does not need to have prior knowledge of bot creation as the article will demonstrate the bot creation and deployment step by step using explanatory pictures. Follow my last article Creating a Chatbot using Amazon Lex Service to learn how to create bot using Amazon’s Lex service. Trust me, it is fun and exciting to create your own bot and see it working over the thought of creating a bot. We’ll setup Dialogflow account to leverage API. Let’s jump directly into the tutorial.
Case Study
Let’s imagine a scenario for our bot creation. Let’s say there is a newly opened restaurant and they have recently launched their website, Facebook page, Twitter handles and integrated their business with other social media accounts. The restaurant wants to come up with a digital solution to book a table in the restaurant online by the user and they want to create an automated bot to do so. An end-user can talk to the bot and book a table. The bot will ask all the relevant details before table booking in the restaurant like date, time, number of persons, etc. We’ll create the bot and integrate that with few social media accounts.
Setup Dialog Flow Account
- If you already have a Google account and want to use that for creating a bot in dialog flow, you can do so, otherwise create a new one. I am using my existing Google account to sign in to dialog flow.
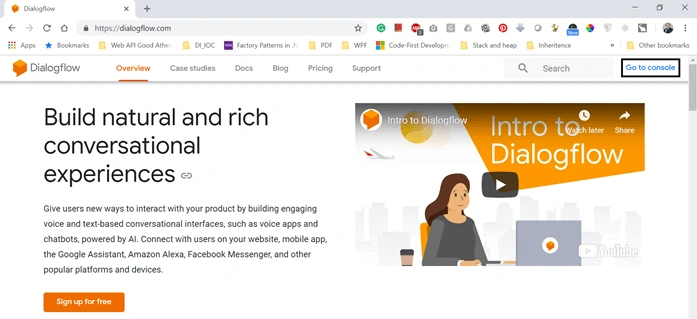
“Dialogflow is powered by Google’s machine learning and Give users new ways to interact with your product by building engaging voice and text-based conversational interfaces, such as voice apps and chatbots, powered by AI. Connect with users on your website, mobile app, the Google Assistant, Amazon Alexa, Facebook Messenger, and other popular platforms and devices. Read more…”
Click on “Go to console” to login into Dialogflow.
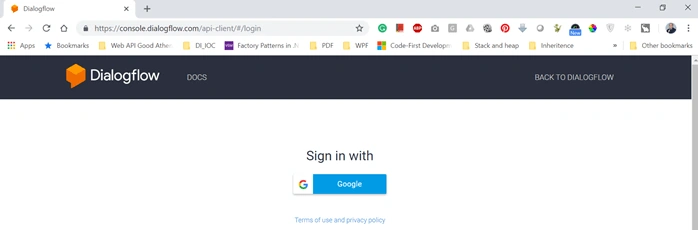
- As suggested earlier, create a new Google account or login with an existing one.
Creating a Bot in Dialogflow
Create Agent
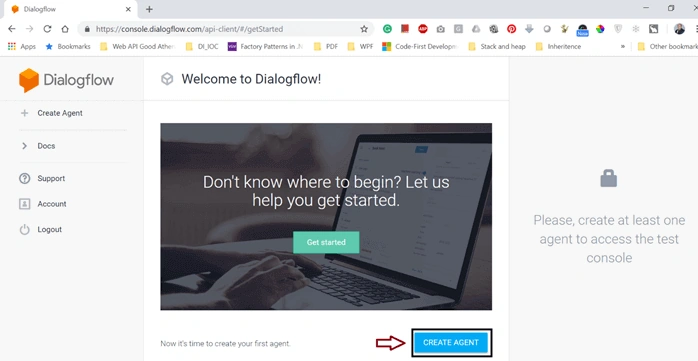
- After entering the console, you’ll see a get-started page, click on the button “CREATE AGENT” to create the agent/bot.
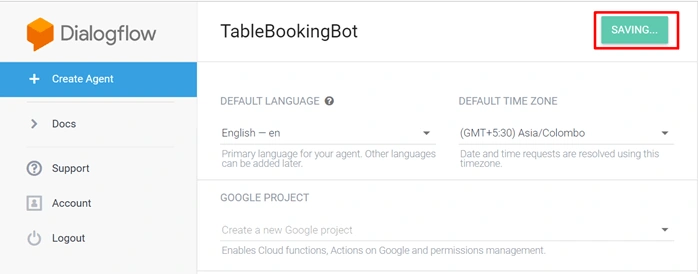
- Give the bot a meaningful name for e.g. “TableBookingBot”. You can choose the default time zone and language as per your choice and click on “CREATE” button.,
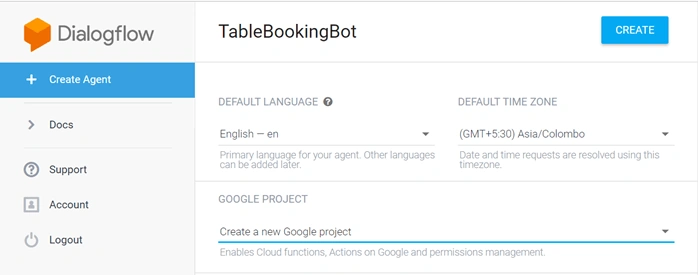
- It will take a moment to save the agent.
Create Intent
- It's time to see what the intents are. Each intent represents a different topic that a bot can understand and perform an action to fulfill For e.g. when a user types in “Hi” or “Hello”, these inputs need to be handled by a bot and for that, an intent should be there that understands user’s input and responds accordingly. If we click on “Intents” button in the left-hand side panel, we’ll see two default intents already created for us; i.e., Default Welcome Intent and Default Fallback Intent.
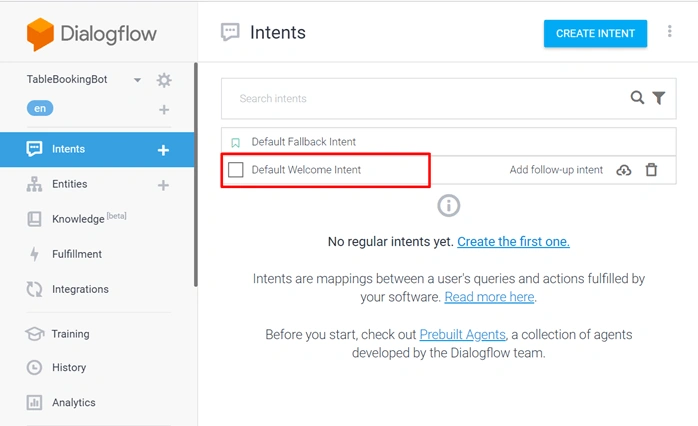
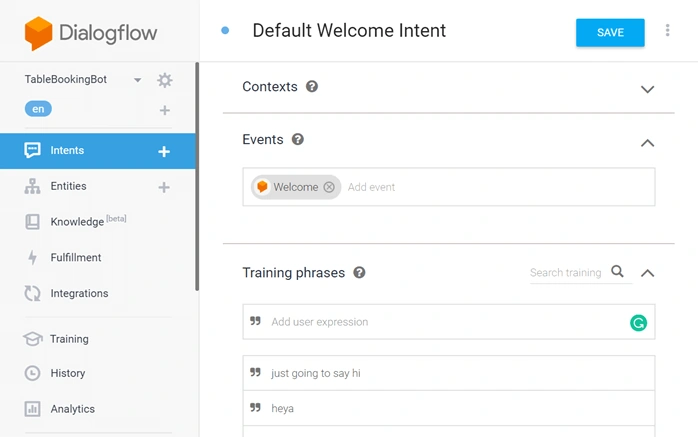
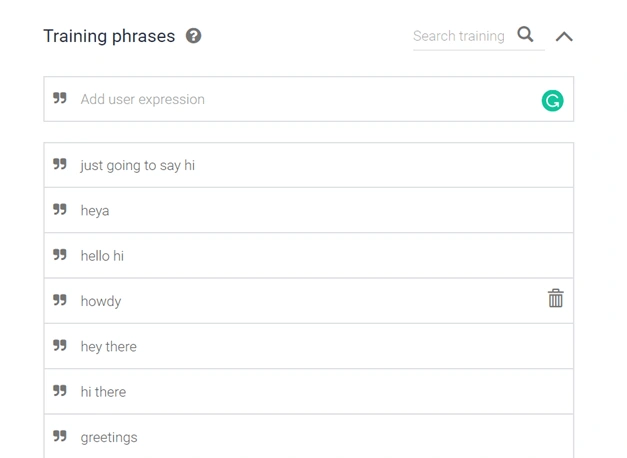
- Click on Default Welcome Intent, and we see the sample Training Phrases called utterances in Lex service in Amazon already filled in for e.g. “just going to say hi”, “heya”. You can add more in the list depending upon what you expect from a user to start with.
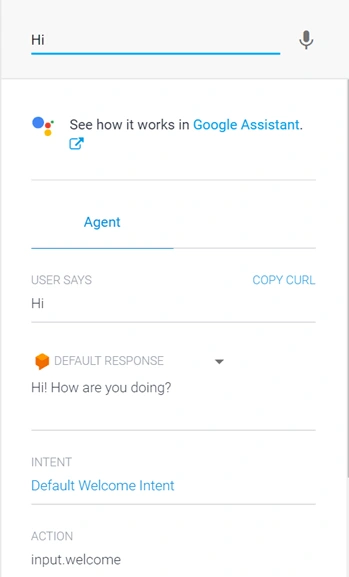
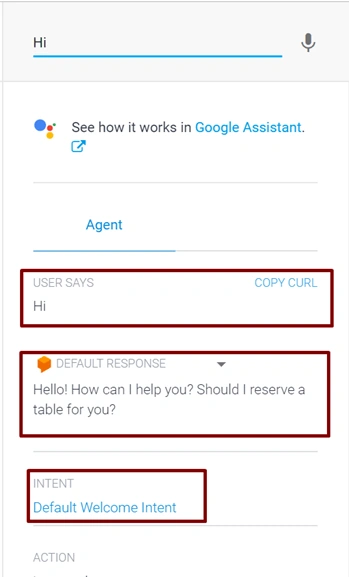
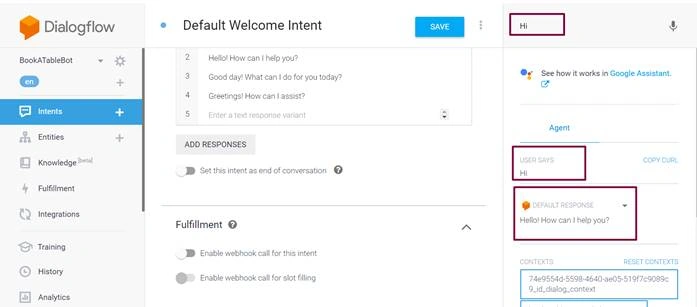
- On the right side of the page, there is an option to test the intent. Click on that and type “Hi”. Here we see in the test panel, it recognizes that user said (“USER SAYS”) “Hi” and responds back with a default text “Hi! How are you doing?”. So, this response text comes from the default response set in the intent for all the training phrases/utterances.
- Following image shows all the sample pre-defined training phrases existing in this default welcome intent.
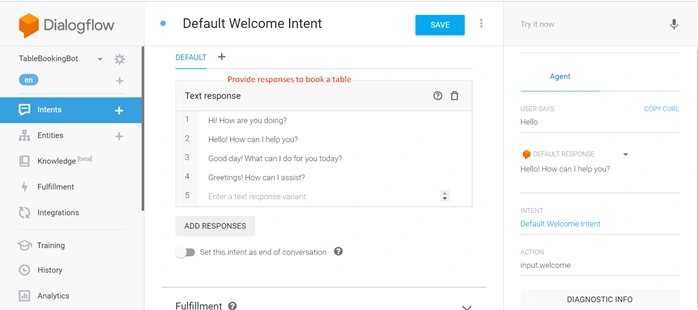
- When you scroll down, you see the Text Responses section. A few default responses are shown here. Since our purpose is to ask the user about his intent to book a table, we can delete these default responses and provide a few for our intent.
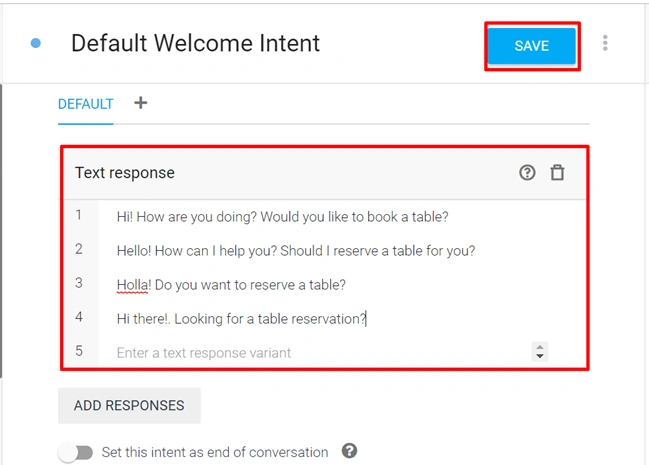
- Give some meaningful responses that meet our purpose of asking the user if he wants to book a table for e.g. “Hi! How are you doing? Would you like to book a table?”, “Hi, There! Looking for a table reservation?” etc.
- Now if you test the intent after saving it, it will respond accordingly as per the set response texts.
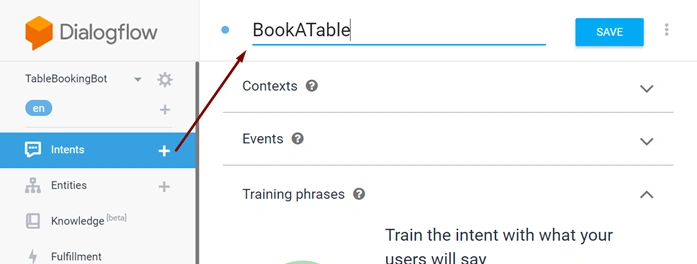
- Now, what about if the user wants to book a table, so we need to have a new intent that takes care of table booking for the user. So, click on the + button in Intents and create a new intent and name that BookATable
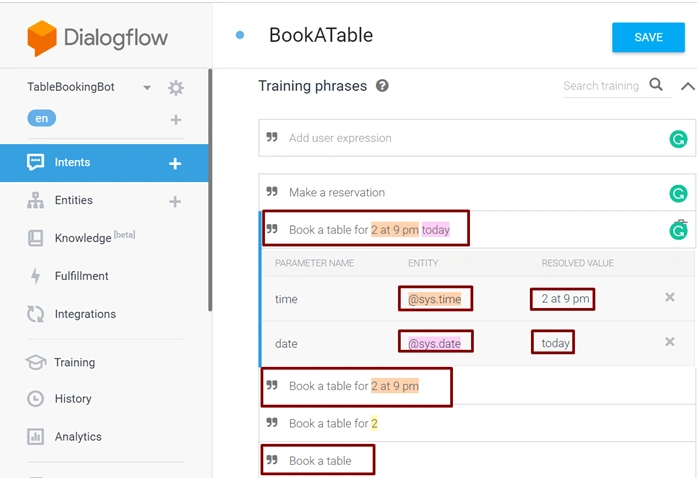
- In the Training Phrases/Utterances section, provide the phrases like “Book a table”, “Book a table for 2”, “Book a table for 2 at 9 PM today”. You see that the while you type and enter these phrases, the framework is so smart to recognize your input parameters for e.g. when you type “book a table for 2”, it understands that 2 is a number and creates a parameter list and adds 2 as a parameter with a type number. This functionality is basically the part of action/parameters section where one can define the input parameters but should take from the user. We can define those parameters manually, but the framework is also smart enough to understand from our training phrases and add that to the action/parameters list. Like the number, it goes for time and date as well.
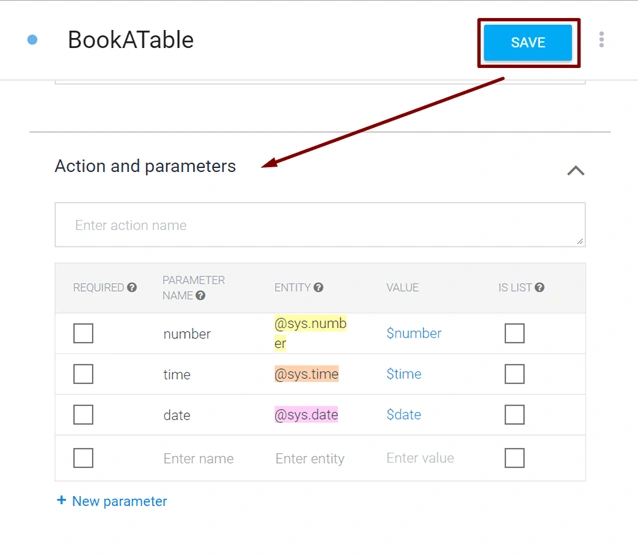
- Now at the Action and parameters section, we see three parameters added based on the training phrases i.e of type, number, date and time. A bot expects the user to provide these parameters when user types in. Click on “SAVE” to save the training phrases and parameters.
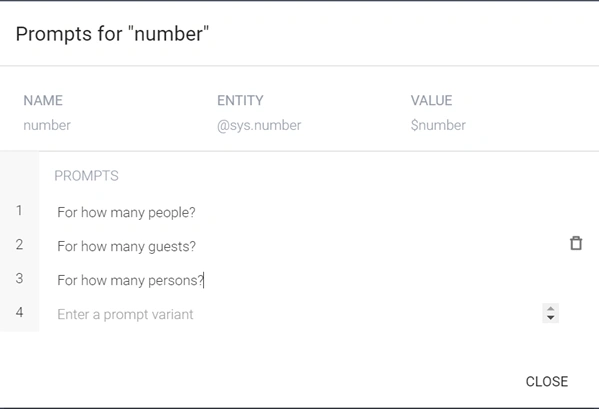
- We can also make these parameters mandatory for the user to provide and set the default prompts for the parameter. So that if the user does not provide those parameters, the bot asks the user to provide that. Click on “Define prompt.” link for the number.
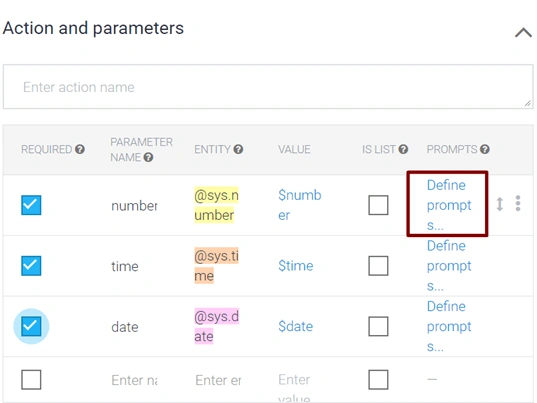
- Define a few prompts for a number like “For how many people?”, “For how many guests” etc.
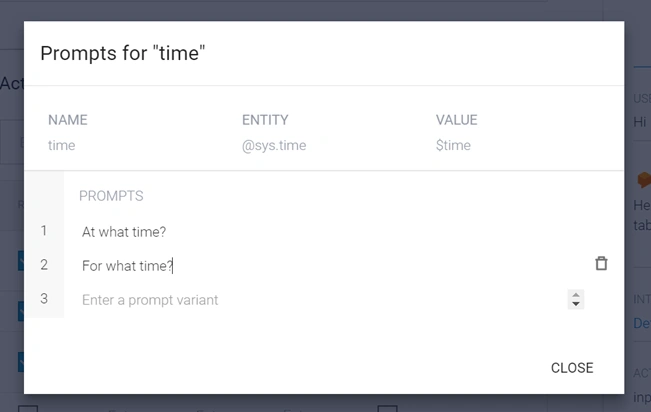
- Similarly, for time, as shown below.
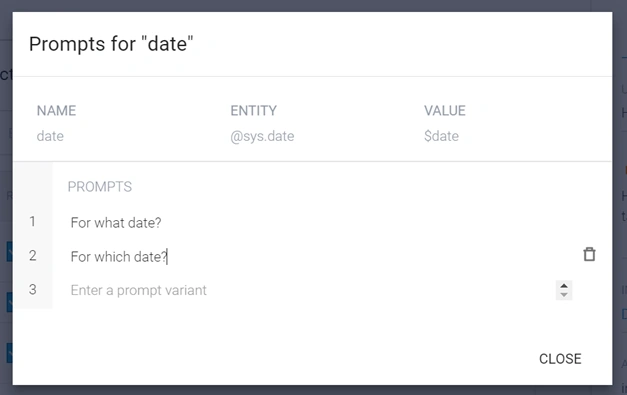
- For date as well, as shown in the following picture.
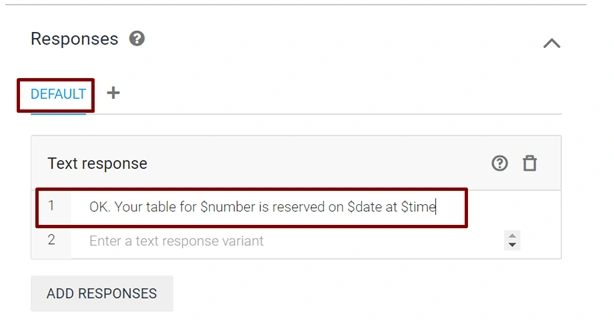
- We can provide the default response of this intent that says, “Your table is booked” and also provide the input parameters in the default response like “your table I booked for the $number on a $date at a $time” where the $ and corresponding parameter is the input parameter that the user provided. You can play with lots of given action and parameters likewise to make your bot more interactive and cooler. This default response is the response that a bot returns if there is no webhook or functionality that takes care of user’s input texts. Save the intent.
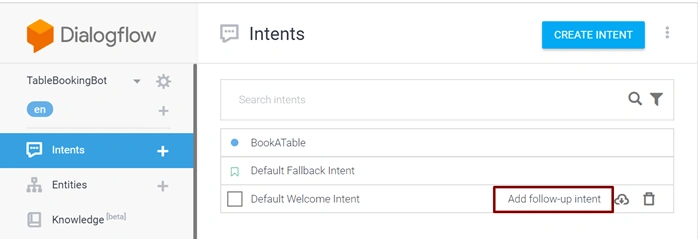
- Going back to the intents list and Default Welcome Intent, we see that we can add the follow-up intents here as well. Follow up intent means the next bot response is based on user input. For e.g. the response of the bot if the user says “Yes” or “No” when asked for “Would you like to book a table.” Click on Add follow-up intent.
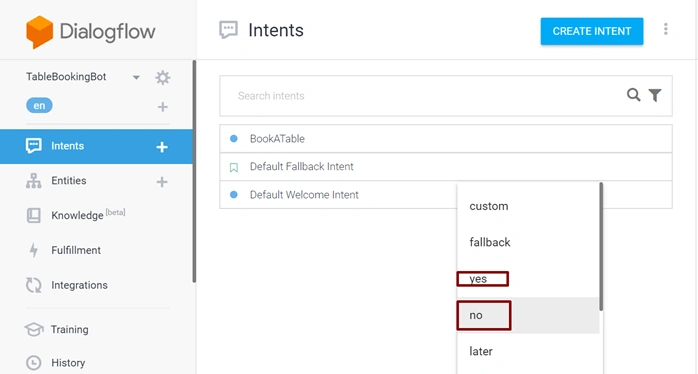
- We see the list of follow up intent types you can create, we’ll create one for yes response and one for no response.
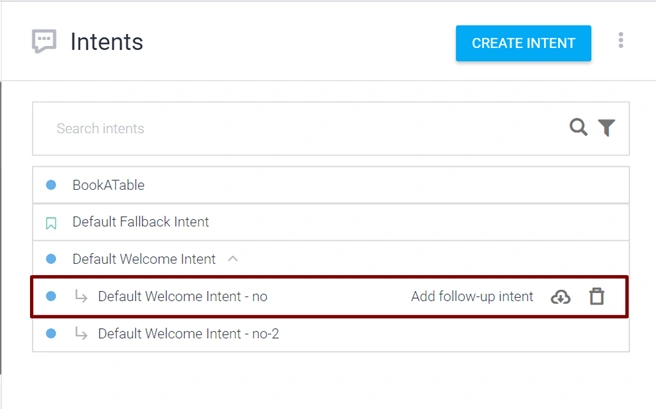
- Click on no and create a new follow up intent for no.
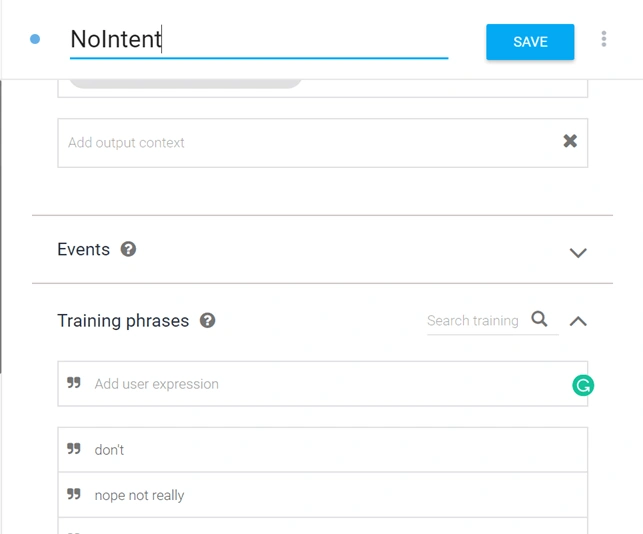
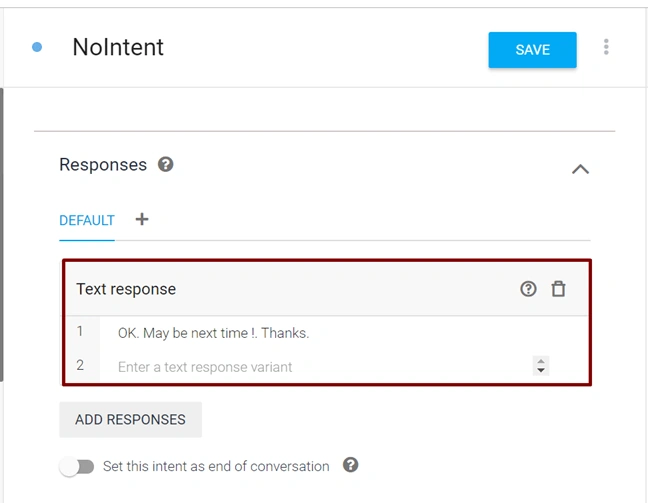
- Name the intent as “NoIntent” and we see the default training phrases there like user saying “no”, “don’t”, “nope really” etc. That means the user does not want to book a table.
- In that case of the user saying “no”, provide the response text like “No problem! Thanks”, “OK. Maybe next time! Thanks” etc.
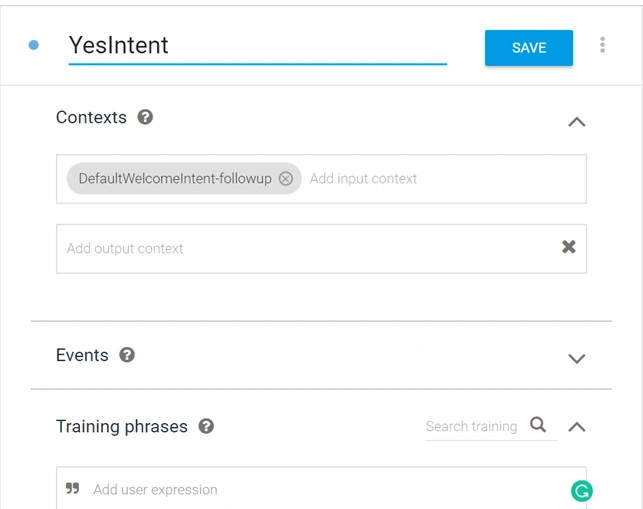
- Similarly, create a “Yes” follow up intent and name that “YesIntent” and save.
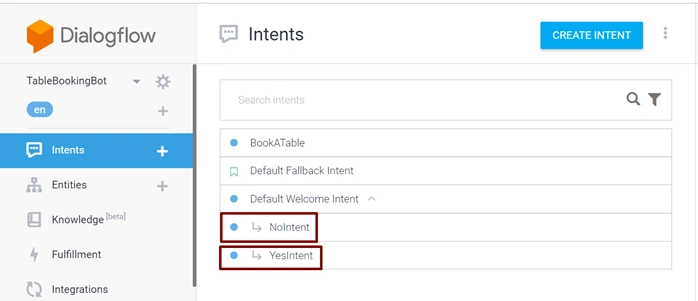
- Now, in the Intents list, we see two follow up intents for Default Welcome Intent. You can test the bot in the test window and check your intents and user responses.
In the next section, we’ll create a bot using Microsoft’s Bot Framework and hook the real-time business logic to handle the user requests instead of sending dummy responses.
Test the bot in Dialogflow console
Our first version of a bot without a webhook is complete and can be tested.
- Open the test window for Default Welcome Intent and type “Hi”. The bot will return the default response text.
- Now, type “Book a table” and the bot will ask “For how many persons”.
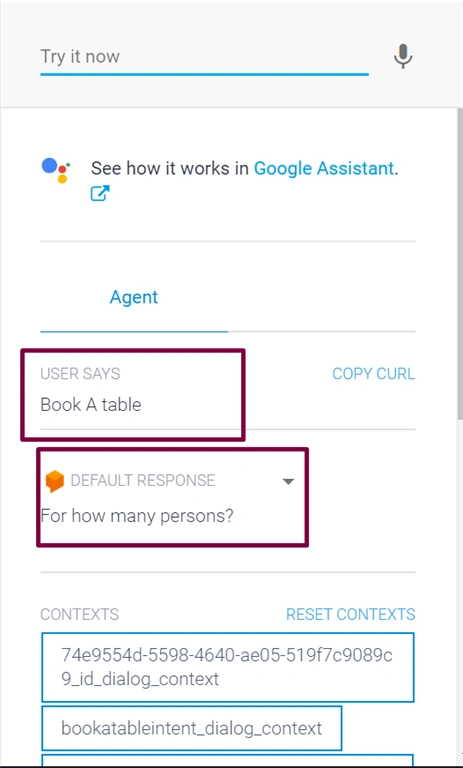
- Provide the number of persons and bot will continue asking about time and date because we set those parameters as mandatory.
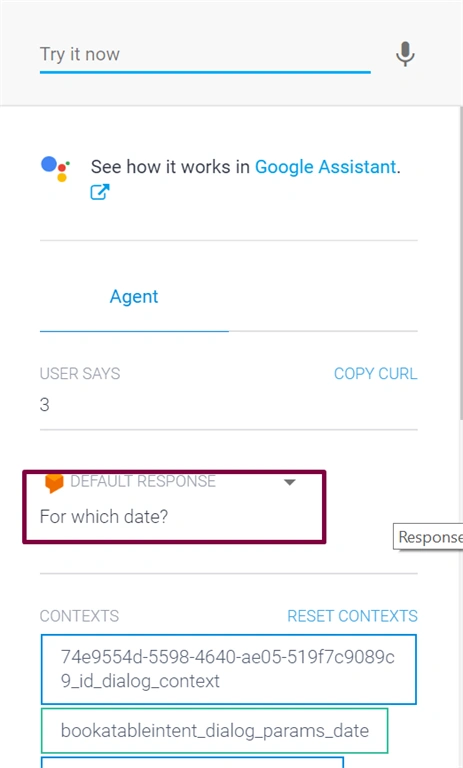
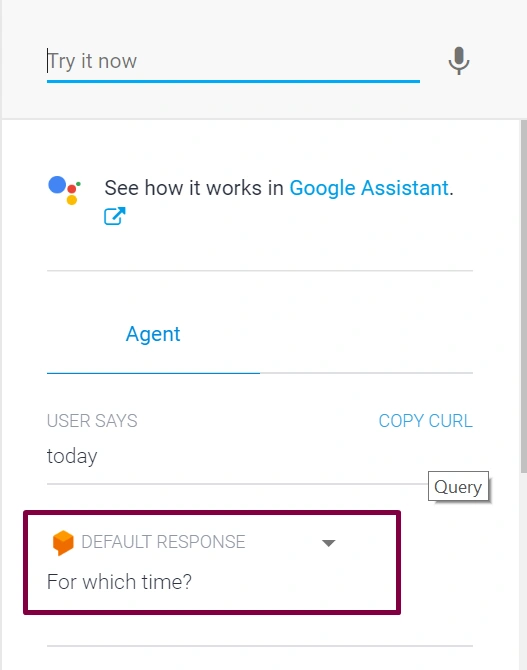
And it returns the final response as follows.
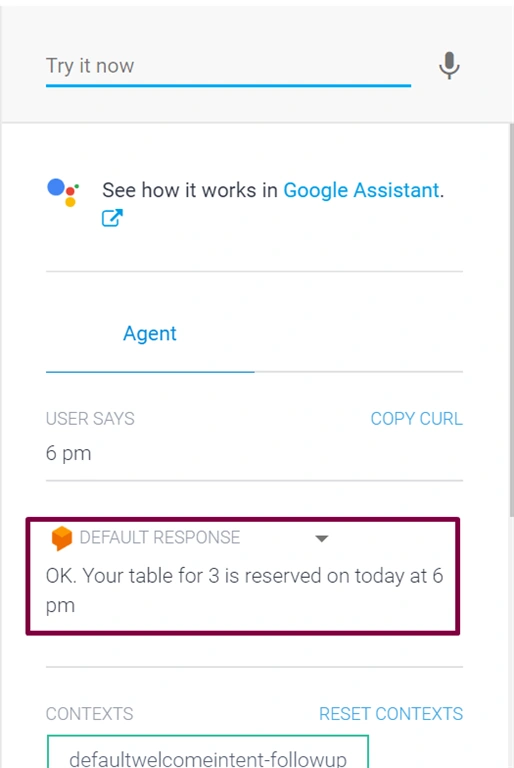
It says “OK. Your table for 3 is reserved on today at 6 pm” i.e. the default response text. We call it a default response text because we have not integrated any external webhook as a fulfillment of request and so it takes the default response text. We can also add our custom functionality by creating our custom bot engine and integrate the same with Dialogflow as a fulfillment webhook and in that case, the response will be returned from our API which could be a calculated response as per the backend business logic. In the next section, we’ll see how we can create a webhook using Microsoft’s bot framework and integrate the same to our bot.
Integrating the Bot with Slack
You can learn how to create your own slack app in this article.
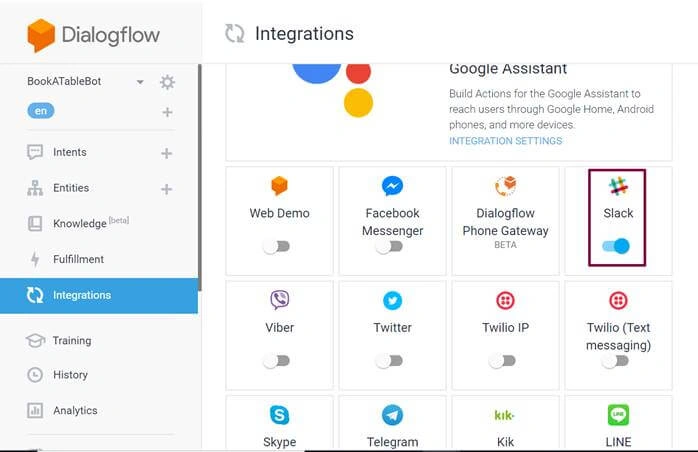
- Go to the Integrations section of Google Dialogflow console and enable Slack.
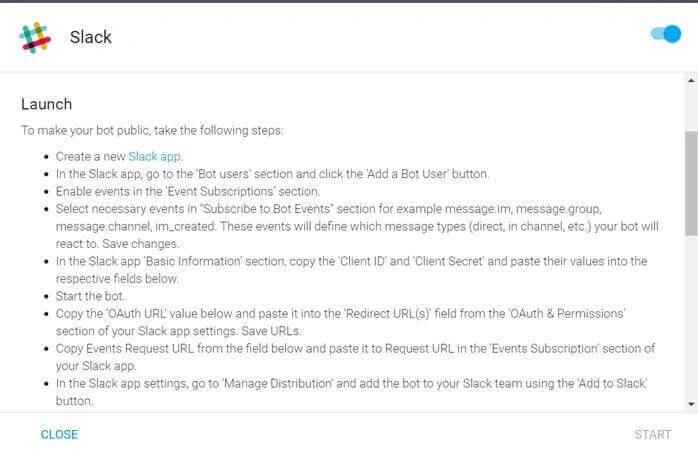
- Follow the instructions as shown in the popup.
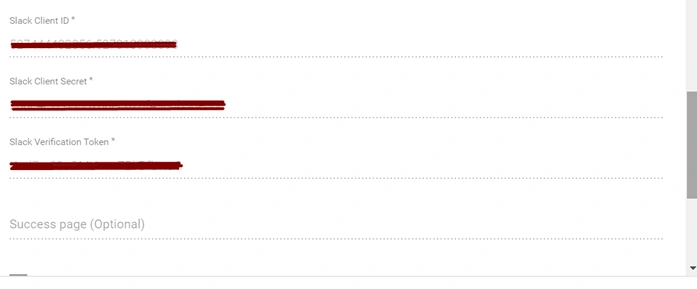
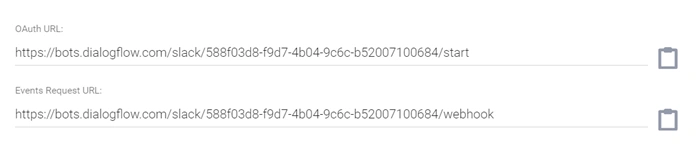
- Create your new slack app and get the needed details to be filled in this section.
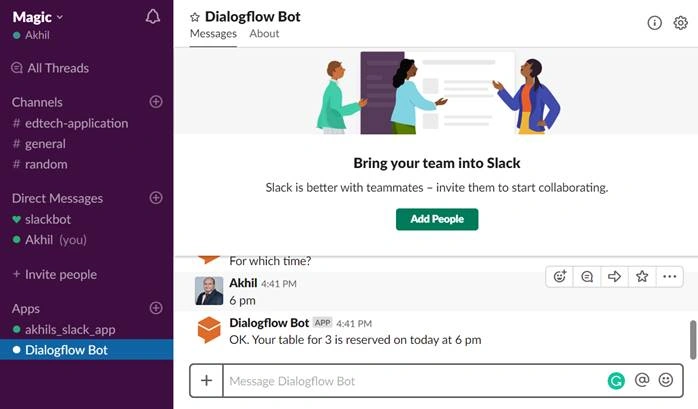
- Open the newly created Slack app and type “Hi”. It will respond as expected.
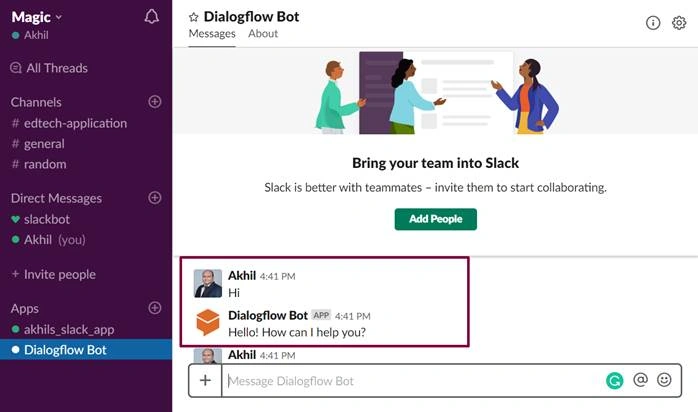
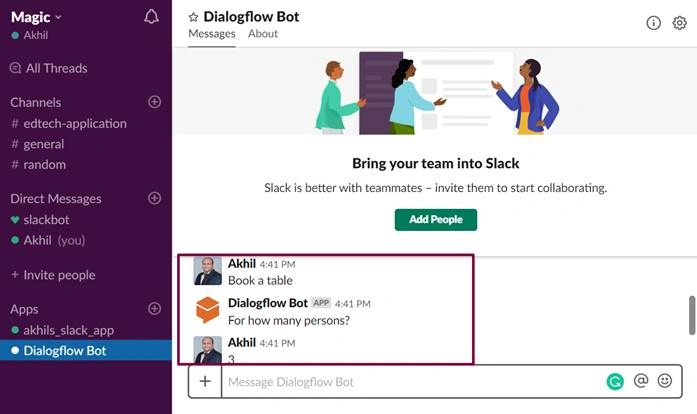
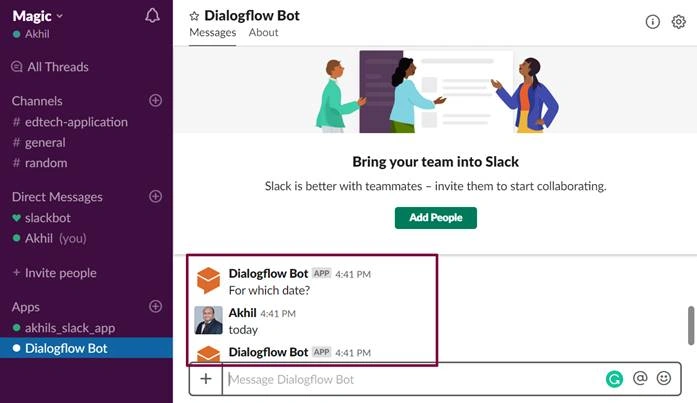
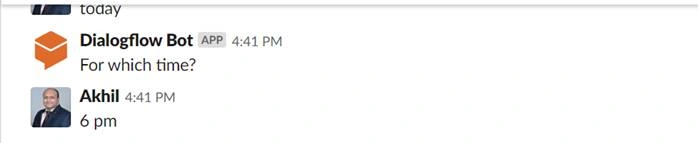
So, we get the response from the default return response.
Yippie.
Conclusion
In this detailed article, we learned what a chatbot is, how to create your own bot using Google’s Dialogflow and test the bot in Dialogflow console and in Slack App. In the next article of the series, we’ll learn how to create a bot using Microsoft’s bot framework and return the fulfillment response from that webhook instead of returning the default response from the Dialogflow Intent.
Abhishek ChadhaPosted Apr 22, 2020, 3:53 AM
Is it a way we can delay 20 sec and call next intent automatically after 20 sec like if user not respond for 20 sec then we call another intent automatically