

In this article, I would like to share the procedures to check out and check in a file in a SharePoint 2013 Document Library.
Need for check-out and check-in
The following are reasons it necessary to check out or check in:
- In a SharePoint Document Library, you have one way to control the document collaboration by using the “Require Check Out”. Especially when multiple users have access to this library.
- If you have checked out the file then other users cannot overwrite the file. Other users can edit the documents but only when you have checked in the files.
- You are also prevent other people from seeing the latest changes or making changes themselves, so it is important that you check files back in promptly.
- By default, check out and check are not enabled in the Document Library settings
Procedure to enable the “Require Check Out” in library settings
Use the following procedure to enable “Require Check Out”.
Step 1: Go to your library in your site, that you have created already.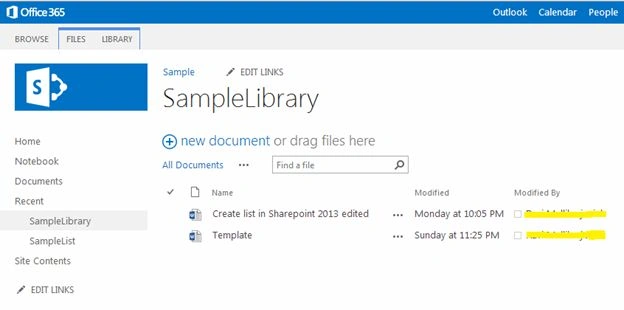
Step 2: Then click on the “library” option in the top ribbon bar to go to the library settings,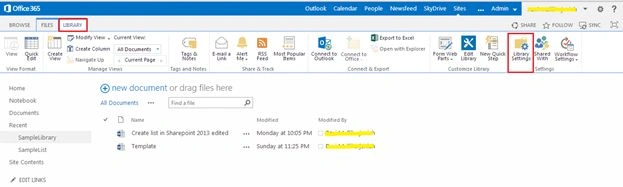
Step 3: When you click on the “library settings” in the top ribbon bar, you will get the library settings page as shown below: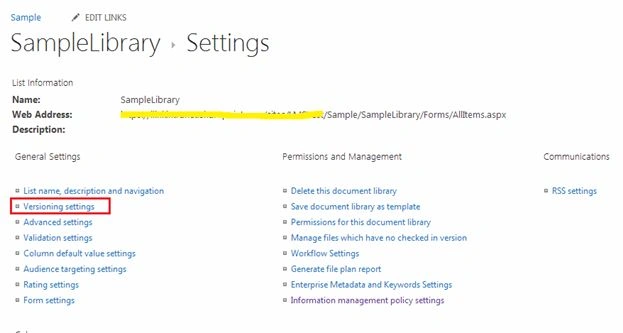
Step 4: Then go to the “versioning settings” under “General Settings” and then click on “Yes” in the “Require Check Out” part as shown below: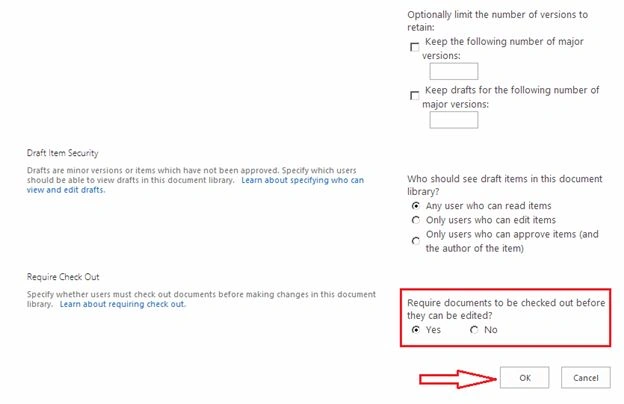
When you click on “Ok” you will get the check-out option in your Document Library as shown below.
You have two ways to check-out the document.
Way 1: On the top ribbon bar you can choose the check-out option in SharePoint Document Library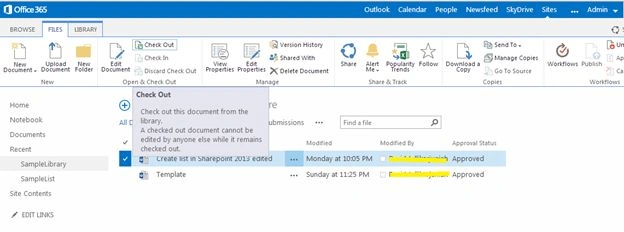
Way 2: You can check out the document by using “open menu” (…) also as shown below.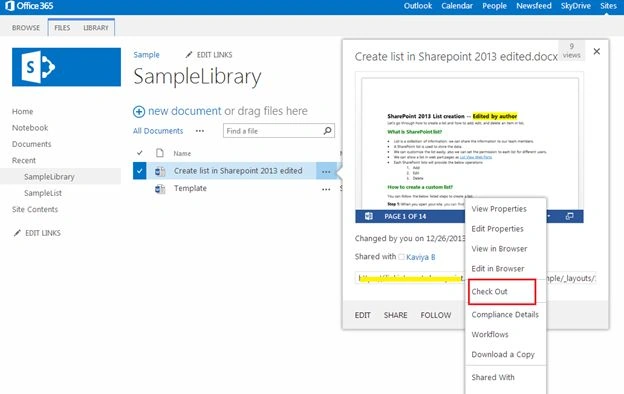
Procedure to check-out a file
Use the following procedure to check out and check in a file,
Step 1: Go to your library in your site, that you have created already.
Step 2: Then select the document in the library, that you want to check-out as shown as below.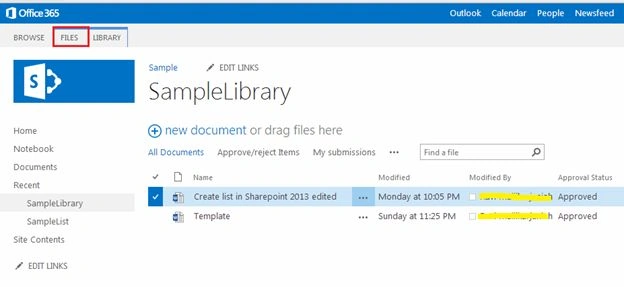
Step 3: Click on the files option in the top ribbon bar and then select the check-out option on your ribbon as shown below.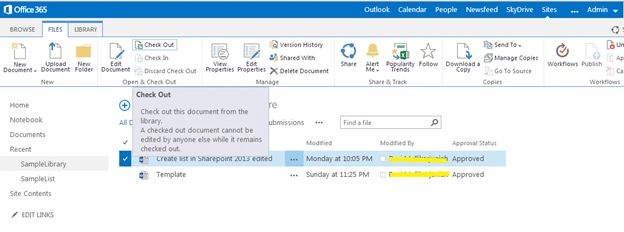
Step 4: When you click on the check-out option in your ribbon the document will be checked out as shown below.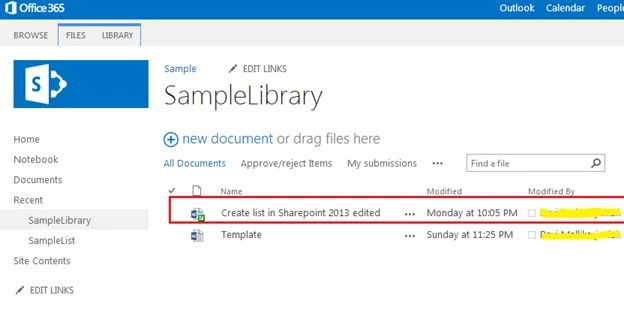
If you have checked out the file then other users cannot change the file. Other users can edit the documents only after you have checked-in the files.
If other users try to edit the document then they will get an error message as shown below: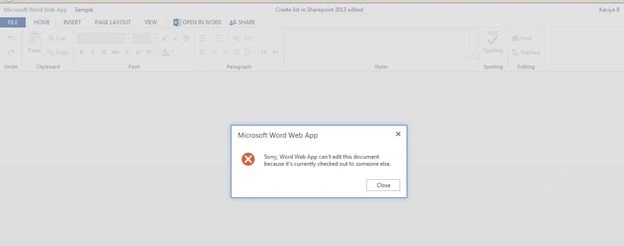
Step 5: You (the checked-out user) can edit and save the changes of the document.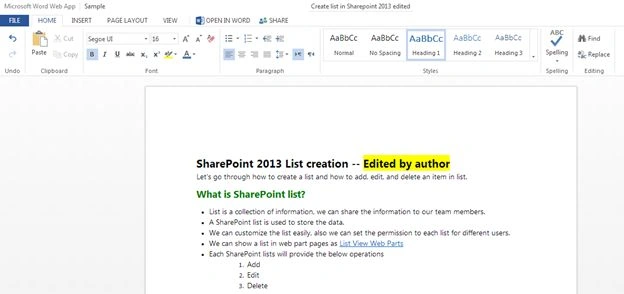
Procedure to check-in a file
You can use the following procedure to check-in a file.
Step 1: Then you can check-in the edited file as shown below:
- Select the checked-out file
- Click on the files on the top ribbon bar
- Then select the check-in option on the top ribbon bar
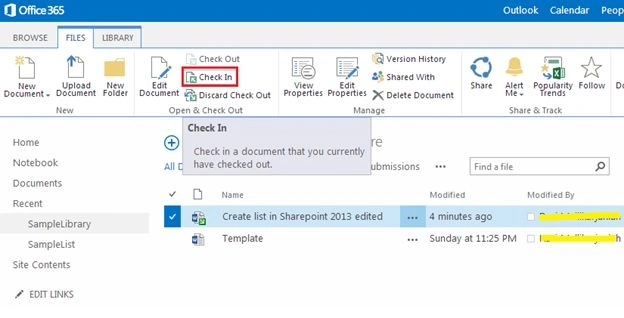
Step 2: When you select the check-in option in the top ribbon bar, you will get the pop-up as shown below,
Provide your comments and then select “Ok” to check-in the document.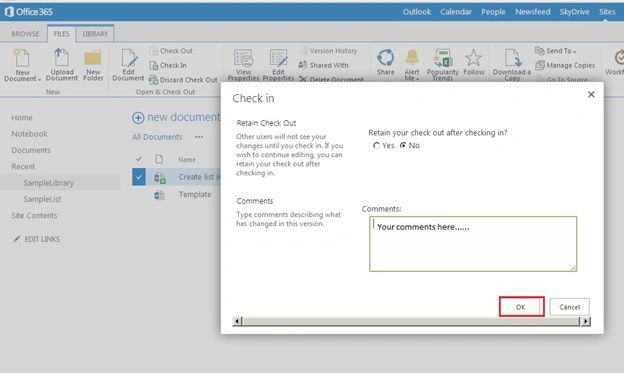
The document will be checked- in successfully. 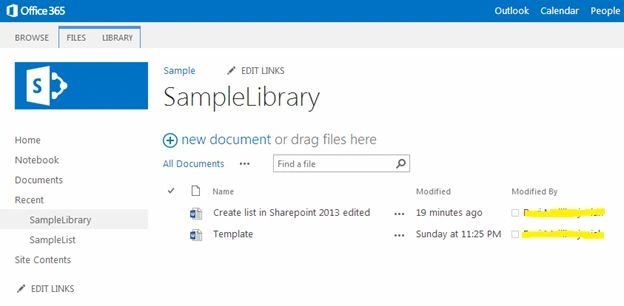
Summary
In this article we have explored how to check-out and check-in a file in a Sharepoint 2013 Document Library.
Join the conversation! Your thoughts help the community grow.