

Google Chrome extension (or Plugin or AddIn) is a useful medium to share features or tools across the tech community. I have prepared one small Chrome extension for SharePoint (2013, 2016 and Online) which tags (marks with red button) unique permission lists on SP Site’s Site Content Page. This is done using SP REST API calls. I will walk you through the major steps I followed for creating this Chrome extension (SharePoint - Tag Unique Permission Lists) and how to publish it. You may create your own extension by following these simple steps.
Step 1 - Create new Chrome Extension
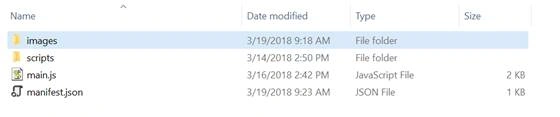
There is a defined file structure to be followed while building chrome extension. The most important and must-have file is “manifest.json”.
- Create any folder (ex: “My First Chrome Extension”) in your local drive.
- Create new file named “manifest.json” in it.
- Open “manifest.json” empty file in notepad and paste following code in it. You may update the code based on your need. This code loads js scripts on page load, but you can design your code in such a way that certain actions can be performed on browser actions. More details,
- {
- "manifest_version": 2,
- "name": "SharePoint - Tag Unique Permission Lists",
- "short_name": "Tag SP Lists",
- "description": "It tags unique permissions lists with red buttons on Site Contents page. Compatible - SP 2013, 2016 and Online.",
- "version": "2.0",
- "icons": {
- "16": "images/icon16.png",
- "48": "images/icon48.png",
- "128": "images/icon128.png"
- },
- "content_scripts": [{
- "all_frames": true,
- "css": ["scripts/css/style.css"],
- "js": ["scripts/js/jquery-1.9.1.min.js", "main.js"],
- "matches": ["*://*/*viewlsts.aspx*"],
- "run_at": "document_end"
- }]
- }
Description of above used manifest.json properties:
- manifest_version => Integer must be always 2 (applicable since Chrome 18). Mandatory.
- name => Name of the extension. Type is String. Plain Text. Maximum 45 characters. Mandatory.
- short_name => Short name of the extension. Type is String. Plain Text. Maximum 12 characters. Optional.
- description => Description of the extension. Type is String. Plain Text. Maximum 132 characters. Optional.
- version => One to four dot-separated integers identifying the version of this extension. Must be between 0 and 65535.
- icons => Icons to be used in the extension. Ideally to be in PNG format. Optional.
- content_scripts => Content scripts are JavaScript files that run in the context of web pages. By using the standard Document Object Model (DOM), they can read details of the web pages the browser visits, or make changes to them. Optional.
- all_frames (Boolean, Optional)
Controls whether the content script runs in all frames of the matching page, or only the top frame. - css (array of strings, Optional)
The list of CSS files to be injected into matching pages. These are injected in the order they appear in this array, before any DOM is constructed or displayed for the page. We are using css here (from folder “scripts/css/”) to render style for red button which will be shown on those list tiles which are having unique permissions on SP Site Content Page. - js (array of strings, Optional)
The list of JavaScript files to be injected into matching pages. These are injected in the order they appear in this array. jquery-1.9.1.min.js file is added at the first place and is referred in js file. Both files are placed in folder “scripts/js/”. main.js file is having actual js code logic(using REST API) which fetches only unique permission and non-hidden lists and tags them with red button. - matches (array of strings, Required)
Specifies which pages this content script will be injected into. Match Patterns. We are matching “aspx” (SP Site Content Page) page here only so that script won’t run on other pages. - run_at (string, Optional)
Controls when the files in js are injected. It can be "document_start", "document_end", or "document_idle". Default is "document_idle". We are running our script files at the end of document object model life cycle.
- This is how root folder structure looks.
Step 2 - Test the package locally
- Open the Google Chrome browser
- Click on 3 dots in the corner (settings) which show tooltip as “customize and control Google Chrome.”
- Navigate to More Tools >> Extensions
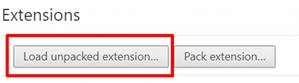
- Click on “Load unpacked extension…” button
- Open “My First Chrome Extension” folder
- If there are no errors, then this extension will load without any problem. If there are errors visible, fix those issues in files and just reload extension again.
- If you want to run extension in Incognito mode then check this setting.

Step 3 - Prepare the package to be published in Google Web Store
- Now once we are finished with testing the extension, just create a .zip file of the parent folder. (for ex: “My First Chrome Extension.zip”)
- Open Google web store for extensions
- Login with your gmail account
- Click on settings icon at the top right and select Developer Dashboard
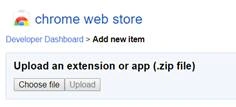
- Click on Add new item and upload your zip file here
- Follow the steps to fill in details like icons, screenshots, descriptions etc. Appropriate descriptions, icons and screenshots will correctly emphasize your extension’s purpose.
- The most important thing to mention here is that Google Chrome Extension is not free. You will have to pay a nominal $5 fee before publishing the Chrome extension to the store. This fee will be valid for a total of 20 extensions. So ideally for the next 19 extensions you don’t have to pay anything.
- Once you pay $5 and everything looks fine then just publish your extension.
- In one hour or so, you can see your extension in the Google web store.
- That’s it!
Prasham SabadraPosted Mar 21, 2018, 12:21 AM
Nice to see you here...
Prasham SabadraPosted Mar 21, 2018, 12:20 AM
Thanks Shriram for sharing this!
Prasad PathakPosted Mar 21, 2018, 12:04 AM
Great and detailed explanation, Thanks.