Introduction
This hands-on article demonstrates how to build your first Cloud Application using Visual Studio.
What is Cloud Computing?
- Can act as a Service - We can store and retrieve information, the most basic service offered.
- Can act as a Platform/operating system - The future, through Cloud computing " Internet/Web " is a platform.
The "cloud" represents the Internet.
So Cloud computing is the use of the Internet/Web for the tasks you perform on your computer.
Getting Started
Prerequisites
- Visual Studio 2008/2010
- Windows Azure SDK and Windows Azure Tools for Microsoft Visual Studio
Download Link1, or
Now we start to create our first Cloud Application.
Step 1:
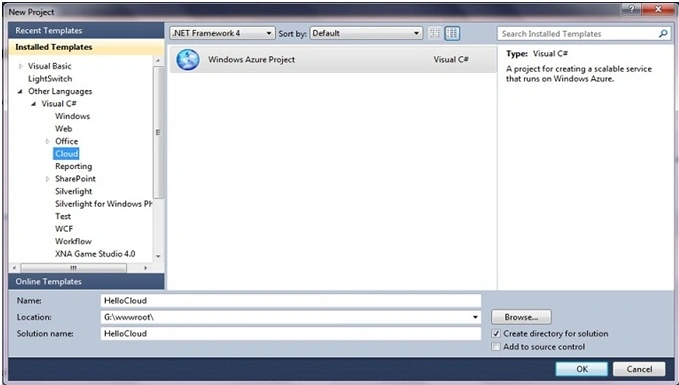
Open Visual Studio, from menu File New Project. Select template Windows Azure Project, give appropriate solution name, select location path, and then hit OK.
Step 2:
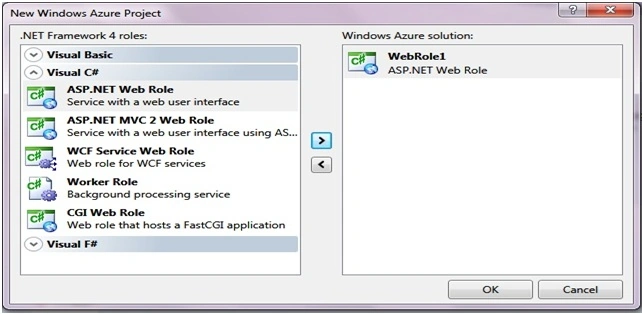
A new window will open asking for what kind of role/application you want to create. By default, we will select and add an ASP.NET Web Role application and hit OK.
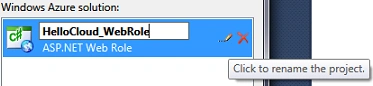
You can also change the default WebRole name to other meaningful words. Click on the pen-like icon provided.
The project is created; you can view the list of files created from project solution explorer.
Step 3:
Now drag and drop a Button and Label Control. Also, create an event handler for Button and run the project (F5 or hitting the green play button).
Step 4:
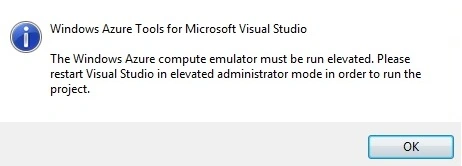
While running the project you will encounter an error as shown in the image below.
Step 5:
Why this error occurred?
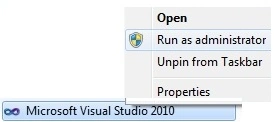
Because in a real-life scenario Cloud application will get deployed into a dynamic highly scalable virtualized environment called Windows Azure (platform for Cloud Applications). In order to mimic this on our localhost, we need to run the Visual Studio in Administrator mode. Open the Visual Studio in Administrator (right-click "Run as administrator") mode and select your project.
Step 6:
Now run your project; it will take some time to compile. You can see the background process going, on the left bottom corner status bar.
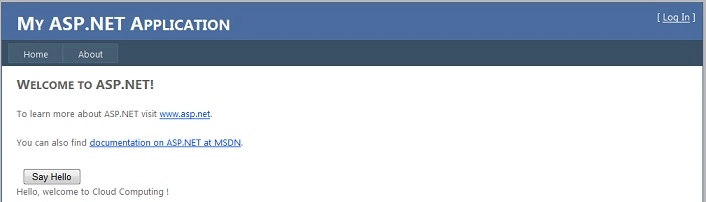
When your page has loaded, click on the Button; you will get the text displayed on the Label. There we go; we have created our first Cloud Application.
During the first time when you run your project, a series of background setup initializations take place.
Also, a blue icon will appear on the right corner of the taskbar. This is the virtual local Windows Azure created on your system.
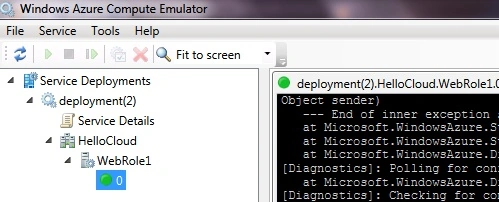
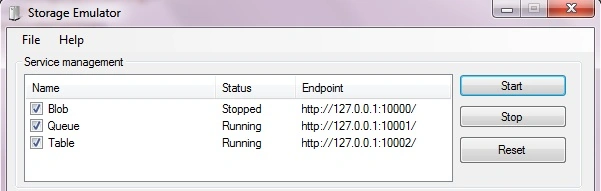
Right-click on the icon and click on "Show Compute Emulator UI". This will open the Emulator window, in which you can see the services created.
Step 7:
Right-click on the icon and click on "Show Storage Emulator UI".
Step 8:
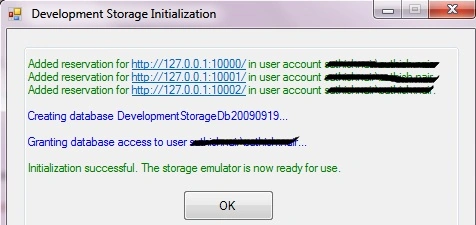
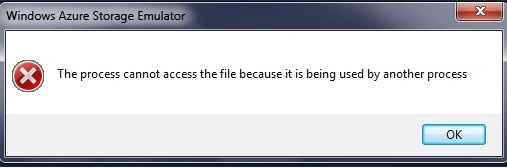
Assuming that the above services are not running, you will get an error as below. Click "OK", the services will automatically start.
How to publish the application
Right-click on your project and click "Publish". A new window with two options will appear
Create Service Package Only
This will publish two files into the project publish folder, which later you can manually upload to a Windows Azure platform over the internet (Internet connection is a must).
Deploy directly to Windows Azure
You need to Sign Up and subscribe to both the facilities above.
http://www.microsoft.com/windowsazure/offers/
We already have a couple of articles "How to Publish Cloud Applications".
Summary
Hope you all enjoyed this article. I tried my best to show all the step by step way to create the project. Please comment!



mohit ranjanPosted Feb 3, 2011, 6:33 AM
the work is nice but i wnt more detail please
Hassan HumayunPosted Dec 26, 2010, 8:21 AM
good job
Sam HobbseditedPosted Dec 22, 2010, 7:07 PMEdited Dec 22, 2010, 7:09 PM
Thank you, Suthish. This looks like fun and a good way to start Azure. Can you provide guidance about what to download? The "Windows Azure SDK and Windows Azure Tools for Microsoft Visual Studio (November 2010)" page lists the following: VSCloudService.exe 18.7MB VSCloudServiceHelp.chm 1.2MB WindowsAzureSDK.chm 4.1MB WindowsAzureSDK-x64.exe 8.8MB WindowsAzureSDK-x86.exe 9.0MB I understand the help (chm) files. I assume we need to install the VSCloudService.exe file. I also assume that if we install the SDK, we need to install either the x64 or the x86 versions; is that correct? Is there any value in installing both? Is installing both a mistake? Do we need to install both the VSCloudService.exe and the SDK?