

Introduction
In this article, we are going to learn about the conditional column and New Parameter – What If in Power BI. We will learn what condition column is and how can we use it. After that we will see how to create a New Parameter – What If in Power BI desktop.
Conditional Column
Create a new column that conditionally adds the values in the currently selected column.
We can define the single as well multiple conditions while adding a conditional column. Once those criteria which are given during defining the conditional column matches the value automatically appears in that column based on that condition.
Creating or Adding Conditional Column
According to the above statement values in conditional column are based on the condition what we specify during the condition. So first I shall import a table and then I shall give condition for conditional column.
For this article excel sheet has been taken as data taken which are attached also for reference. To know more about how to use excel as a data source in Power BI desktop please have a look at my previous article,
Below are the steps for creating conditional column after importing the table.
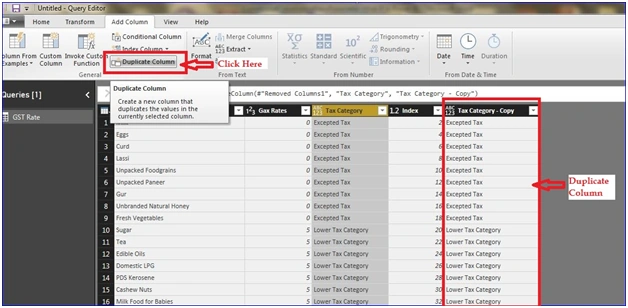
Click on Edit Queries option of home tab which open the query editor window it will open query editor window as below. Now you have to click on Add Column tab & then click on Conditional Column.
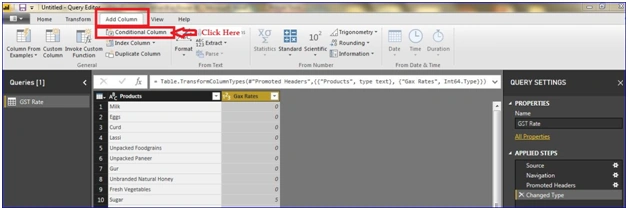
Now a window will appear here you have to provide the name and criteria or condition for the conditional column as below.
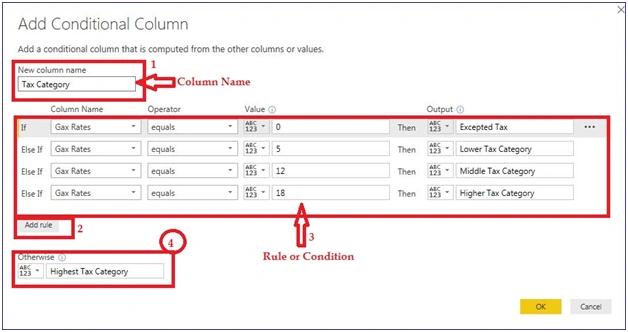
Point number 1 is the name of conditional column, point number 2 is the Add rule button after clicking on the Add rule button you can add the new condition. By default one condition option is already appeared and you don’t need to click on Add rule button for adding single condition. Point number 3 is the added condition with their value which is in Output column. Point number 4 is the values which appear in conditional column if not any rule or condition matches. Now click on OK. Now you can see the conditional column with their values as below.
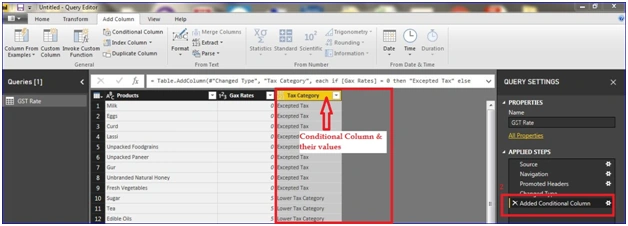
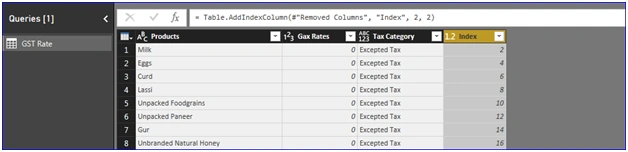
Point number 1 in above image is the name and value of Conditional Column while point number 2 denotes the added steps. Steps are the track of every activity what you do in Power BI query editor.
Editing or Deleting the Conditional Column
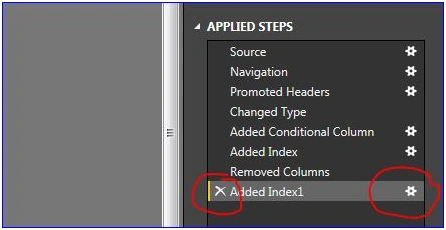
You edit the conditional column by clicking on added step setting icon and you can also delete the conditional column by clicking on cross icon of added steps as shown in above image. Once you click on setting icon again it opens a window which is as below where you can change the rule.
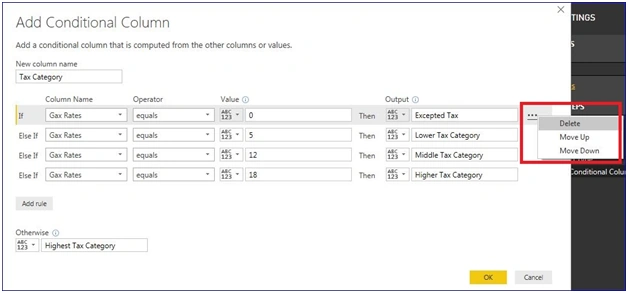
You can click on highlighted ellipse … icon as below for Deleting or moving up and down the rule.
Mark DeguisnePosted Jul 6, 2018, 11:59 AM
Hello Suraj. Thank you for this information. I am not sure if it is just my version of Excel (MS Office Pro Plus 2016), but I do not have the Conditional Column button in the 'Add Column' tab.