

Introduction
Microsoft Intune is a cloud service that helps organizations manage and protect computers, laptops, tablets, and mobile phones. IT administrators can use Intune to manage devices, install apps, apply security settings, and make sure devices follow company rules.
Microsoft Intune works together with Microsoft Entra ID. Microsoft Entra ID manages user identities and helps verify that only trusted users and devices can access company resources.
This article explains how to configure Microsoft Intune with Microsoft Entra ID using simple steps.
Requirements
Before you start, make sure you have:
A Microsoft Intune license
A Microsoft Entra ID tenant
Administrator permissions
A Windows 10 or Windows 11 computer
An internet connection
Step 1: Sign in to Microsoft Intune
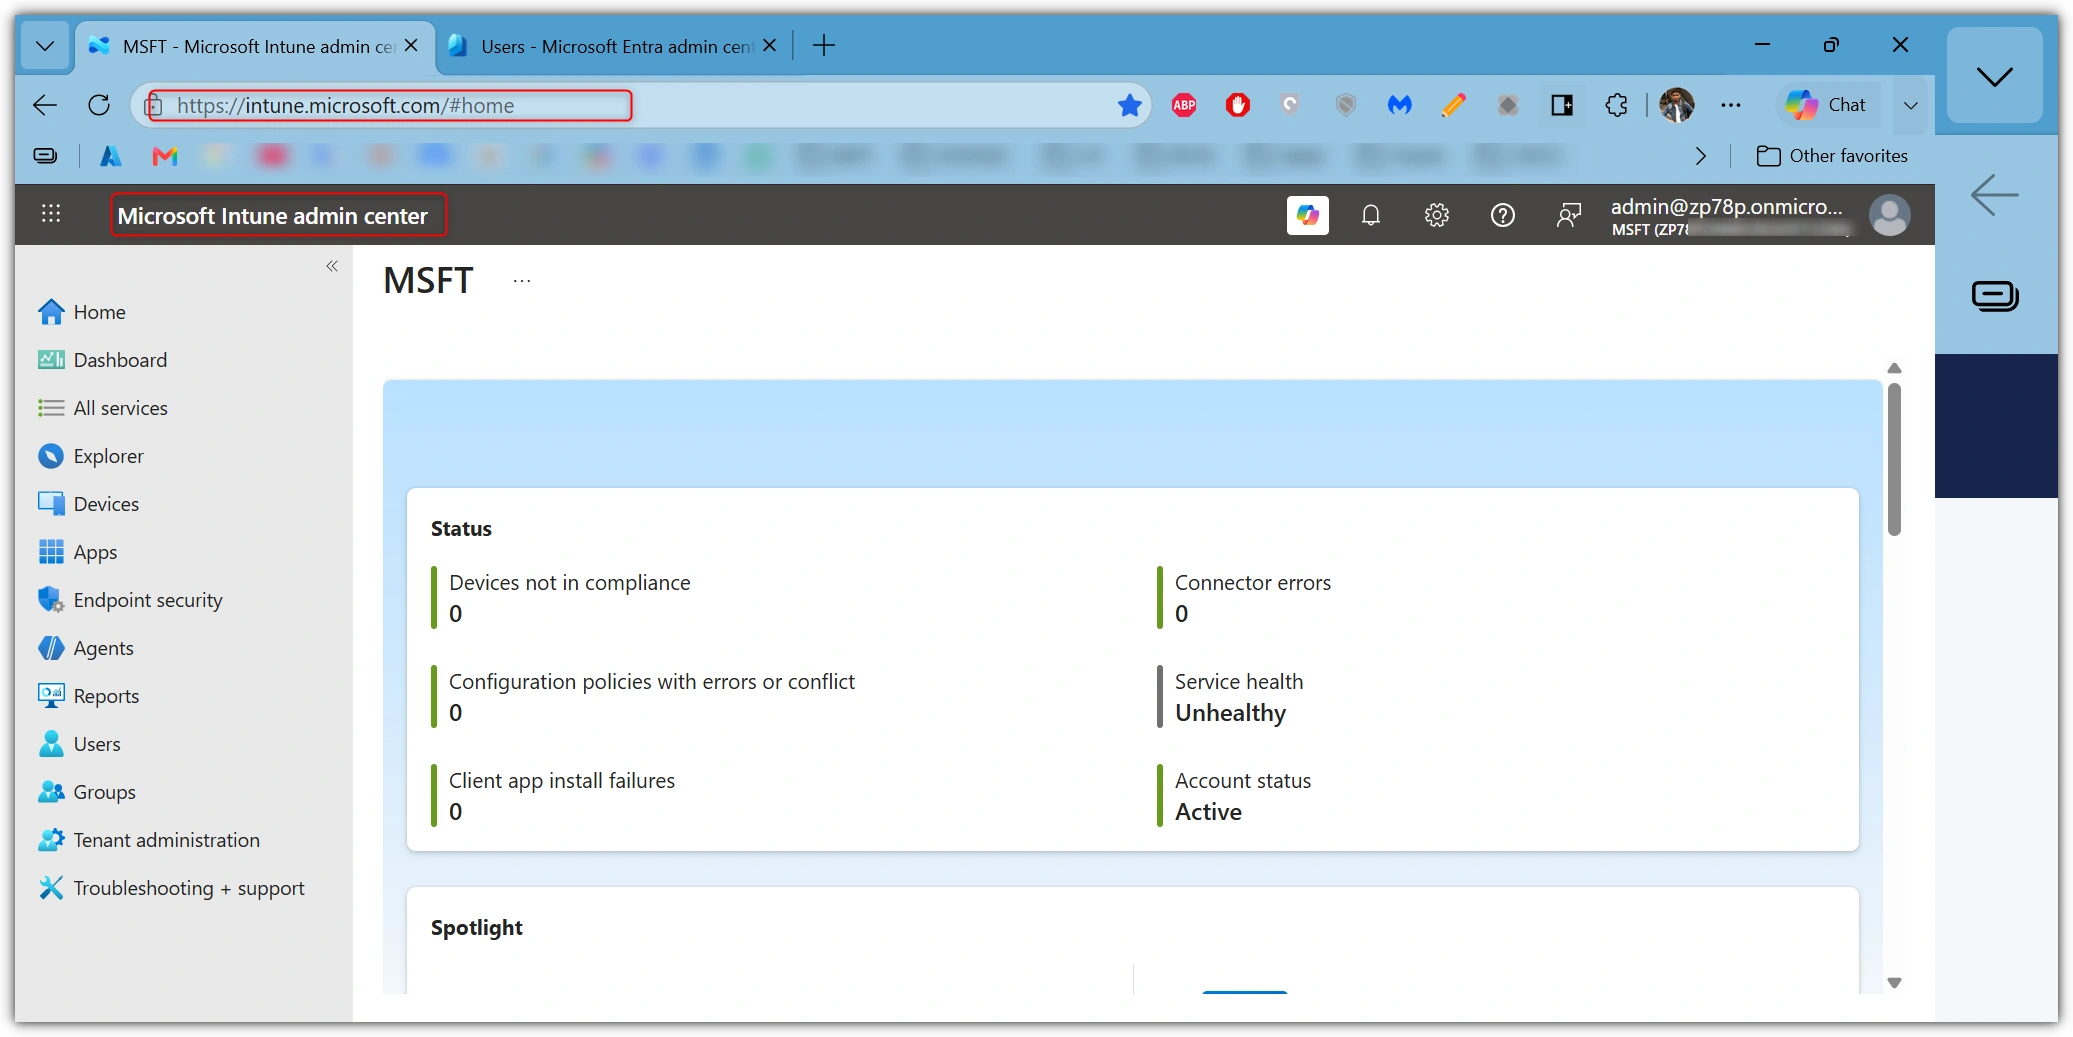
First, open the Microsoft Intune Admin Center.
Open your web browser.
Go to the Microsoft Intune Admin Center.
Sign in using your administrator account.
After you sign in, you will see the Intune dashboard.
Step 2: Check Microsoft Entra ID
Next, check that your users and groups are available.
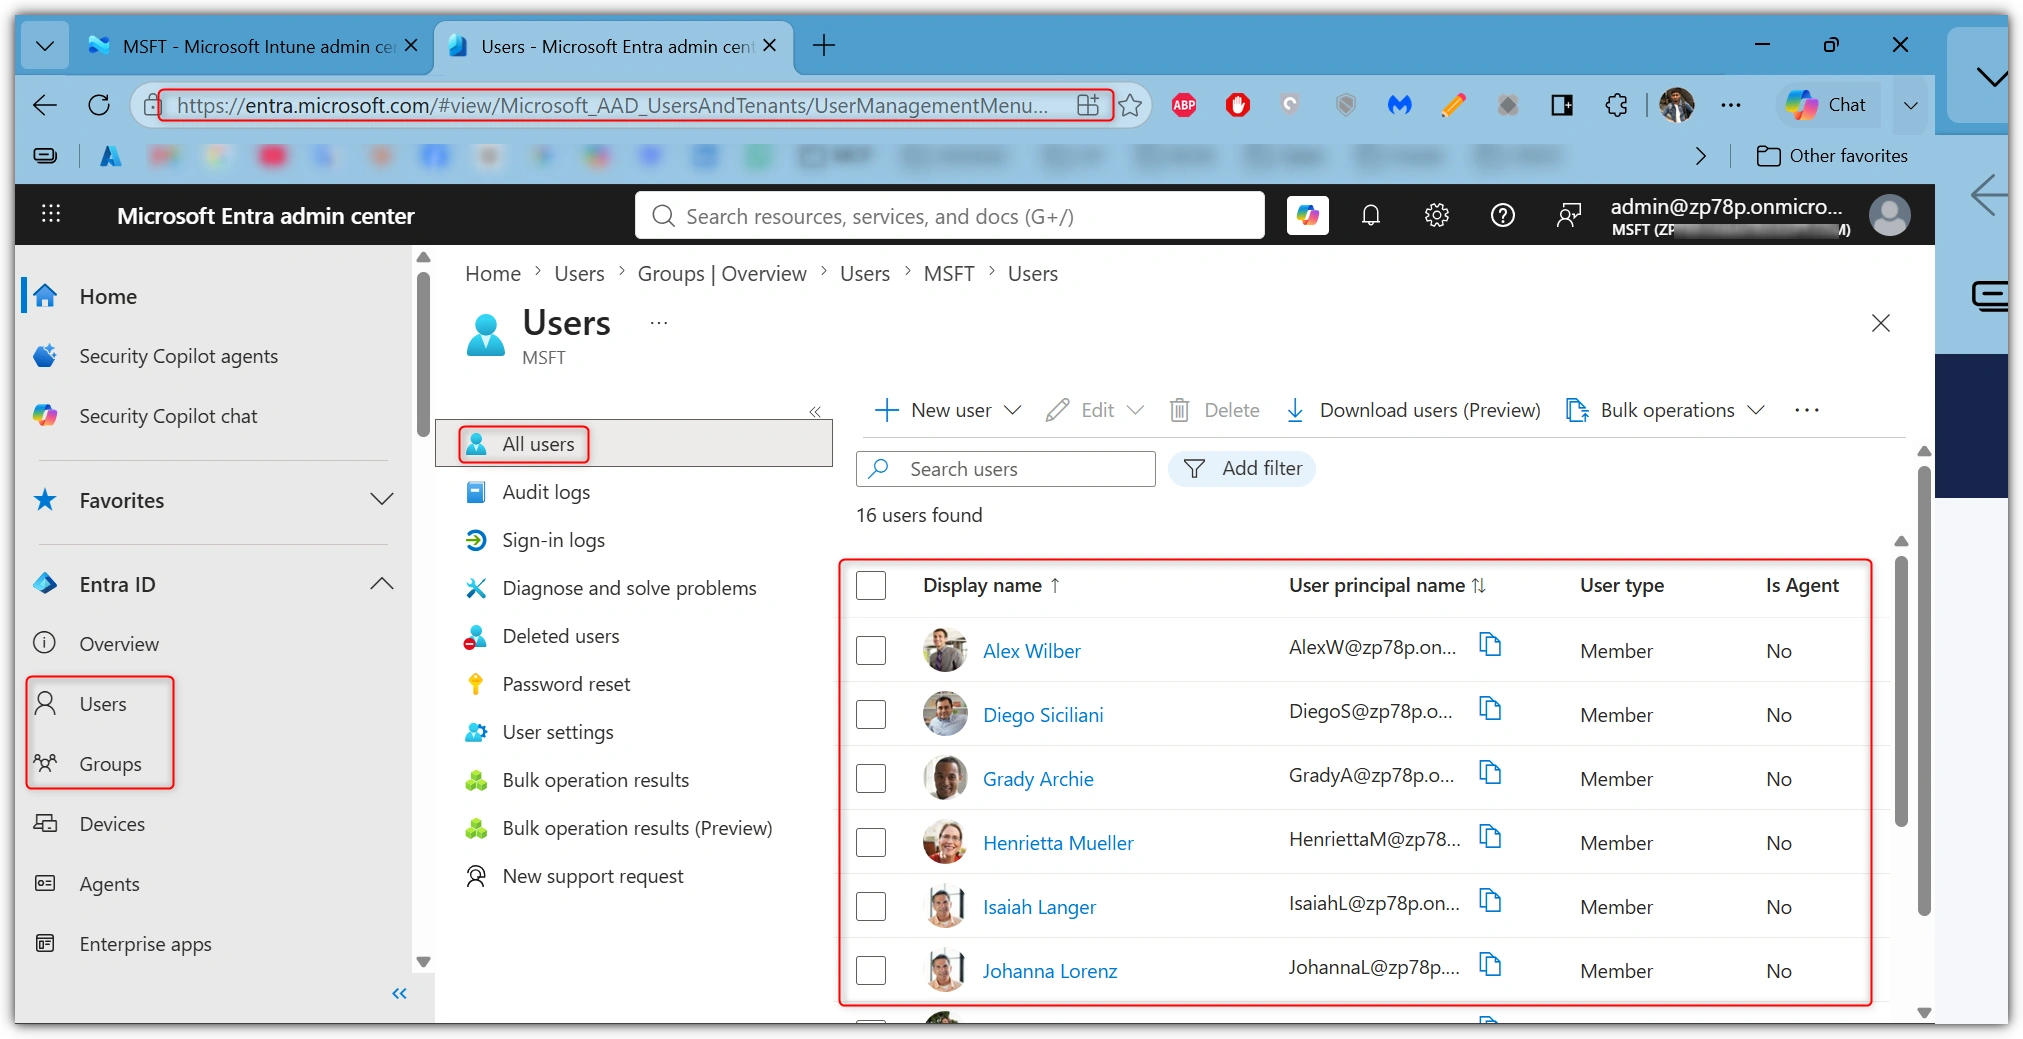
Open the Microsoft Entra Admin Center.
Select Identity.
Open Users and Groups.
Make sure your users and groups are listed.
Microsoft Entra ID stores the user accounts that Intune uses to manage devices.
Step 3: Create a User
If you need a new user, create one.
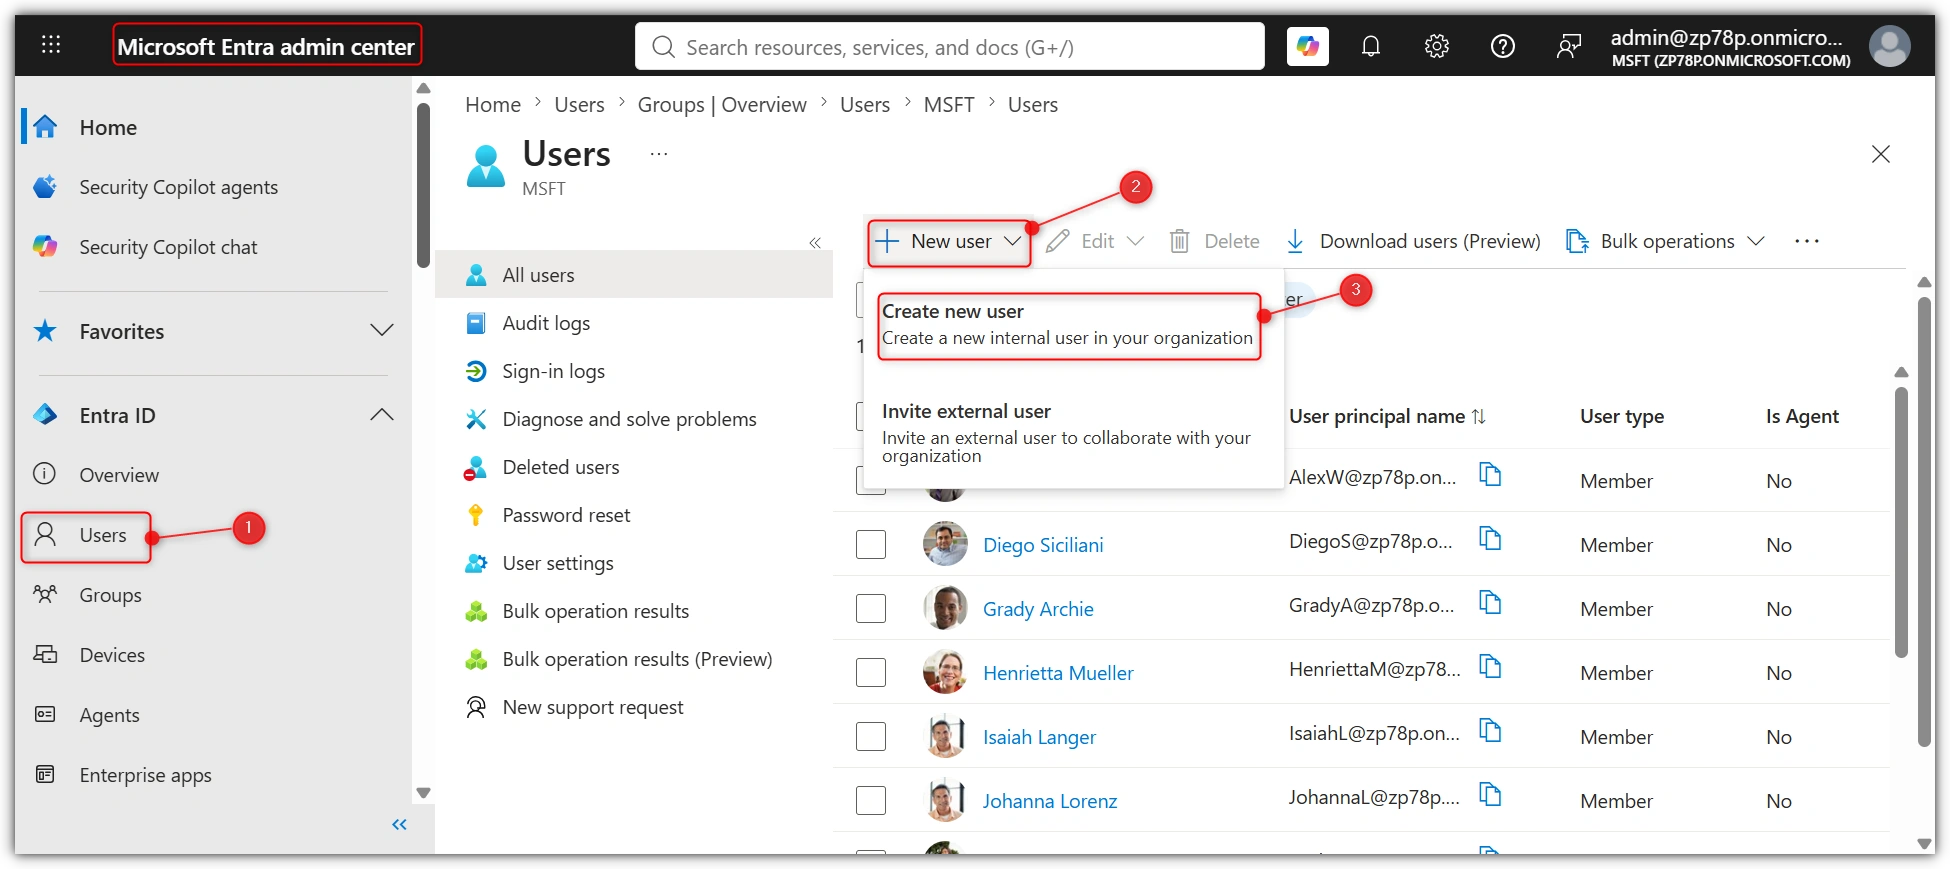
Open Users.
Select New User.
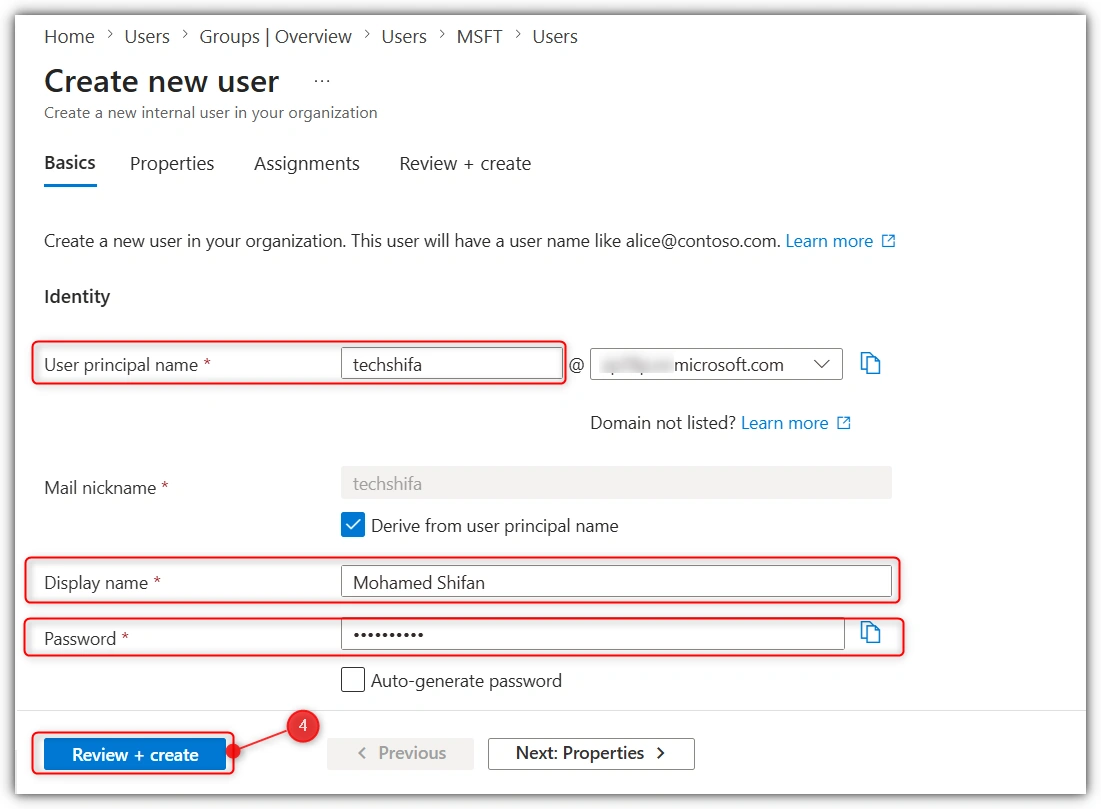
Enter the following information:
User principal name
Display Name
Password
Then Click Create
The new user can now sign in to Microsoft services.
Step 4: Create a Security Group
Security groups help you manage many users at the same time.
Open Groups.
Select New Group.
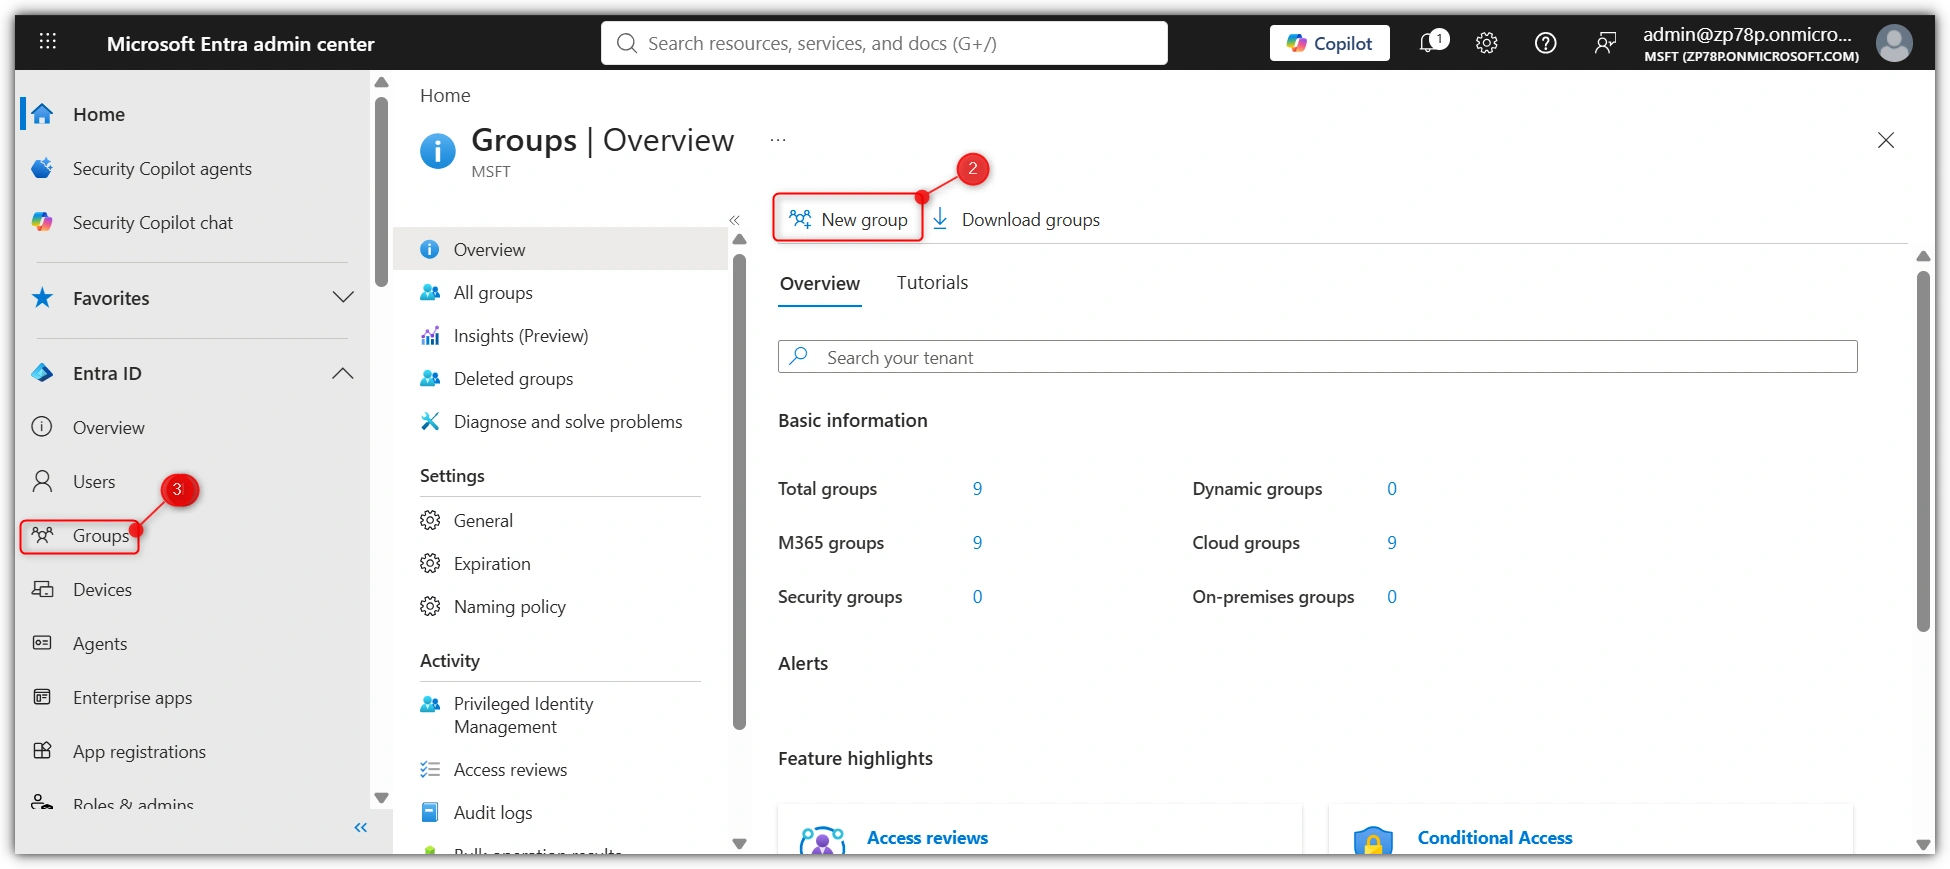
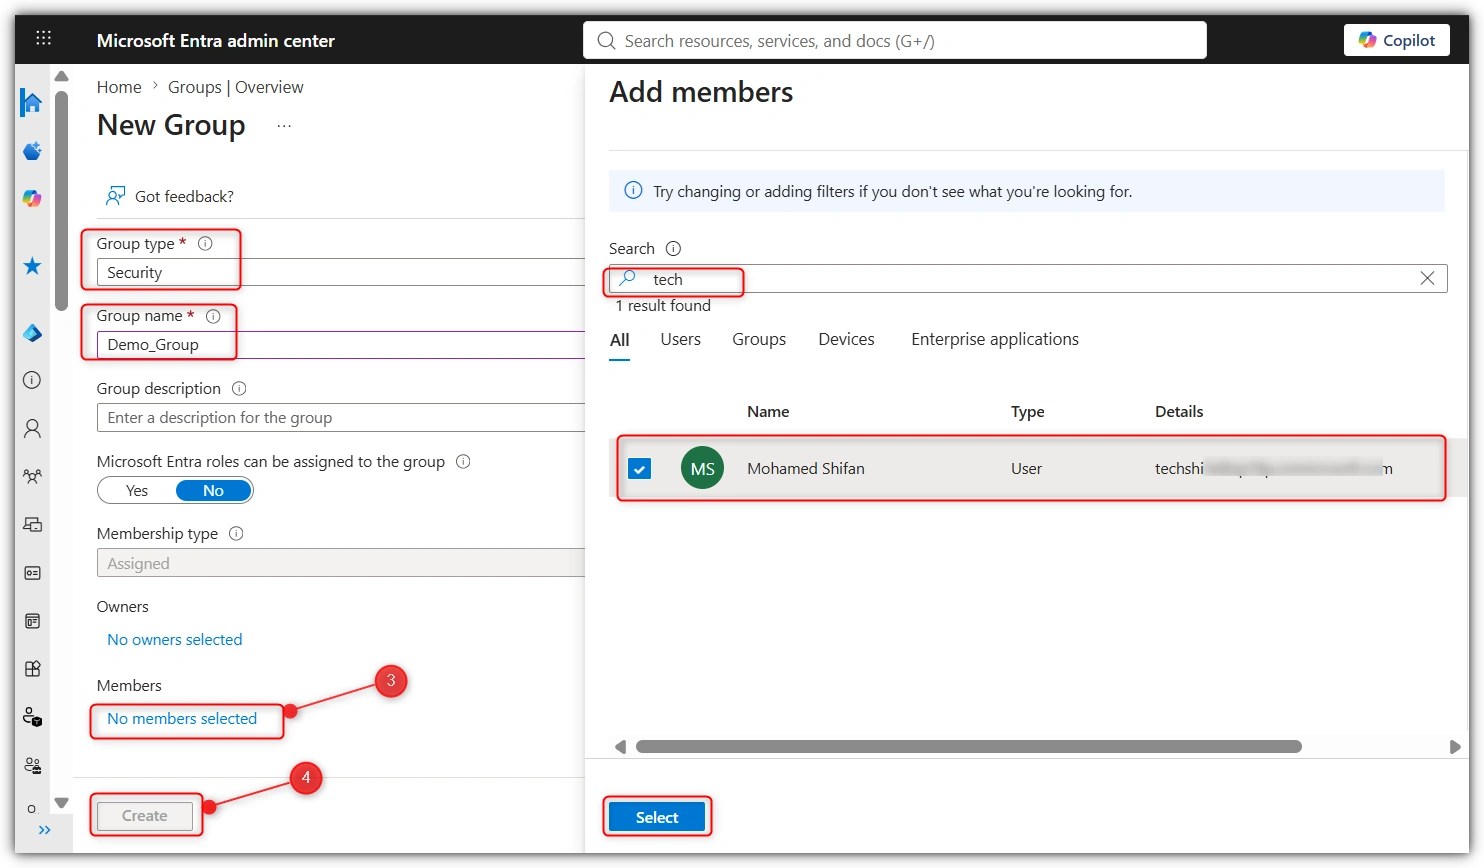
Choose Security Group.
Enter a group name.
Add Members
Then Select
Then Click Create
Using groups makes it easier to manage users and devices.
Step 5: Enable Automatic Enrollment
Automatic enrollment allows Windows devices to join Intune automatically.
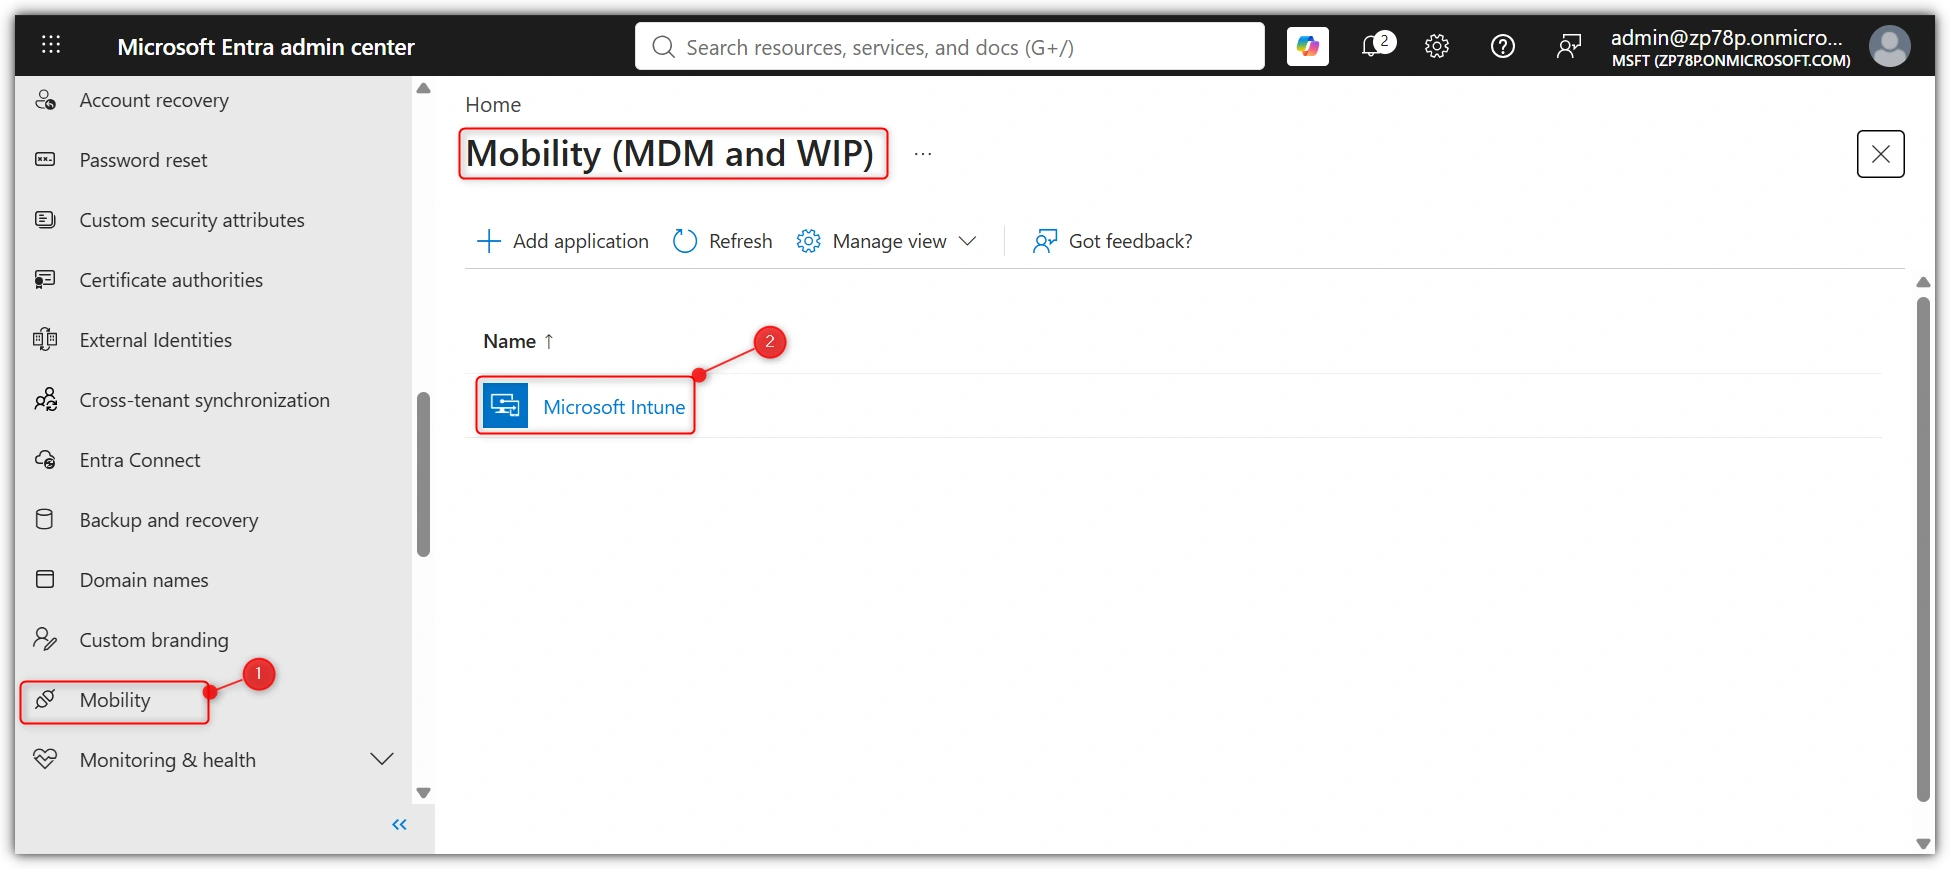
Open Mobility (MDM and MAM).
Select Microsoft Intune.
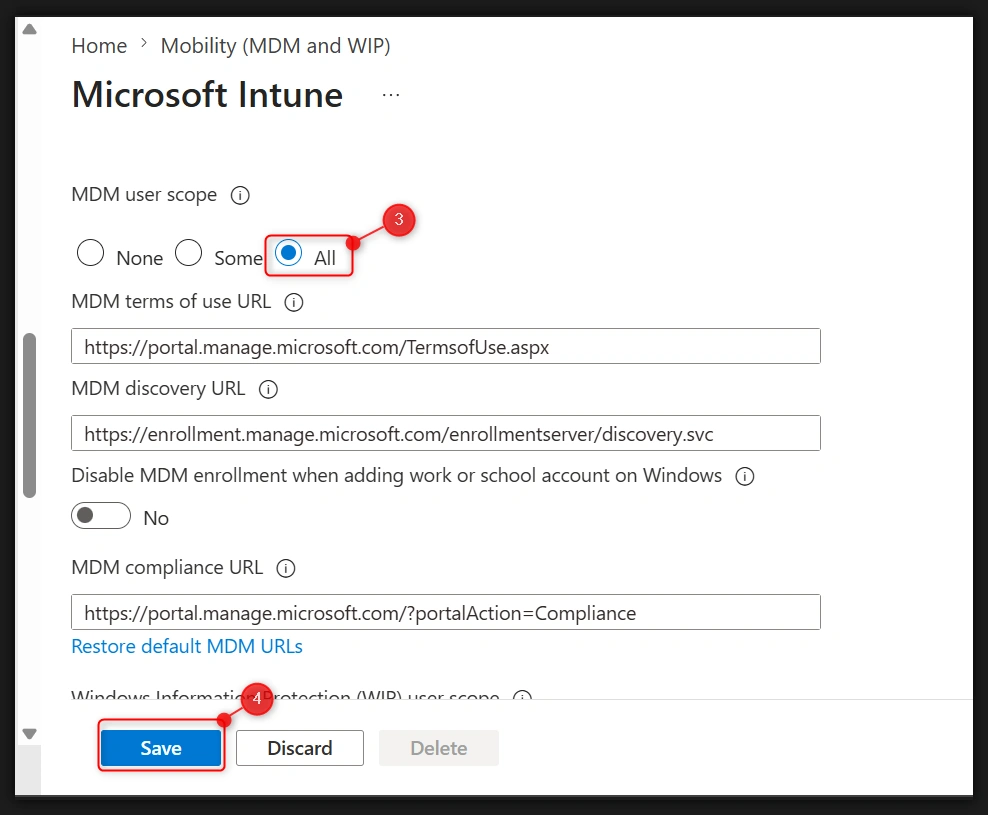
Set MDM User Scope to All or Selected.
Save the settings.
Now, supported devices will enroll in Intune automatically after joining Microsoft Entra ID.
Step 6: Join a Windows Device
Now connect a Windows computer to Microsoft Entra ID.
On the Windows computer:
Go to Settings.
Select Accounts.
Select Access work or school.
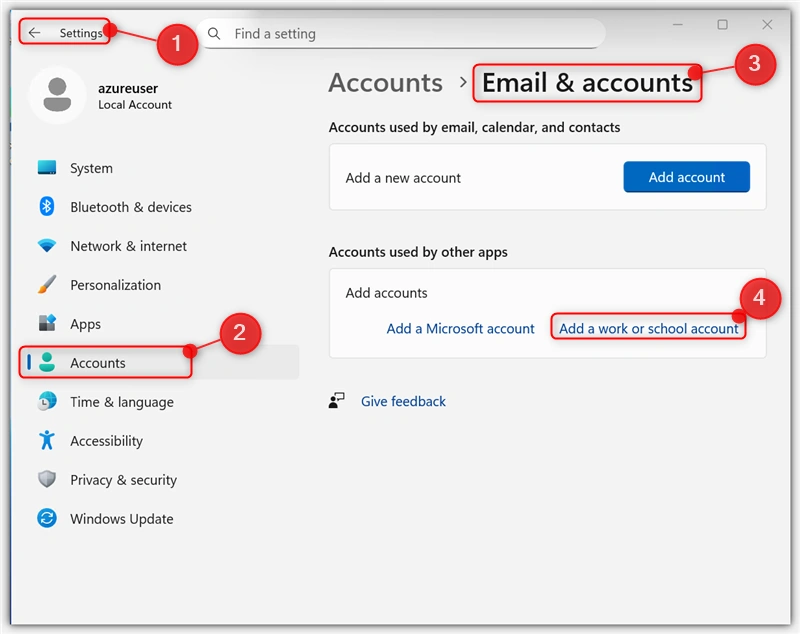
Choose Join this device to Microsoft Entra ID.
Sign in using your work account.
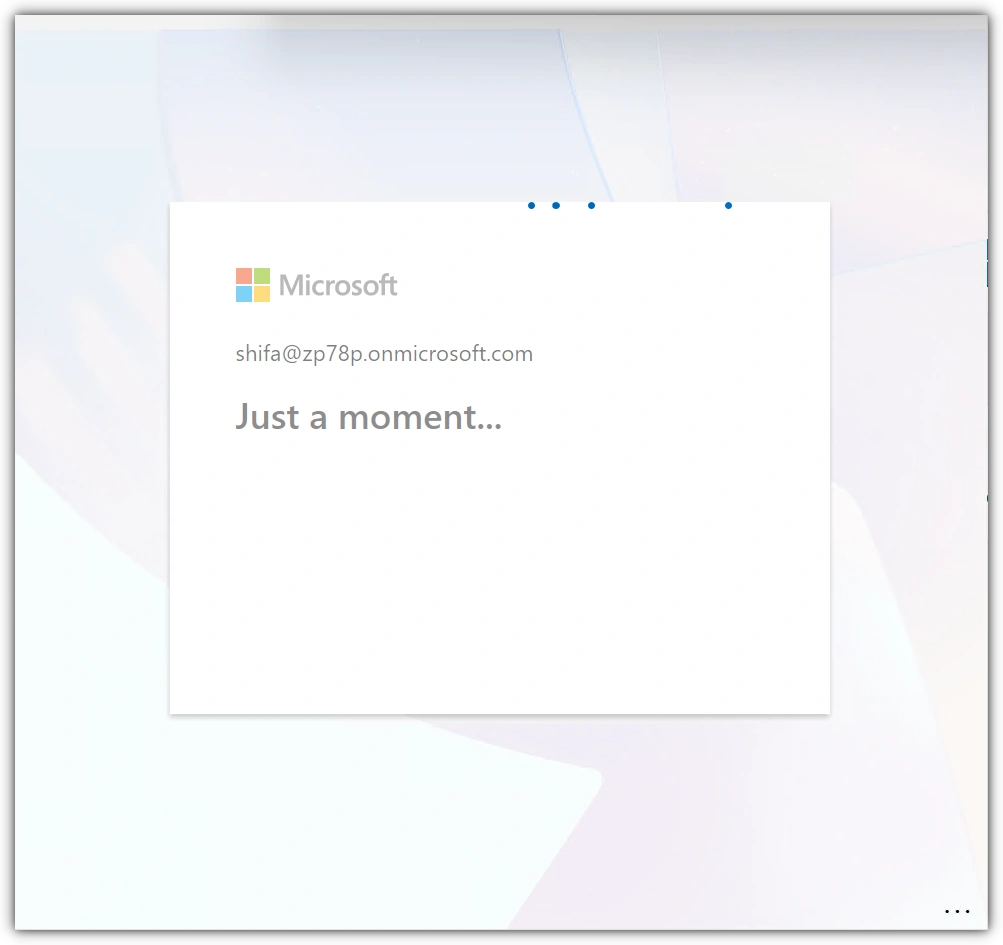
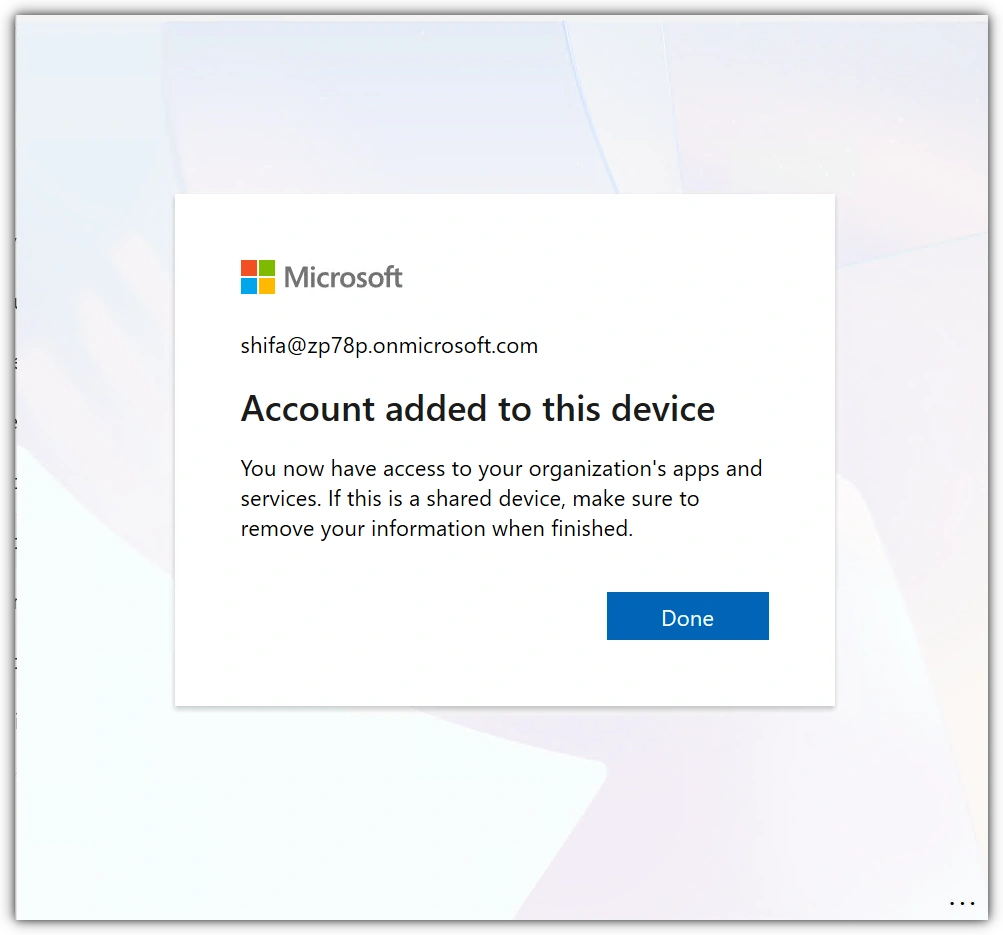
After the sign-in is complete, the device is connected to Microsoft Entra ID and enrolled in Intune.
Click Done.
Step 7: Check the Device
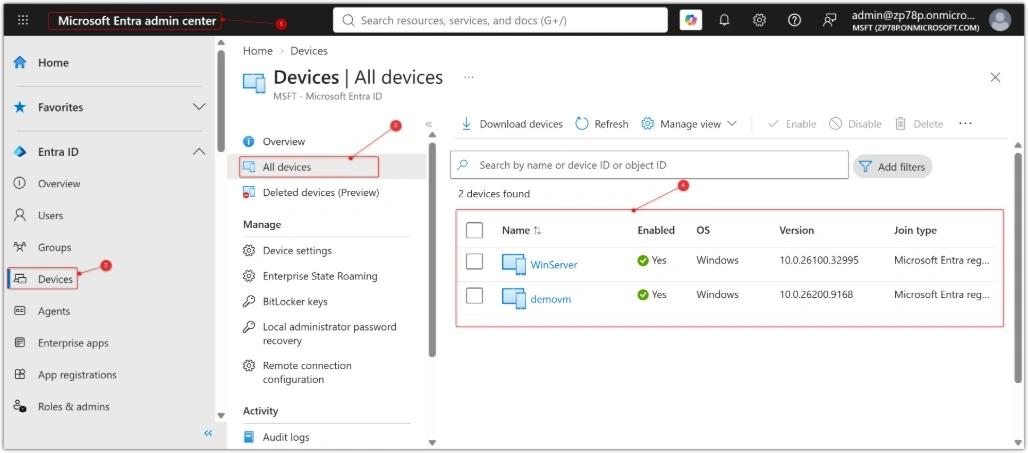
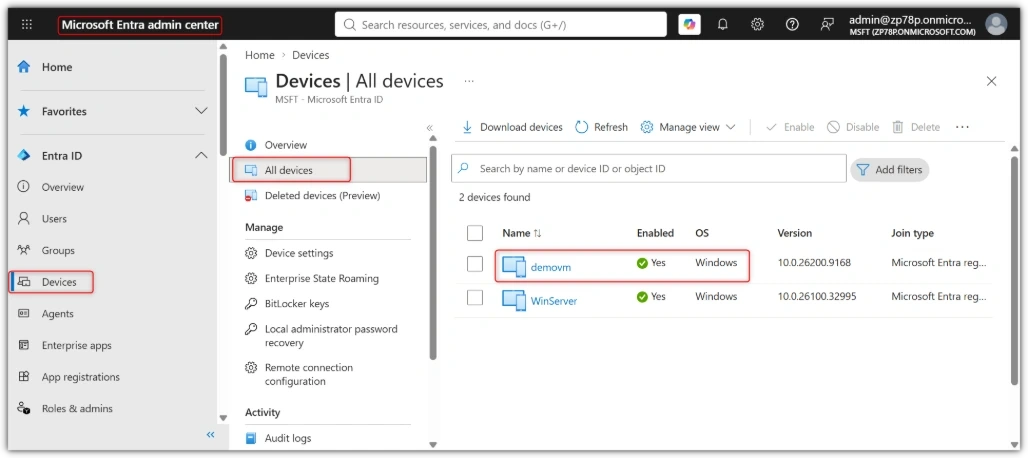
Now check that the device appears in Entra ID.
Open the Microsoft Entra Admin Center
Select Devices.
Open All Devices.
Check that your device is listed.
If the device appears, it has been enrolled in Microsoft Entra Admin Center successfully.
Step 8: Install the Company Portal App
Now install the Microsoft Intune Company Portal application on the Windows computer.
Open the Microsoft Store.
Search for Company Portal.
Select Company Portal from Microsoft.
Click Get or Install.
Wait for the application to finish installing.
Open the Company Portal app.
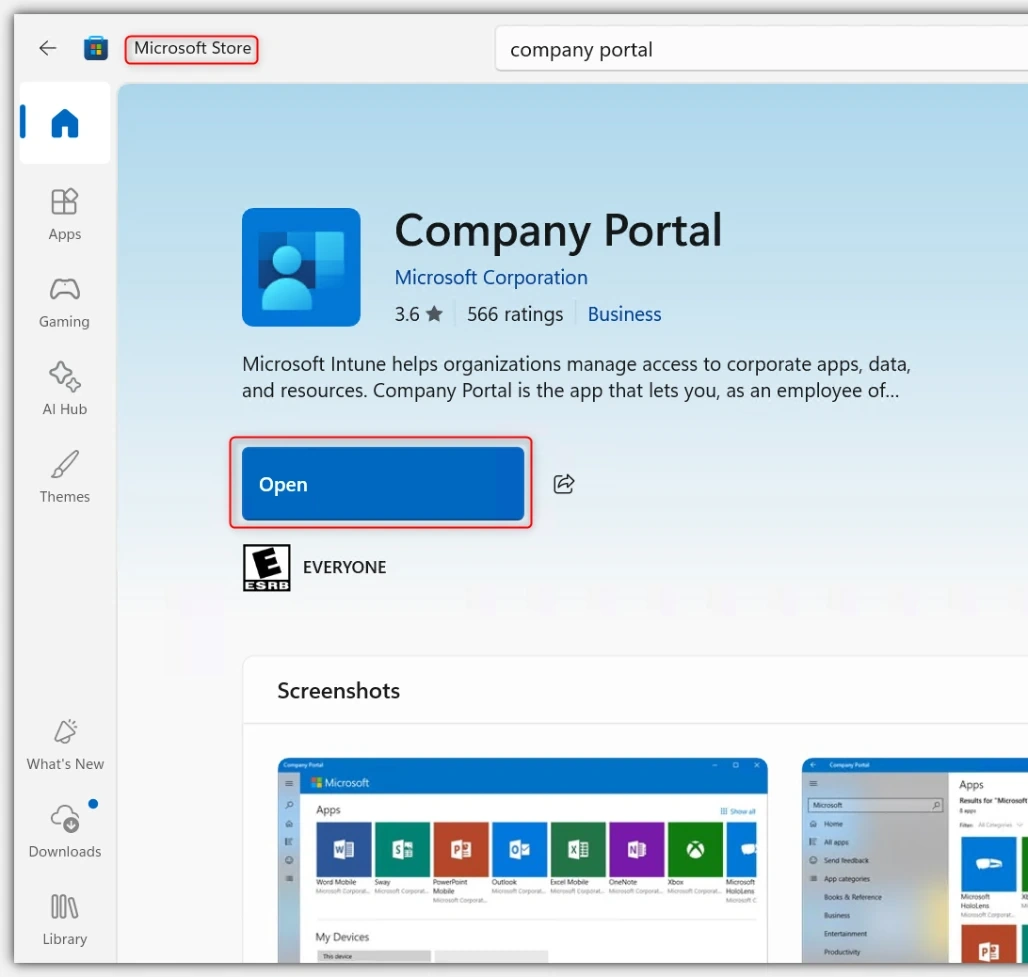
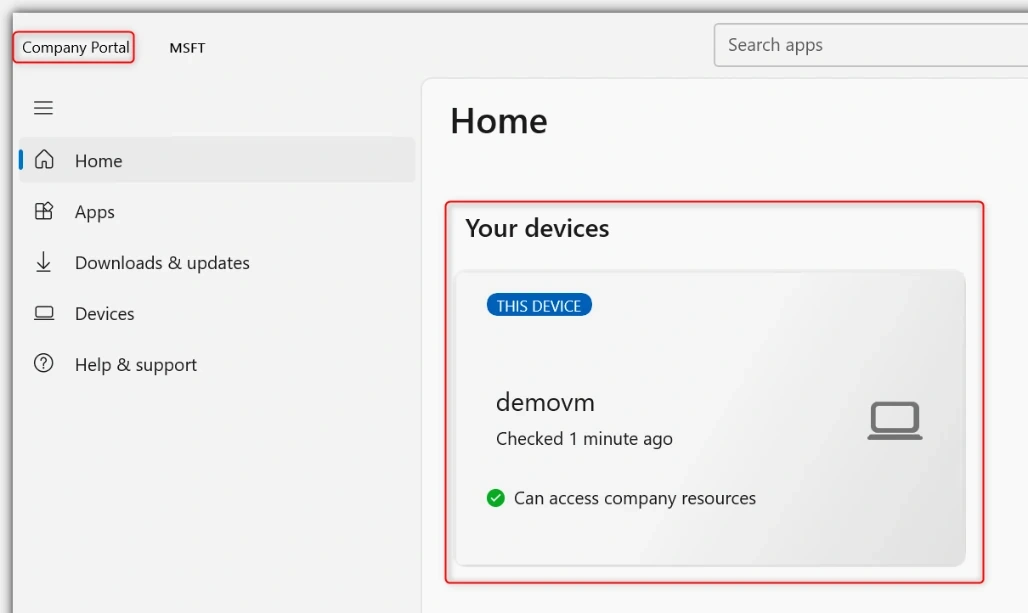
After opening the Company Portal app, sign in with your company account. (Since the device is already signed in with the work account, Company Portal will use the existing work account.)
If automatic enrollment is configured, the device will be automatically enrolled in Microsoft Intune.
The Company Portal app will show the device and its management status.
Note: Automatic enrollment depends on the organization's Microsoft Intune automatic enrollment settings and the user's MDM enrollment scope.
Step 9: Verify the Device in Microsoft Intune Admin Center
Now check the device in Intune.
Open the Microsoft Intune admin center.
Select Devices.
Select All devices.
Find your Windows device.
Click the device name.
Check the device details and Management state.
If the device is listed, it has been successfully enrolled in Microsoft Intune.
Conclusion
Microsoft Intune and Microsoft Entra ID work together to manage and protect devices.
In this article, we created a user and security group, enabled automatic enrollment, joined a Windows device to Microsoft Entra ID, and checked the device. We also installed the Company Portal app and checked the device management status.
Using Intune with Microsoft Entra ID makes it easier for IT administrators to manage devices, install applications, and apply security settings. It also helps keep company devices and data secure.
Join the conversation! Your thoughts help the community grow.