

Uses of Alternate access mappings
- It enables a web application that receives a request for an Internal URL in the one of the five zones to return pages that contain links to the public URL for the Zone.
- You can associate a web application by using a collection of mappings between internal and public URLs. Internal refers to the URL of a web request as it is received by SharePoint 2013.
- Public refers to the URL by which SharePoint will format links that correspond to requests that match one of the internal URLs on that zone when it returns a response. The public URL is the base URL that SharePoint 2013 uses in the pages that it returns. If the internal URL was changed by a reverse proxy device, it can differ from the public URL.
Procedure to Configure alternate access mappings
Use the following procedure to configure alternate access mappings using Central Administration.
Step 1: Go to the Central Administration using a farm administrator account as shown below.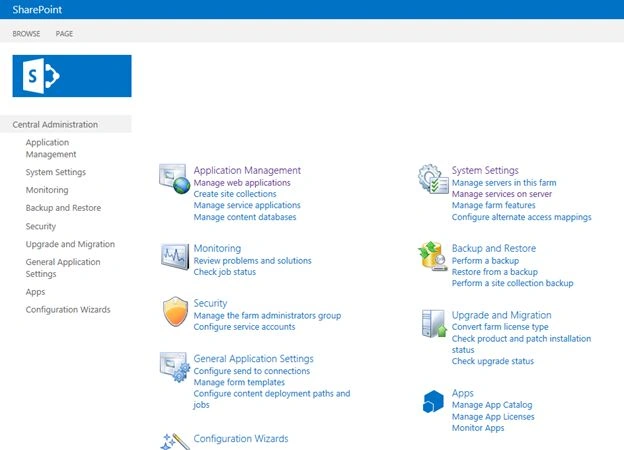
Step 2: In Central Administration, click system settings from the left navigation. Then you will be navigated to the system settings page.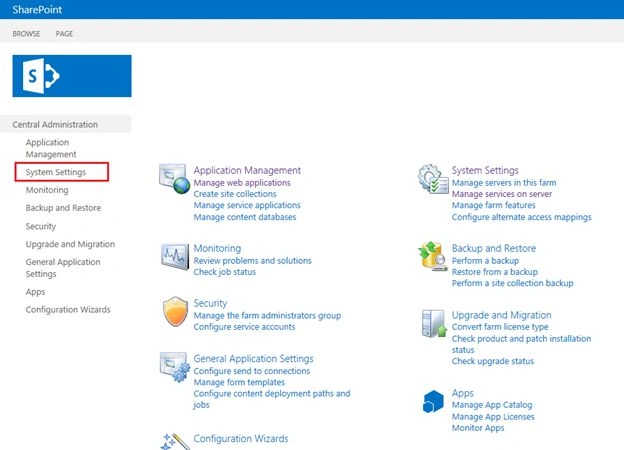
Step 3: On the system setting page, in the “Farm Management” section select the “Configure Alternate Access Mappings”.
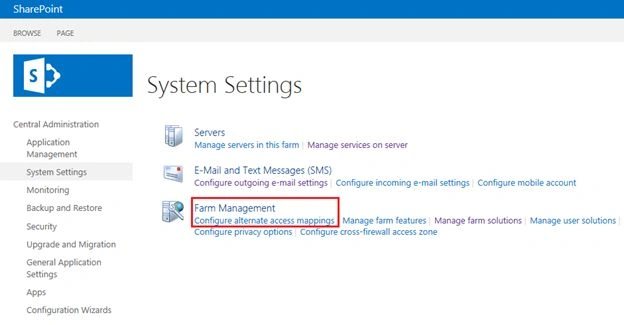
Step 4: When you click on the “Configure alternate”, you will be navigated to the Alternate access settings page as shown below, then click on the “Edit Public URL's”.
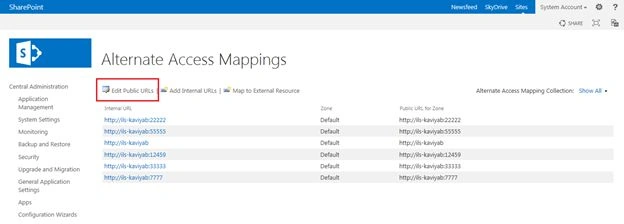
Step 5: On the “Edit public zone URL's” page, select the site collection from the alternate access mapping collection from the drop down as shown below:
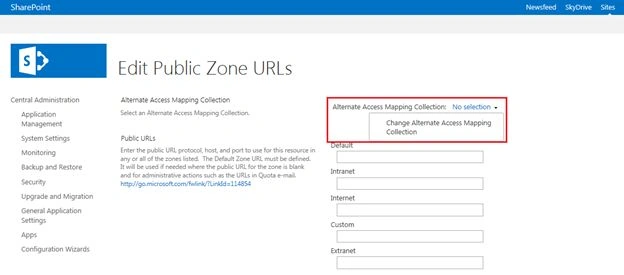
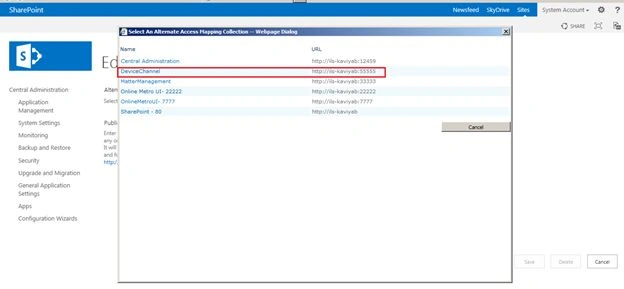
Step 6: When you click on the change alternate access mapping collection option, you will get a pop-up to choose the site collection as shown below. There you can select the site collection that you want to add the URLs in Intranet, Internet, custom and Extranet.
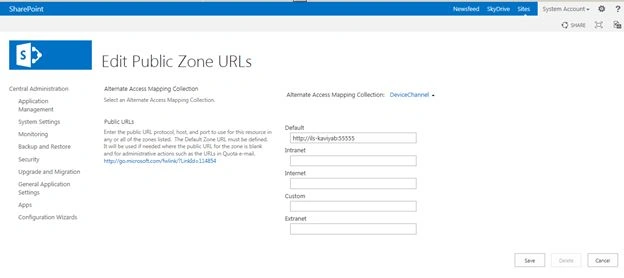
Step 7: After selecting the site collection, you will have the option to add the URLs as shown below.
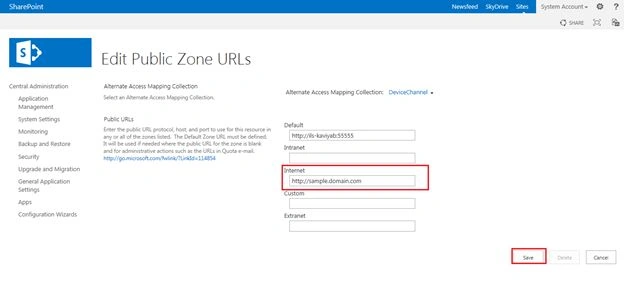
Step 8: Then give the URL in the text boxes, which zone you want to access the site and then click Save.
Here I provided the Internet URL for public access.
Summary
In this article we have explored how to configure the alternate access mapping for a SharePoint web application using Central Administration.
Anup BhavsarPosted Jan 21, 2019, 11:52 AM
Incomplete article as no information of IIS binding and adding record in DNS. Also simply adding "Internet" public URL as ZONE is not the correct way. Because it will give us an error. Ideally extending the web application to new zone is the correct way. @Kaviya please correct this article.
Anil kumarPosted Apr 19, 2018, 12:07 AM
If a site resolves as https for public access and resolves as http in internal network..what changes are required to resolve the site as https internally too? Does this require binding update?
Ashok JangidPosted Dec 14, 2017, 12:41 AM
Very nice article, it helped me a lot...!!!